The most important part of the Data import process is configuring how the data in your CSV File should be processed
The Fields Screen is used to configure which infoodle Fields each Column of Data in your CSV File relates to, and how that data will be processed during the import. This process is referred to as Field Mapping.
Fields Screen Overview
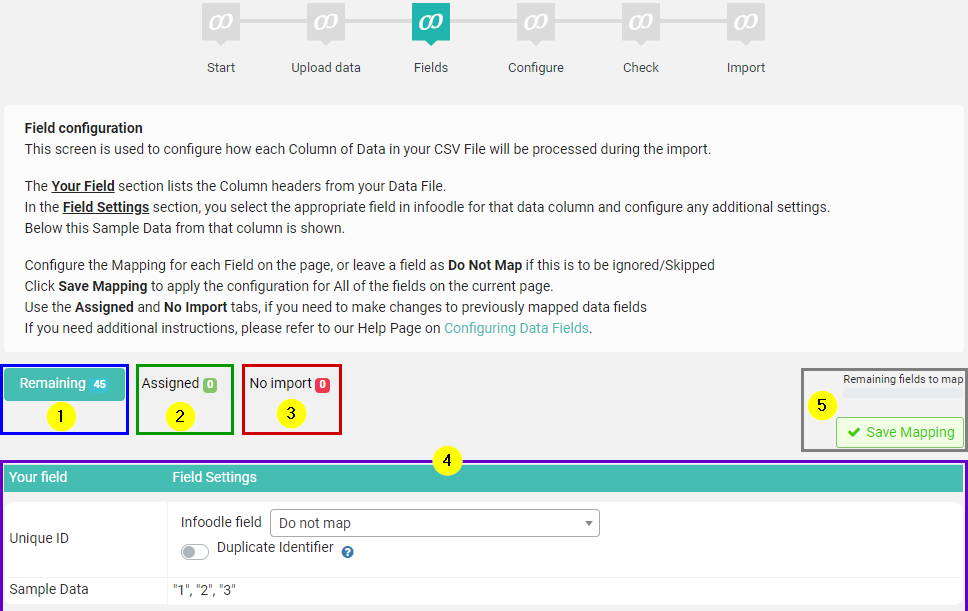
The Fields Screen has three separate Tabs of Fields displayed, as well as the Field Mapping table, and the Overview section.
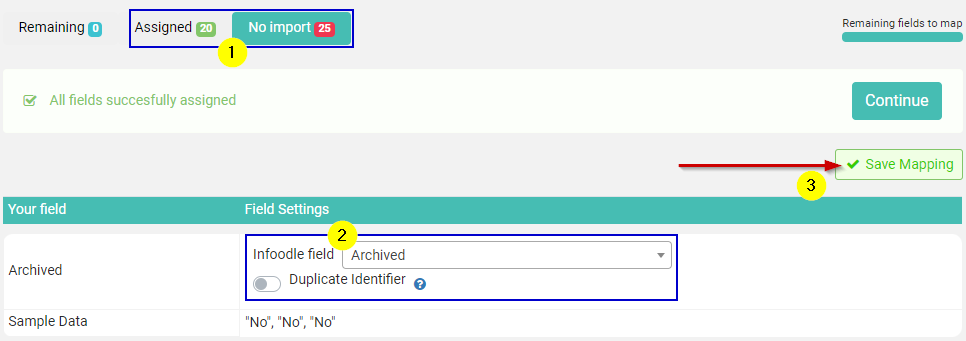
- Remaining Tab: Lists all of the Data columns in your file that are not yet mapped
- Assigned Tab: Lists all Data that has been mapped to an infoodle Field/Group
- No Import Tab: Lists the data slected to be Skipped, or saved using Do Not Map
- Below the Tabs is the main Field Mapping table
- To the Right of the tabs is the overview, which has a Remaining fields to Map progress bar, as well Save Mapping button.
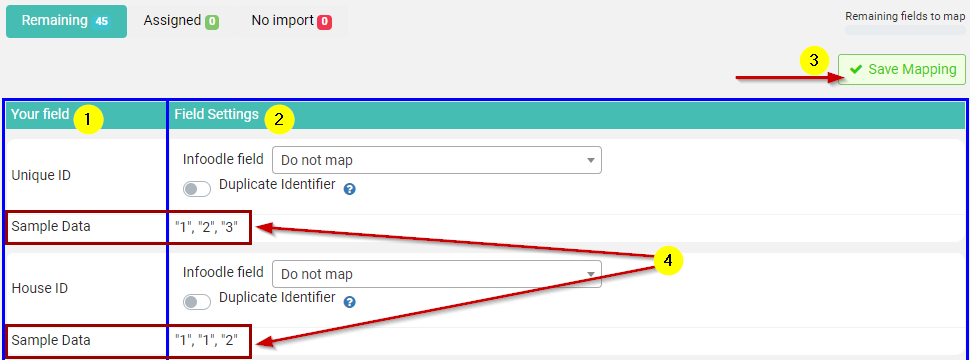
Field Mapping table
The Field Mapping table has 2 key sections, which are the same regardless of which of the 3 Tabs you are looking at.
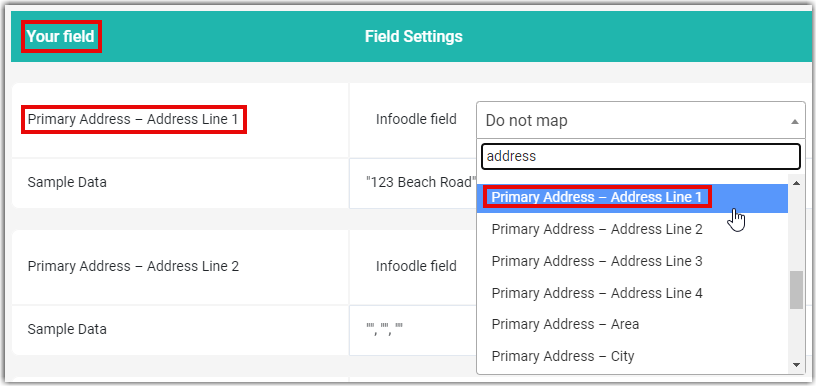
- The Your Field section lists the Column headers from your Data File.
- In the Field Settings section, you select the appropriate infoodle field for that data and configure any additional settings.
- Clicking the Save Mapping button will apply the current mapping settings for all fields on this page, including any set to Do Not Map.
- Also note that for each Field, a sample of data from that column of data is listed below
Mapping Data Fields
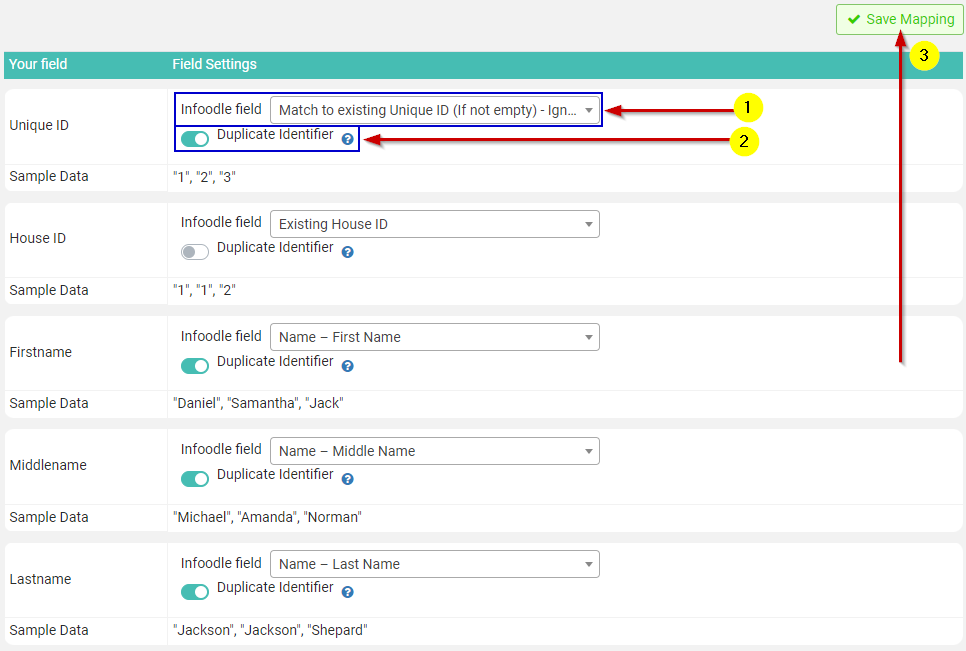
Please take care that you map each Data field correctly, and take note of any additional Field Settings that are listed, as the fielr options may update after you have selected the infoodle field to map to.
When Mapping data fields for import, there are essentially 3 key Steps:
- Use the Dropdown to search for and Select the infoodle Data field to connect
- Configure any available settings or that field, if required.
- Once all fields on this page have been configured, click the Save Mapping button to apply the configuration and map these fields.
Once a field is mapped and saved, it will be moved to the Assigned Tab on this screen.
If you need information about the available settings when mapping a Data Field, you can look this up in the Field Settings section of this help page.
For any Data fields that are not required, you can set these to Do Not Map, to skip loding that data during the import.
Skipped/"Do not map" fields will be moved to the No Import Tab on this screen once you have clicked Save Mapping for that page.

If you need to make changes to Field Mapping:
- Go to the relevant Assigned or No Import tab
- Locate the Field(s), and reconfigure the settings as needed
- Click Save Mapping to re-map the page of fields using the new configuration
Mapping Complete
Once all of the fields have been fully mapped or Skipped, you will see the All Fields Sucessfully Asssigned Text displayed on the Remaining tab.
From this tab, click the Continue option to move to the Configure Import stage

See Configuring Import Settings for instructions on Configuring the import
Field Settings
While you are mapping data fields, you will come across various settings for each field.
Some settings, such as Duplicate Identifier are available for most fields, while other settings will only be listed for specific Types of fields, such as Date Format for a Date Field, or Create List Options for a Lookup or Multi-select Lookup field.
Address Field Settings
Typically you address data will contain Street, City, Postcode, etc for a single address, and these will be imported into the Primary Address fields:
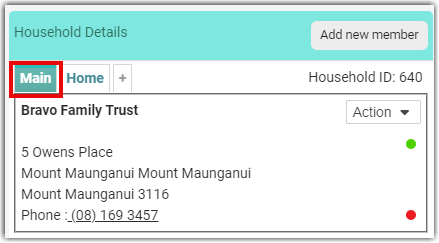
Once imported this data will then appear on a contact's profile address detail on the Main tab (from our demo site):
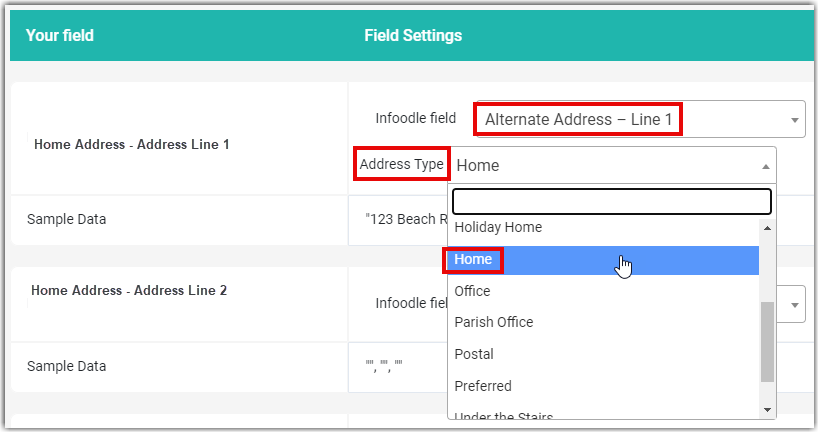
If you have additional address details you want to import, say for work or your church, have these details identified in such a way as they are identified separately from your main address details, and when mapping the fields, select the Alternative Address fields (for example, Alternative Address - Line 1) and select the associated Address Type:
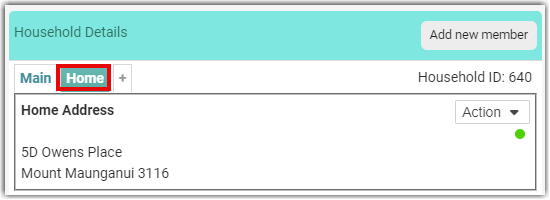
Once imported this data will then appear on a contact's profile address detail on the Home tab (from our demo site):