Adding a Form
- 5 Minutes to read
- Print
- DarkLight
Adding a Form
- 5 Minutes to read
- Print
- DarkLight
Article Summary
Share feedback
Thanks for sharing your feedback!
Adding a Form - Introduction
infoodle enables you to build forms to capture data provided by clients, and can be embedded into your website, or provided as clickable links within an email (for example).
Forms are easy for your contacts, members or community to use, with information entered into the form being available to add directly to your infoodle database.
Steps for Adding a New Form
- Building a form - this is covered below.
Separate aricles are available for the next steps:
Setup an email response and finally,
Building a Form
To Build a Form
- To create a Form you can use the following options:
Use the Quick Add ( + ) icon on the top right of the Quick Access bar, and select Form
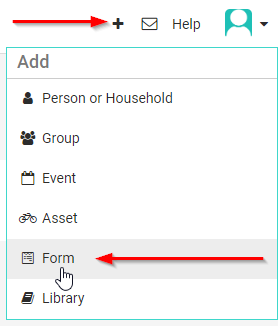
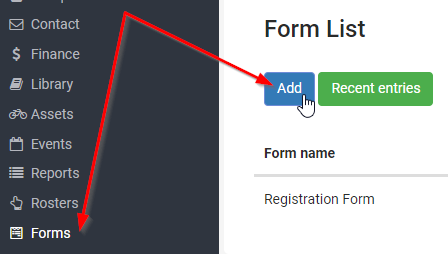
Navigate to the Forms section of infoodle and click Add.


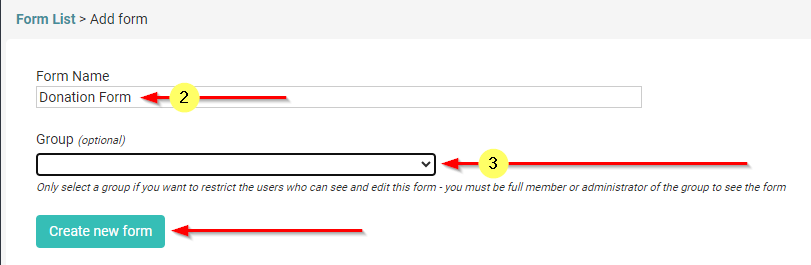
Form Name - start by giving your form a name.
This name is for internal use only and will not appear on the form iself. Once the form has been saved it will be displayed in the list of available forms using this Form Name.Group (Optional) - choose whether you want to limit the visibility of this form to a specific group. With this setting only people within that group (with Full member or Administrator Group Permissons) can see the form and are able to edit it.
Click the Create new form to proceed to the Form Builder
- On the Build Form Screen, you will see a List of Available Form Fields on the Left Hand Side. Select the form field that you require from under and then drag and drop this into the form builder to start creating your form.
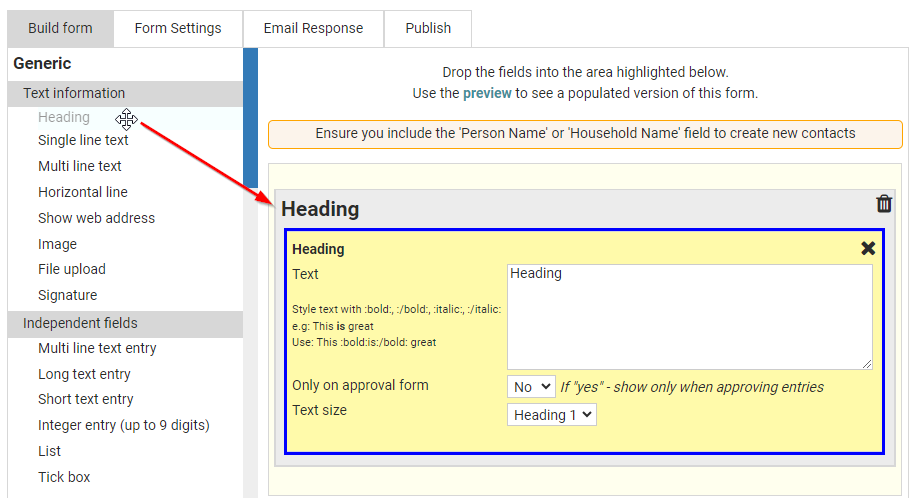
For the Currently Selected field in the Form Builder, you will see the available settings used to configure and customise that field
Note
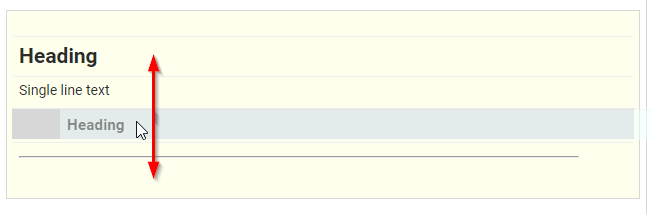
You can re-order the fields by dragging them up and down, or you can place a field between, above or below other fields.
Type of Fields
Generic fields - Text information
These fields are used to include Design Elements on the form, such as Headings, Text and Images.
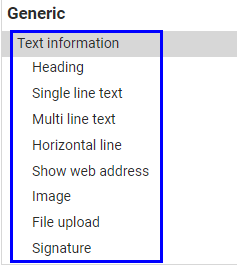
You can also include a Web Page link (via Show Web Address), allow files to be uploaded (via File upload), or allow digital signing of the form (via Signature).
One or more images can be added to a form. To do this drag the Image field from the list on the left and select Upload a file.
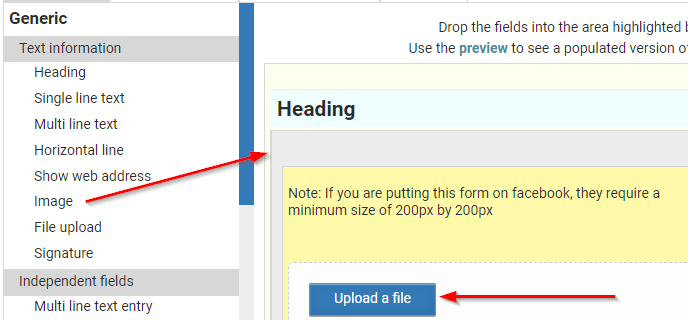
These images are tailored so that Facebook can pick them up when you choose to publish a form in Facebook. Facebook requires a minimum size of 200 by 200 pixels. Be aware that it takes time for Facebook to load the image, so once you've finish posting the form, check back later.
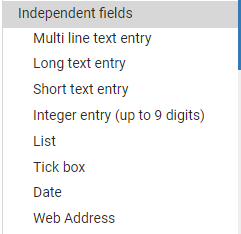
Generic fields - Independent fields
These Fields are information entry fields that can be used to capture information (e.g. for surveys).
Please Note:
As these Generic fields are created specifically for the form, and are not linked to a field in the Database, this information will not be added to a Field on a contact Profile.
The data will be visible when vieiwing the Form Entry and can be accessed on a person's page in the Forms tab when you look at that form Entry.
They cannot be reported on via the Reports Section, but you can Export the Form Data to an Excel or CSV file.
Repeating content
These Fields provides the ability to register multiple people on one form or Separate a Form into multiple different pages.
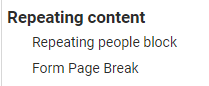
You can allow the Form to Capture data form more that one Person or Organisation via the use of Repeating People Blocks.
See Adding Multiple People To A Form for more information.
You can also create mutliple Pages on your form, and include Page routing, using the Form Page Break Fields
See Form Page Break for more information.
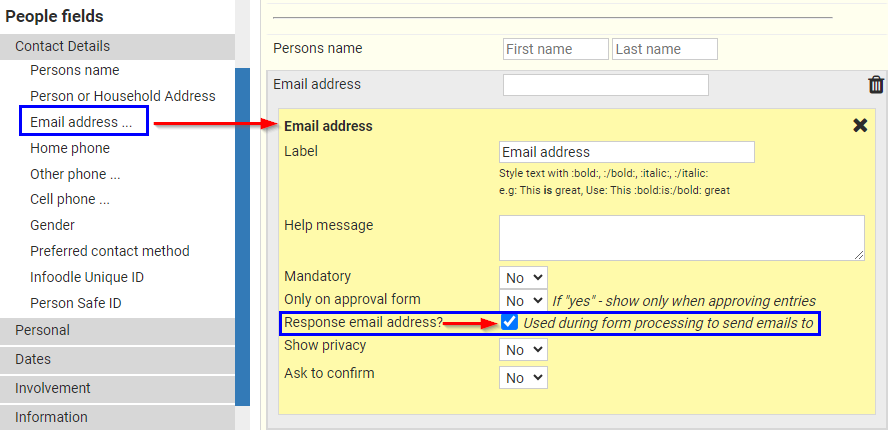
People fields, Organisation/Household Fields and Group Fields
These Sections will list your infoodle Custom fields For People, Organisations/Households and Groups. The People Fields Grouped into headings based on the Profile Tab that the field is stored under.
See Custom Fields for more information about adding new fields to the database.
Using these Custom fields on a form will allow the update of a persons data in the relebant custom field on that Person's Profile page (Or Group if Using Group Fields)
Note
When adding an email address field, if you wish to send a Form email response to the person submitting the form, make sure that you tick the Responce email address box to ensure your email is sent to the email address that the Form Submitter enters.
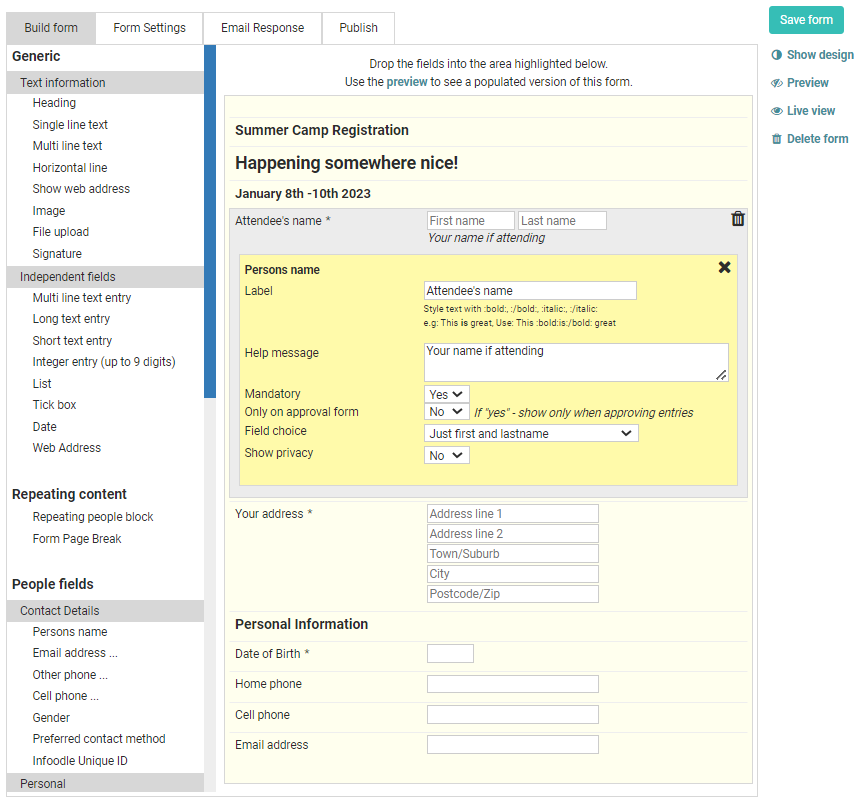
Saving the Form
Configure each field you choose with appropriate settings. For further information on field options see the Related Articles section on the right of this page.
Once you have added all the fields, select Save form. Your form will now look something like this:
Design and Preview controls (upper right)
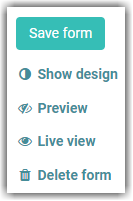
- Show design - provides styling features your designer can use on individual fields or the whole form. For example, if you want the labels of a field to be in red, you can do that using Advanced CSS Design.
- If you do not have a designer and need help with additional styling contact the infoodle office.
- If you do not have a designer and need help with additional styling contact the infoodle office.
- Preview - select anytime to see what the form will look like once Published. You can see the preview in desk top, tablet and phone versions.
- To go back to Edit mode select the Build form tab.
- To go back to Edit mode select the Build form tab.
- Live view - displays a page that contains the completed design and is good for a test. It shows the payment options for amount lists, others etc.
- Delete form - select this optionto delete the entire form.
At any stage during the building of the form, you can edit individual fields by re-selecting the field to edit. The form element being selected is indicated as you move your mouse over the filed elements, by the change of background colour to blue.
Next Step
Video 8:26
Was this article helpful?