How to add a form
Forms in infoodle let you collect data from contacts, members, or the public — sign-up forms, registrations, donation forms, surveys, and more. You share a form via a public link, QR code, or by embedding it in your website, and submissions arrive back in infoodle as entries ready to review and approve.
Before you begin
You need the following permission to create and edit forms. Contact your infoodle administrator if you don't have access to the Forms section.
- Need forms menu item
- Create and manage forms and entries

Step 1 — Open the Add Form screen
You can reach the Add Form screen in two ways:
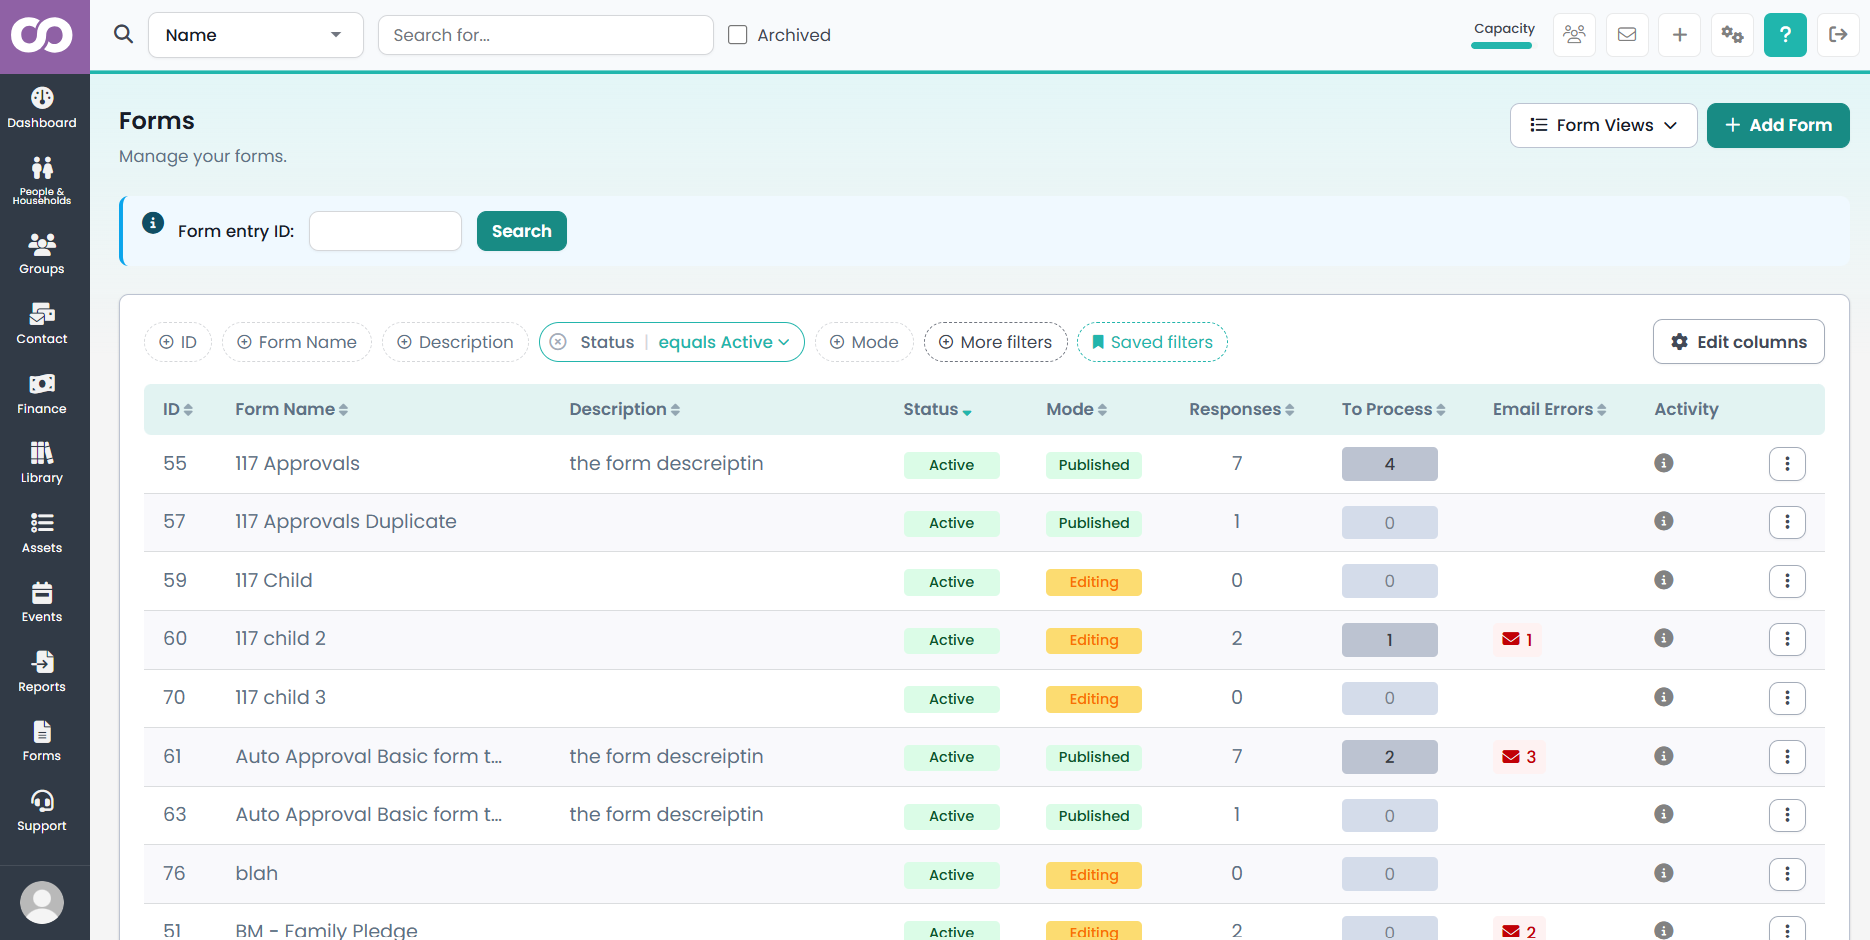
- Go to Forms in the left navigation menu, then click + Add Form in the top-right corner.

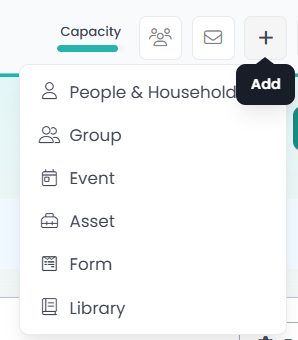
- Click the + quick-add icon in the top toolbar and select Form.
Step 2 — Name your form and choose initial settings
The Add form screen appears with three fields:

Form Name (required)
Enter a name for internal use. This name appears in the Forms list and is used to identify the form — it does not appear on the public-facing form itself.
Group (optional)
Select a group to restrict who can see and edit this form in infoodle. Only people who are a Full member or Administrator of the selected group will be able to access it. Leave this blank if you want all relevant users to be able to see the form.
Existing form to inherit this new form from (optional)
Choose an existing form if you want the new form to inherit its structure and settings. This is useful when you need a similar form with only minor differences — for example, a form for a different event that follows the same format.
When a form inherits from a parent:
- Build - the inherited fields are fixed and cannot be removed or reordered.
- Pledge Confirmation, Form Settings, and Email Response - inherited settings can be overridden on the child form.
When you are happy with these settings, click + Create new form.
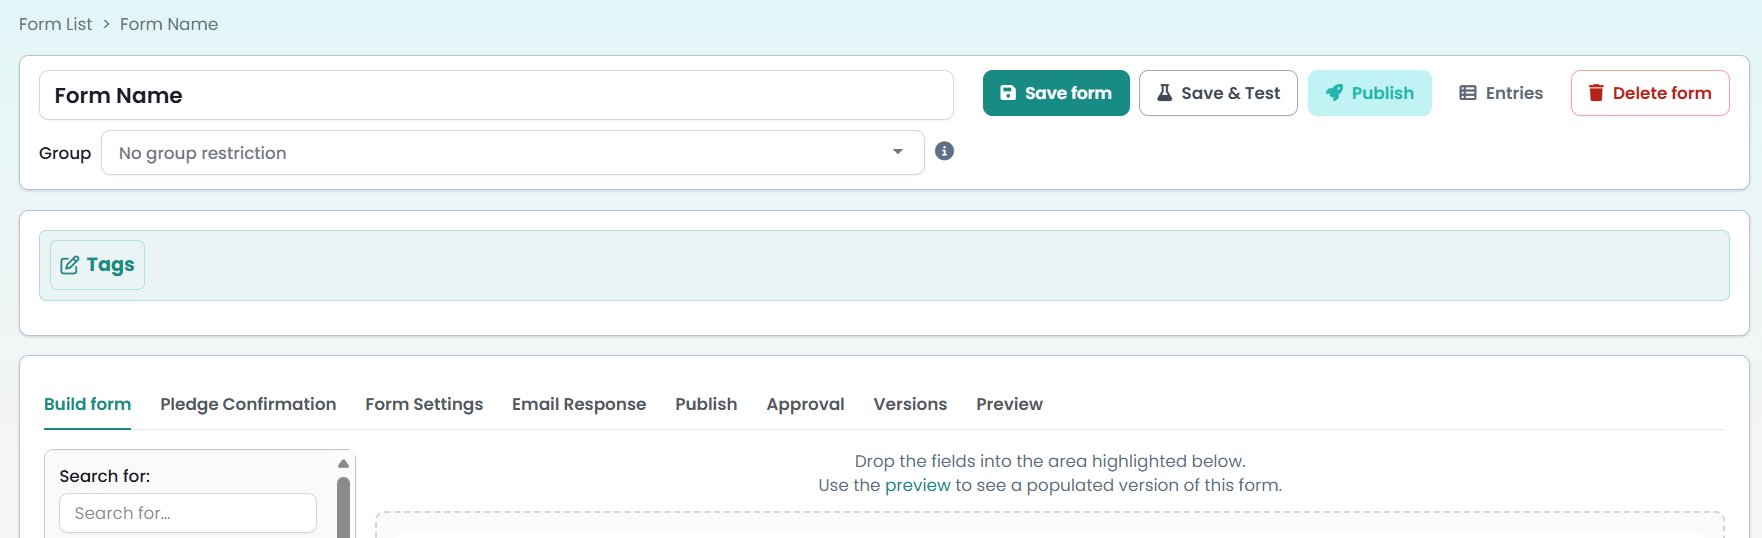
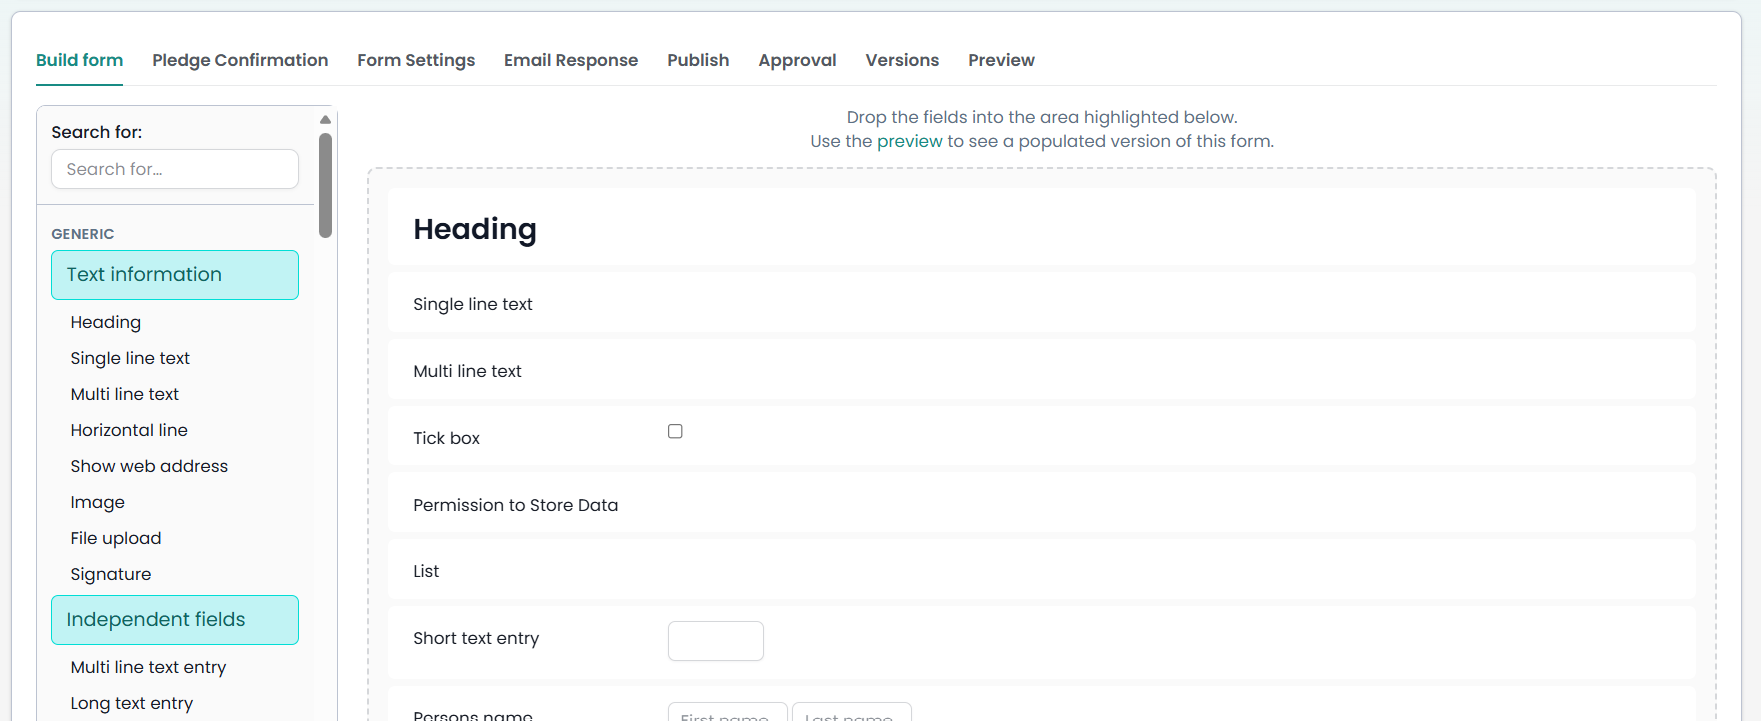
Step 3 — Build your form
The form editor opens on the Build form tab. The field palette on the left lists all available field types. The large dashed area on the right is where your form is built.
Tip: If you want the form to create or match contacts in your infoodle database, include either a Person Name or Household Name field. Without one of these, form submissions cannot be linked to a contact record.
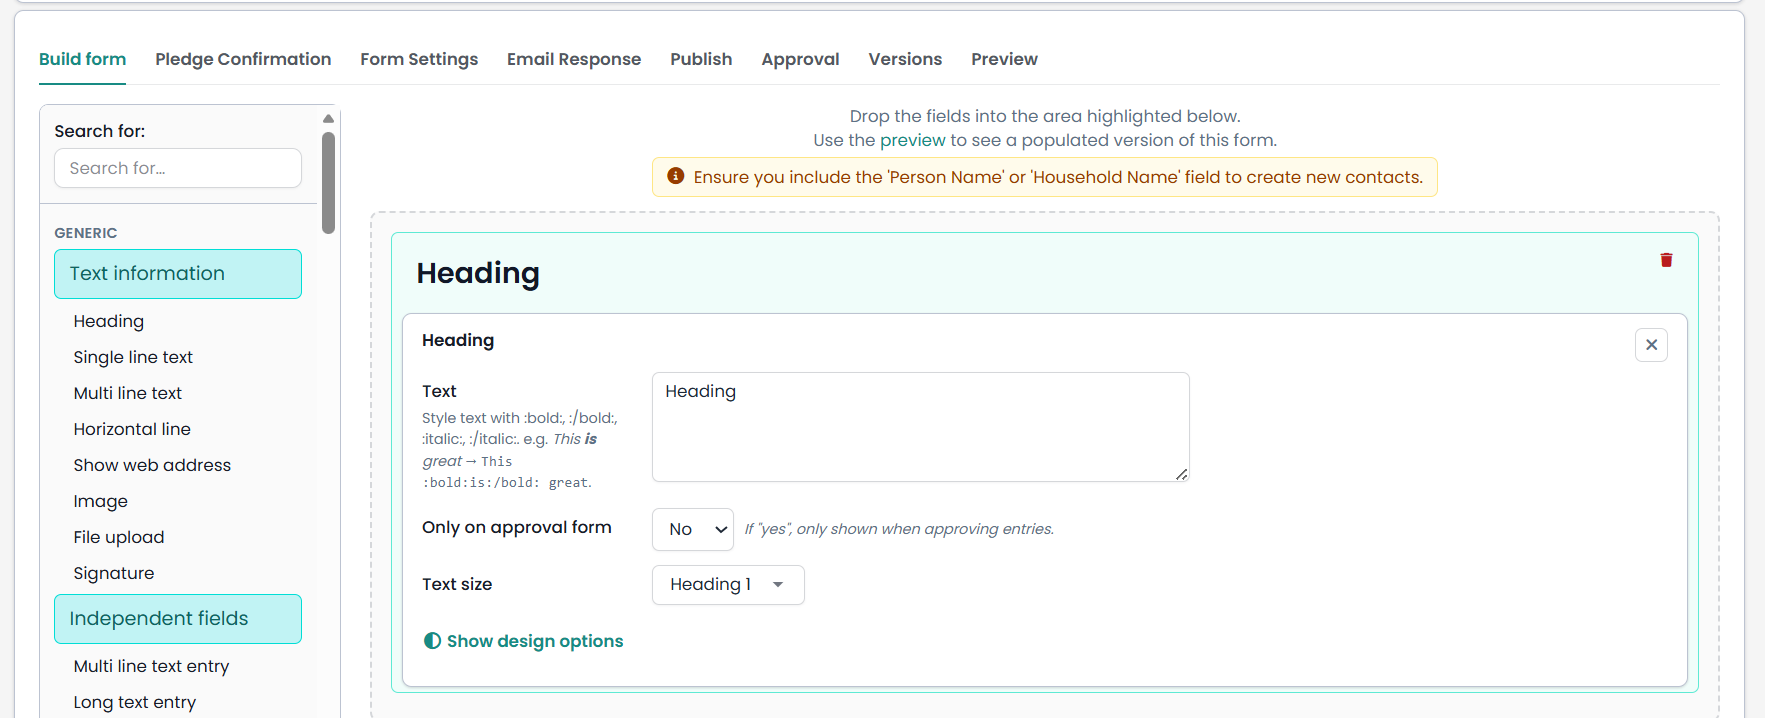
Adding fields
- Find the field you want in the left palette. Use the Search for: box at the top to search by name.
- Drag the field from the palette and drop it into the form area on the right.
- Click the field to open its settings panel and configure it.
You can re-order fields at any time by dragging them up or down within the form.
Available field types
Available field typesation
- Generic fields: text information, independent fields, contact permission fields
- Repeating content
- People fields: contact details, personal, information, dates, donor info, funding application, volunteers
- Household fields
- Group fields: group, group membership
- Finance items
- Payments
Email Response tip: When adding an Email address field, tick the Response email address option in the field settings if you want the form's automated Email Response sent to the address the person enters on the form.
Step 4 — Save and test
Once you have added and configured your fields, click Save form to save your draft.

To check how your form looks and works before publishing, click Save & Test. This opens a test version of the form you can submit. Test entries are flagged separately in the Entries list so they don't mix with real submissions.
You can also click Preview (in the tab row) at any time to see a read-only preview of the form in desktop, tablet, and phone views.
Step 5 — Configure the other tabs
Before publishing, review the remaining tabs across the top of the form editor:
| Tab | What to set up |
|---|---|
| Pledge Confirmation | Configure a confirmation message or email for pledge-based forms. |
| Form Settings | Set open/close dates, custom CSS, the message shown after submission, and more. |
| Email Response | Set up an automatic thank-you email sent to the person when they submit the form. |
| Approval | Choose who is notified of new entries, set up auto-approval rules, and select workflows to trigger on approval. |
| Versions | View the history of published versions of this form. |
Step 6 — Publish your form
When you are happy with the form, click Publish. This locks the current draft as an immutable published version and generates a public link, a QR code, and an embed code — all visible on the Publish tab.
Important: Saving the form does not update the live public link. You must click Publish to push any changes live. While you are working on a draft, the public URL continues to serve the previous published version.
To make changes after publishing, click Edit form in the editor. This creates a new draft without disturbing the live form. When your edits are complete, click Publish again to push the new version live.
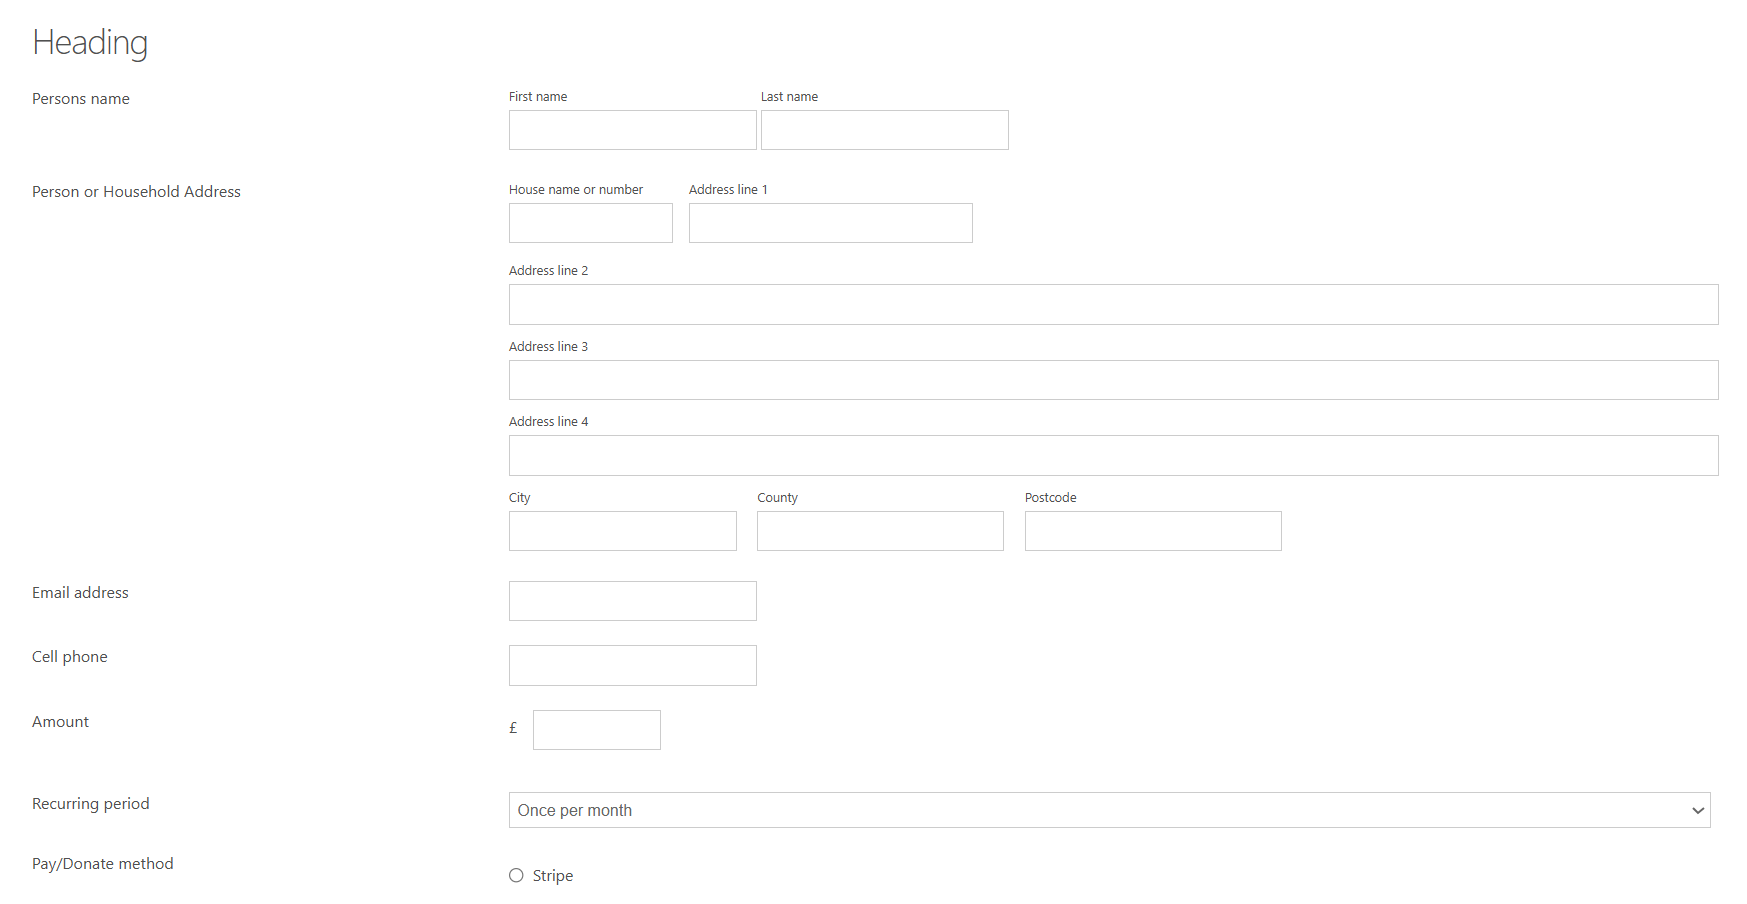
What a published form looks like to respondents:
Builder:
Published: