There are a number of different times when you will need to email when working with Rosters:
- Emailing the roster attachment to all the rostered people,
- Emailing (or texting) a reminder,
- Emailing rostered individuals when they are involved in a change to notify them of the change, or
- Emailing or Quick messaging an individual that is rostered into a position if you need to make contact with them.
- Emailing the group
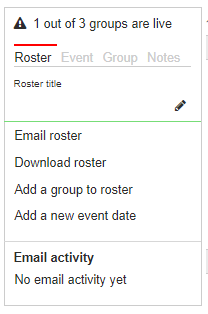
Emailing the roster to all rostered people
Once you have finished setting up the roster you can email it out to all rostered people by following these steps:
- Whilst in edit/view mode of the roster, click Email roster in the panel on the left hand side.
- Select the group(s) that you wish to include in the email for which event and select the format you wish to send the roster in.
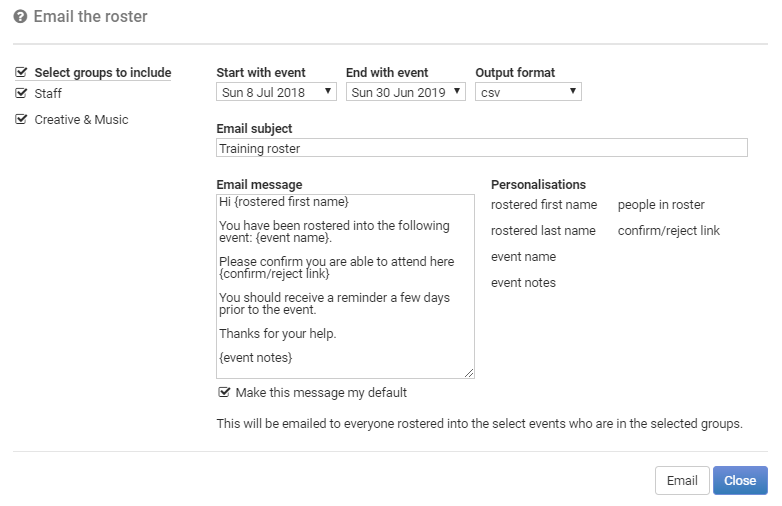
- Complete the Email template by adding a Subject, content in the Email message box and personalisations.
- Click Email and this will be emailed to everyone rostered into the selected events who are in the selected groups.
Emailing (or texting) the roster reminder
Remember that an email reminder, even though set for a day and time, will not be sent if the rostered group is still in plan mode. It needs to be in Live mode.
Click here for more info on setting up the reminder.
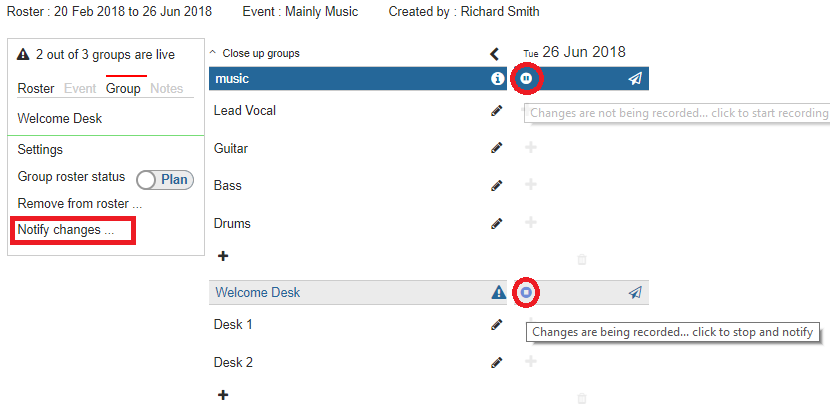
Emailing individuals to notify of changes
When a change is made to a person's roster position, these changes can be logged so that you are able to send an email notification to all those affected by the change. Recording/logging of the changes is off by default and needs to be switched on per rostered group. The recording of the changes is off by default because when you start to set up a new roster you may not want to notify everyone who is to be rostered in future of all the changes from the beginning but perhaps only from once the roster goes live and you get feedback from rostered people. So the button is there for you to stop and start recording of the changes as you wish.
Lets see how to turn recording of changes on or off and how to notify people of the changes:
- Click on the Pause icon to switch on recording and click on the Stop icon to stop recording of changes. Remember that this needs to be switched on/off per rostered group and or event.
-
To stop or pause the recording click on the Stop icon.

-
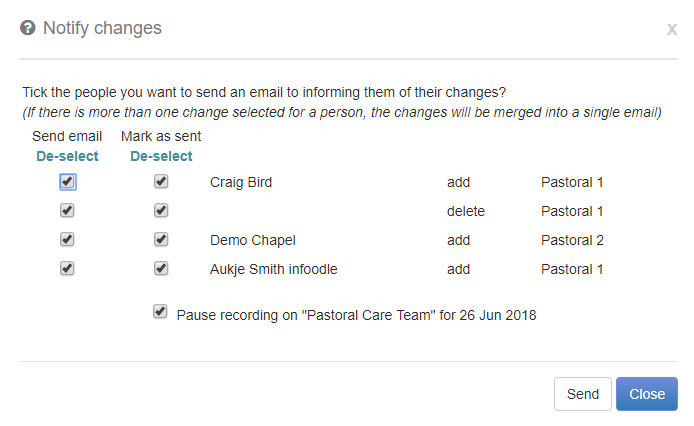
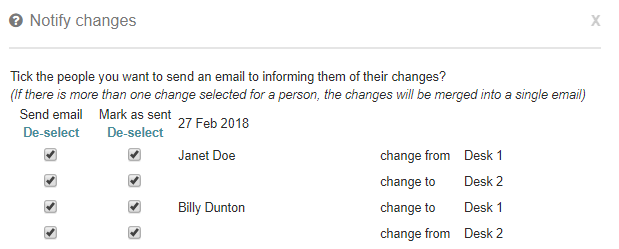
Tick the people that you want to send an email informing them of their changes or deselect them all if you are only stopping the recording.
-
Tick the Pause recording on ..... box and click Send.
- To notify people of the changes to the roster either click on the Stop icon or the Notify changes button on the groups tab on the left.
- Clicking on the notify changes icon presents a list of the changes and allows you to either email them, and/or mark them as being notified (you may make a change and not want to notify).
- Tick the people that you want to send an email informing them of their changes and click Send.
Email or Quick message rostered individuals
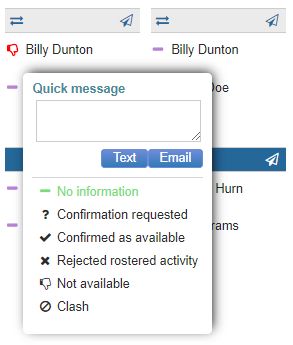
Clicking on a person's status icon allows you to change their status, but also send a quick message either by text or email to only the individual.
Contact the group
Clicking on the Contact group icon on the group bar allows you to contact all or some of the people rostered in the group.
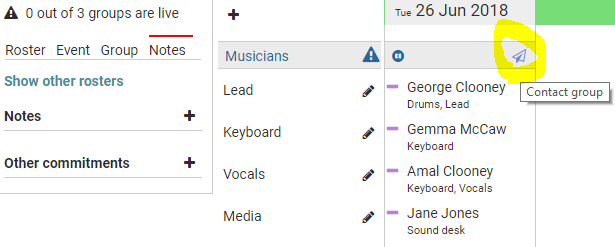
When clicking on this icon it takes you to the Contact screen where you can leave all the rostered people in the** Send to** list or exclude those that you do not wish to contact. You can also choose which form of contact you wish to use ie Email, Letter, Text or Label.