A Quick Roster is useful when you want to roster a group of people who know what they need to do, what time to arrive, etc. This roster allows you to view multiple positions and over multiple weeks.
Creating a Quick Roster is done in three steps. Here's how:
1. Select your group to roster.
From the group list page click on the quick roster icon.

2. Select the roster period.
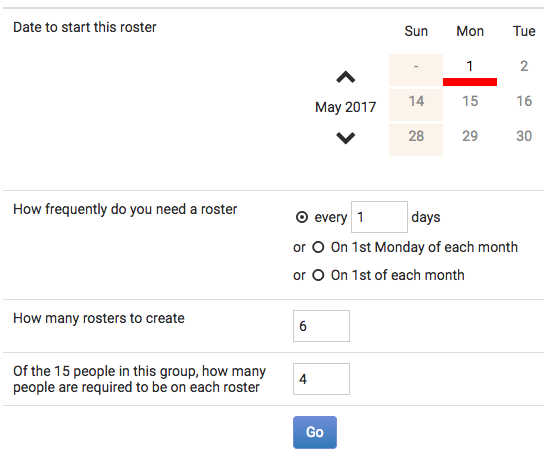
- Click on the date you want the roster to start.
- Enter how often you need a roster run? Daily, Weekly, monthly?
- Enter how long you want the roster to run?
- Enter how many slots need to be filled?
- Finally, click Go.

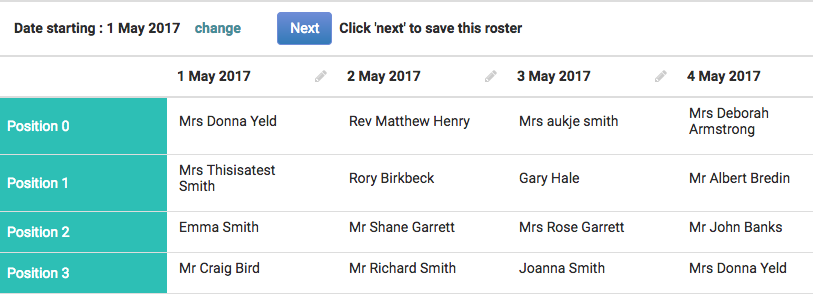
3. Make any changes.

You may wish to name the positions, just click on the position and type in the name e.g. Barista, Server etc.

You may want to swop some of the people around. Just click on a person's name you want to swop, click on the Swop icon, you should notice a red line highlights the person, now click on the person you want to swop with. Swop is done.

When you have finished editing click Next to save this roster. The next screen allows you to send the roster out to roster participants or download it as an Excel spreadsheet.