Before you start - ensure you have the correct permissions in Xero that allow you to connect a Connected App to your account. More details can be found on the Xero website: https://central.xero.com/s/article/Getting-started-with-Xero-Connected-Apps
Step 1 - Contact Settings options
-
Select Administration | Xero OR Finance | Transactions | Configuration | Xero Setup.
-
Select Contact settings.
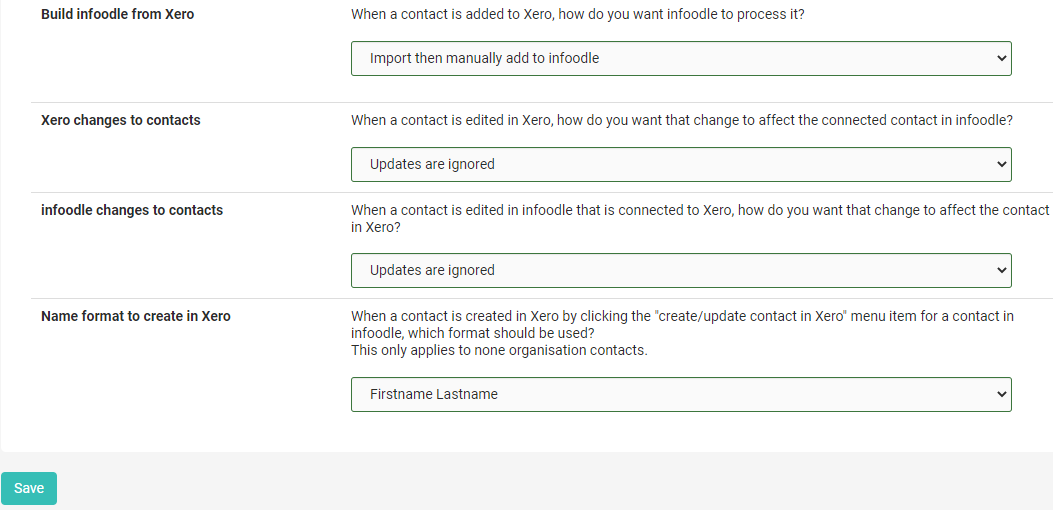
- Select the relevant options:
- Build infoodle from Xero - when a contact is added to Xero, how do you want infoodle to process it? Import and manually add to infoodle, or automatically add?
When Automatically Add is selected there may be times when some duplication occurs and you may go over your price band. In general we suggest to NOT automatically importing contacts and updating them. The goal is that infoodle becomes your central access point for contact data and as such is most likely to be updated here.
There are organisations where this automated approach is useful. We recommend you do some regular data checks in order to keep your data clean.
- Xero changes to contacts - when a contact is edited in Xero, how do you want that change to affect the connected contact in infoodle? Manually or automatically update to match Xero.
- Infoodle changes to contacts - when a contact is edited in infoodle that is connected to Xero, how do you want that change to affect the contact in Xero? Ignore or push up edits to Xero.
- Name format to create in Xero - when an individual's contact is created in Xero by selecting the "create/update contact in Xero" item for an infoodle contact, what name format should be used?
- Select Save.
Step 2 - Xero Connection
You will need to authorise infoodle to access your Xero accounts. To do this follow these steps:
Select Administration | Xero OR Finance | Transaction Processing | Configuration | Xero Setup
1. If currently not connected to Xero

-
Select Connect to Xero.
-
If Xero hasn't been set up to connect to infoodle, a new window will open where you will be asked to Connect to Xero. Follow the options presented by Xero.
Please note that infoodle can only connect to a single Xero Organisation. If you manage more than one organisation, at this stage you will be prompted to confirm which organisation you would like to connect to infoodle
Once completed you will be asked to return to the infoodle screen and will need to re-confirm these details. You are now connected to Xero.
2. If previously connected to Xero
Select Check Xero connection and Authorise.
If this is successful, infoodle will indicate that the connection has been updated.

You can select Check Xero connection and Authorise at any time to check you have a valid connection.
infoodle will now wait until its next schedule import (about three hours) and commence importing the following data ready for you to process further as required:
- All contacts
- All tracking categories
- All bank account information (basic info such as account code and name)
- All account codes (revenue ones by default)
If you have a brand new infoodle site and wish to import the contacts now, select Import contacts. This is great if you are building infoodle from Xero data.
If you are presented with Failed to retrieve information, you may have to wait about 30 minutes before trying again. It can occur when you have just made changes to the Xero account (e.g. removed the add-on). Try logging out of Xero, and then try this step again.
Step 3 - Setup the Xero Schedule - choosing transactions to import from xero
Once transactions are reconciled in Xero they become available to infoodle. To import these transactions automatically, configure infoodle by specifying which bank accounts and account codes you wish to import. It’s normal that many of the transactions you process in Xero are not relevant to infoodle, and you should limit the downloaded transactions to just those you are interested in.
For the steps to setting up the Xero schedule see Xero Schedule.
Once the Xero schedule is setup this will list activities that will run a task every three hours to pull in new data from Xero. By establishing a schedule you are telling infoodle which transactions you want imported.
You can always edit or delete items from the schedule.
What Does infoodle Import?
Each time infoodle updates data from Xero it will collect the following items:
- Updated contacts
- All bank accounts, that is, if the accounts in your schedule are still active
- All account codes, that is, if the codes in your schedule are still active
- Any transactions that have been reconciled or updated since the last time
- Any tracking categories
Step 4 - Transaction settings - reconcile Xero contact names and descriptions
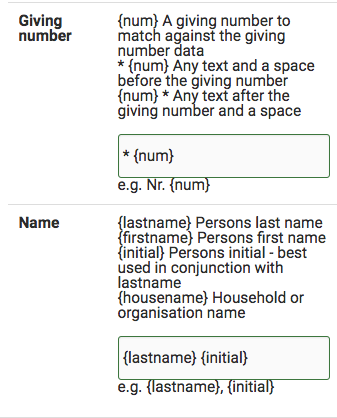
If you enter names or giving numbers in set formats in the description area of Xero line items, you will need to describe that format here so that infoodle can try and match these details to people in infoodle.
Items infoodle can interpret: Giving numbers and Names.
-
Select Finance > Transaction Processing > Configuration > Xero Setup > Transaction Settings
-
Enter the relevant info and select Save.
Step 5 - Account Code Settings
To view, select Finance > Transaction Processing > Configuration > Xero Setup > Account code settings
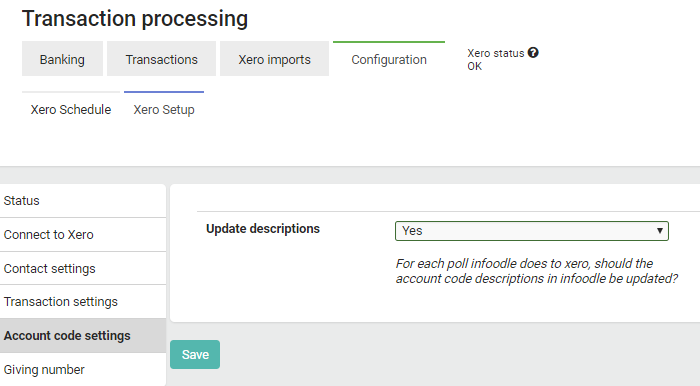
- Choose the relevant option and select Save.
Step 6 - Giving Number Settings
To view, select Finance > Transaction Processing > Configuration > Xero Setup > Giving Number Settings
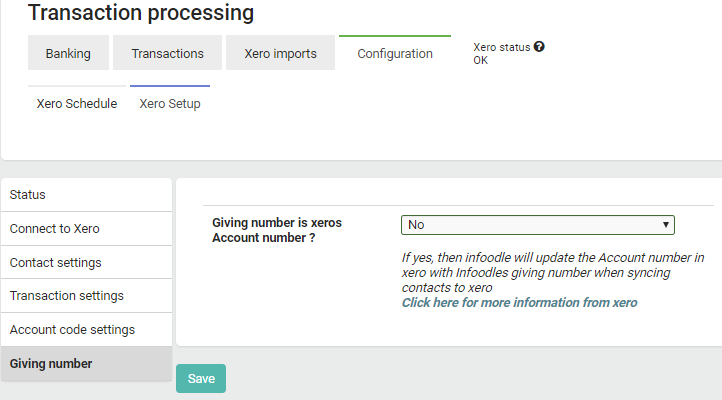
Choose the relevant option and select Save.
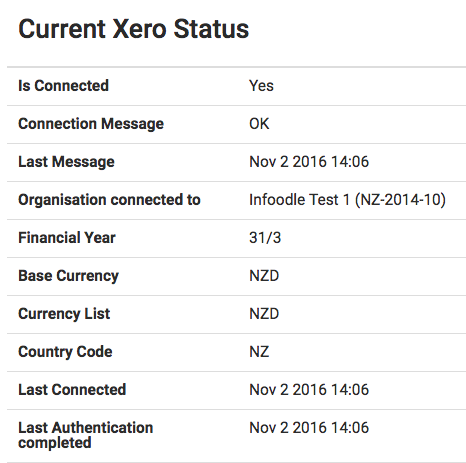
Step 7 - View your current Xero Status
To view, select Finance > Transaction Processing > Configuration > Xero Setup > Status
This displays the current status, when the last connection was made to Xero, etc.
For more information on reconciliation, see Reconciling Transactions.
To find out more on getting started with Finance, click here.