infoodle's Gender field is not a normal field as it has some additional system functions behind the scenes that are associated with this field.
Consequently, the list of gender options for the default Gender field can not be extended.
To ensure that we are able to account for an expanded gender identity selection, infoodle provides the following option.
Step 1 - Create a New Gender Identity field
Via Administration > Custom Fields, create a new Person custom field, for example, Gender Identity.
Select the Type of field to be a Lookup field type, and create a new lookup list, Gender Identity. Lookup fields allow you to create and maintain your own list of Gender options.
For ease of Editing, you should ideally display this field on the Personal - initial page tab
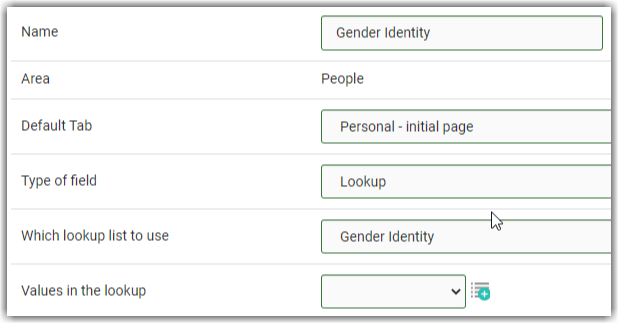
This custom field will not update the Profile icon colours or styles when set.
Step 2 - Bulk Transfer of existing Gender data to the new field
Once the new field is set up, you can use a Report to generate a file with the current Gender settings. Once this is done, you can reimport the data by using the Data Import tool for a bulk update of the new field.
2a - Create a Report of Existing Gender data
You can create a report that will list all contacts with a Gender listed in the Database (including Archived)by setting the following Criteria:
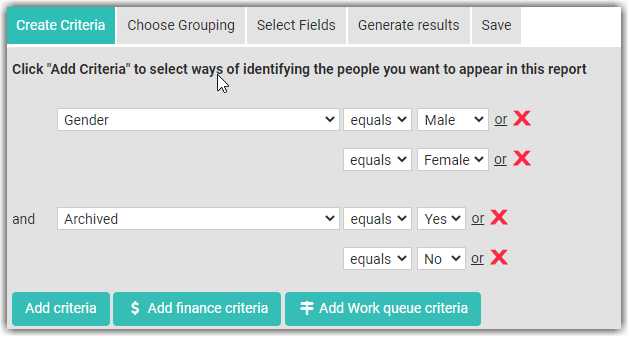
Under Select Fields be sure to include at a minimum, the current Gender field as well as infoodle's Unique ID field. The Unique ID will be used in the import step.

Once you have created the Report, use the option on the Generate results tab to download this as a Plain text (CSV) file.
2b - Import to Update new Gender Field
With the CSV file from the previous step, go to Administration > Data Import and use this new file to import the original Gender data into the new fIeld.
For instructions on running an import, see: Starting your Import.
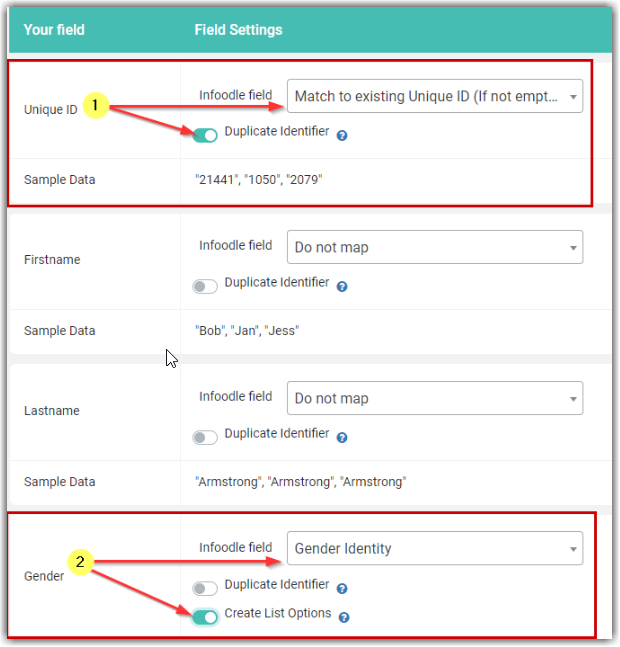
At the Field Mapping stage of the import:
-
Configure the Unique ID column as a duplicate identifier - this will be used to locate and update the correct record.
Set the option to Match to Existing Unique ID (if not empty) - Ignore other Duplicate Criteria if Matched
-
Configure the Gender column to map to the new Gender Identity field.
Set the Create List Options to add the gender options to the lookup list during the import.
See below for an example of this mapping.
Only the Unique ID and Gender fields need to be mapped for this bulk update.
2c - OPTIONAL: Check Import via Report
Once the import is complete, you can use the same report as before, but now include the Gender and new Gender Identity fields, to quickly compare and check that the import worked as planned.
Step 3 - Update Gender Field Settings and Forms
Once you are happy that the new Gender Identity field has all the information from the default Gender field, you can configure infoodle to hide the default field.
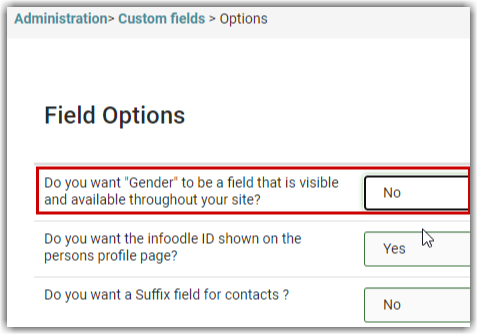
Go to Administration > Custom Fields > Field Options and set the Gender visibilty setting to No, then save the changes.
This only hides the field, it will not delete any data.
You may also need to check for any infoodle Forms that are using the default infoodle Gender field, and update these forms to use your newly created field.
If you need to preserve the exisiting entries, you can set the default Gender field to On Approval Only so that you can still see this on previously submitted form entries.