Once your import data file has been prepared, go to Administration | Data Import from the menu at the top right of the screen.
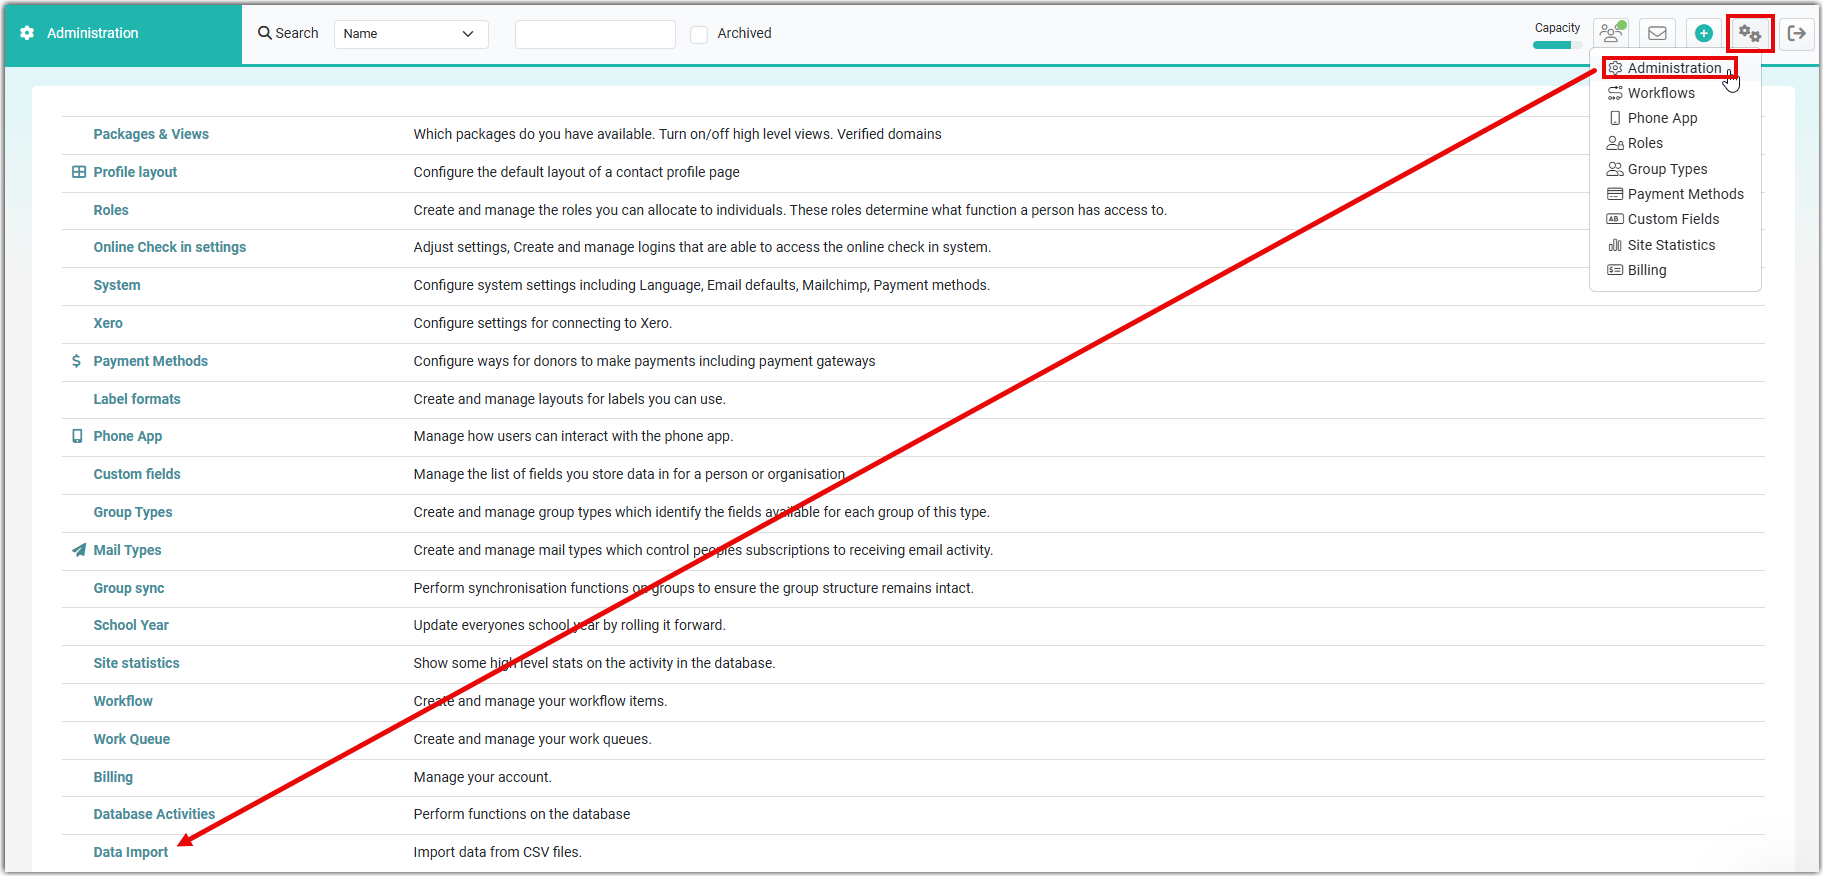
Note that only users with the Access Import Tool Role Permission can access the Data Import system. Role permissions can be managed via Administration | Roles.
For information on getting your data ready to import, see the below help pages:
- People Import: Preparing Import Data
Before starting your import, be sure to check if your site has Mandatory Fields
Any fields in the Database set as Mandatory, will also be Mandatory for an import.
This means that you will need to include these fields as columns in your import data file, and each record in the file will need data in those columns.
Alternatively, if you do not have, or don't wish to include that data, then you will need to go to Administration | Custom Fields and update the fields in question
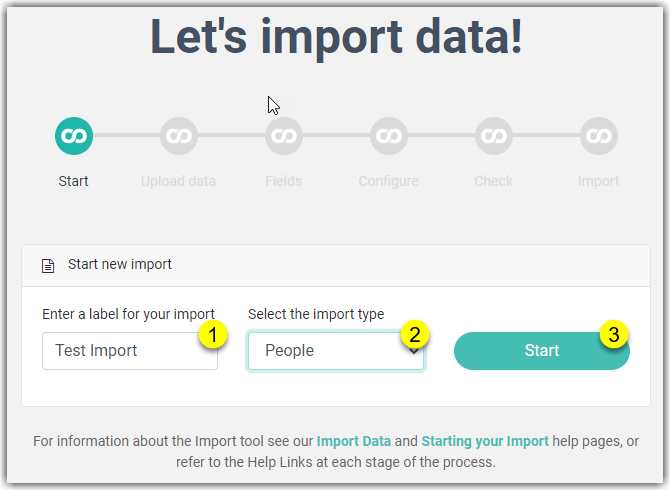
Start an Import
On the Start Screen:
- Enter a Label for your import - This Label is used to Identify your import
- Select the Import Type - Select the Type that mateches the data you are importing
- Click Start to begin the import
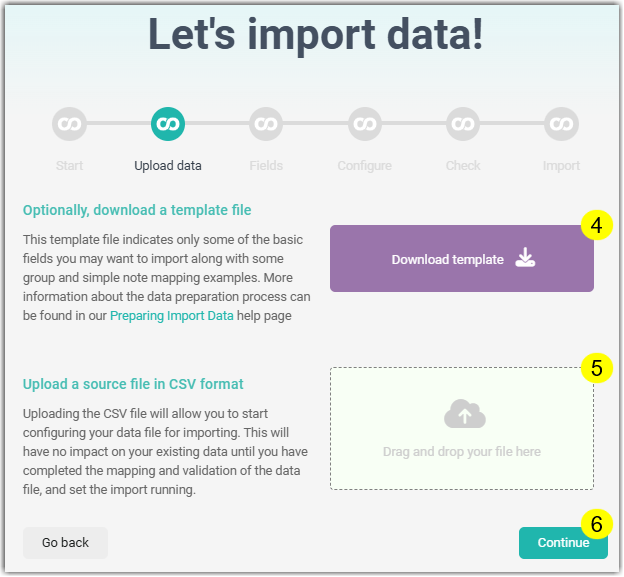
On the Upload Data Screen
- OPTIONAL - If need be, you have the option to download our example Data Template
- Upload File - Either Drag and drop your CSV file to the Upload section, or click this section to locate an upload the CSV file from your computer
- Click Continue to proceed to setting up and using your Import Template
Import Templates
The Import tool uses Templates to manage the Mapping of your Data File Columns to the appropriate Data Fields in the database. Templates are configured by mapping each data column, or selecting to skip some data, and once a Template has been created it can be reused for additional imports at a later stage.
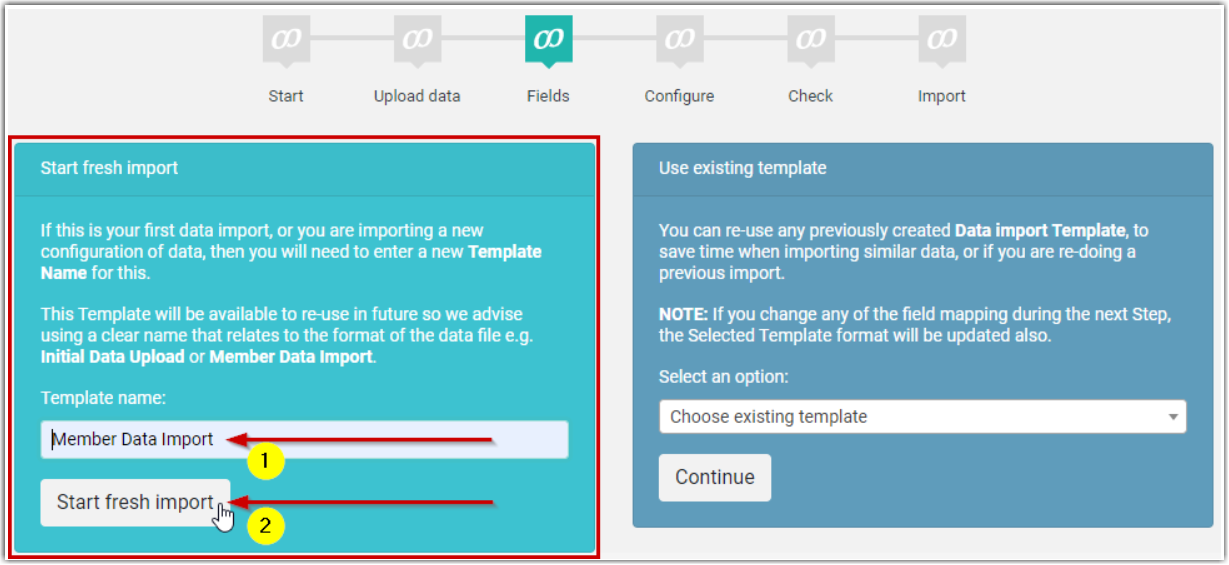
Start a Fresh Import
If this is your first data import, or you are importing a new configuration of data, then you will need to create a new Import Template for this.
Enter a Template Name for this import.
Keep in mind that this Template will become available for yourself or other users to re-use in future so it is recommended that you use clear understood names. For example, use a name that relates to the format of data you are processing such as Initial Data Upload or Member Data Import.
Click on Start fresh Import to proceed to the Data field Mapping.
For instructions on the Data mapping process, see Configuring Data Fields.
Use Existing Template
To save time when carrying out an import of similar data, or if you are re-doing a previous import, you can re-use any previously created Data import Template.
This option is particularly useful if you are importing data from multiple files which have the same information but for different Contacts or Contact Types. It is also saves time if you have the need to carry out regular imports for certain data, or are performing bulk updates.
Select an option from the Template Dropdown list and then click Continue to proceed to the Data field Mapping.
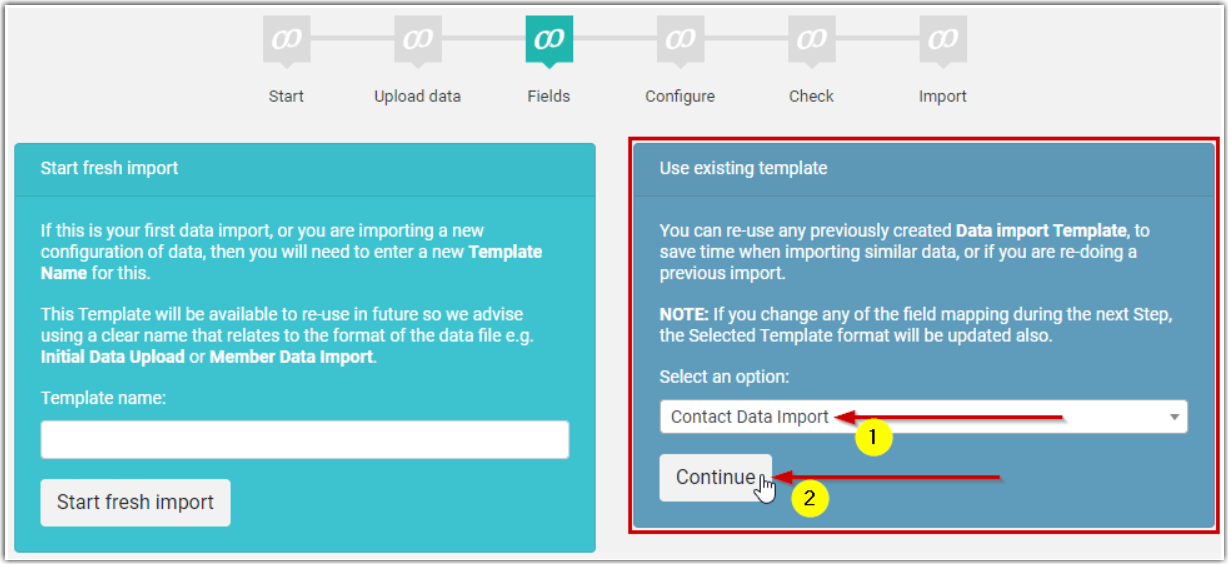
When you choose an existing template, this will pre-load up the Field Mapping structure that was last used for that Import Template.
For Example: Column A = Unique ID; Column B = Firstname; Column C = Skip etc.
Be sure to check that this Template mapping correctly matches the current data file. If needed, you can adjust the field mapping, which will the update the template.
For instructions on the Data mapping process, see Configuring Data Fields.