infoodle is able to capture and store pledges which represent any future planned or committed income by a contact. The new Pledge vs Actual report allows you to show how those pledges are being delivered, with the ability to manage various report configurations, as well as saving report settings for regular use. This v2 report provides the same output as the legacy report but has more options available to enhance your report along with the ability to save your report for future uses.
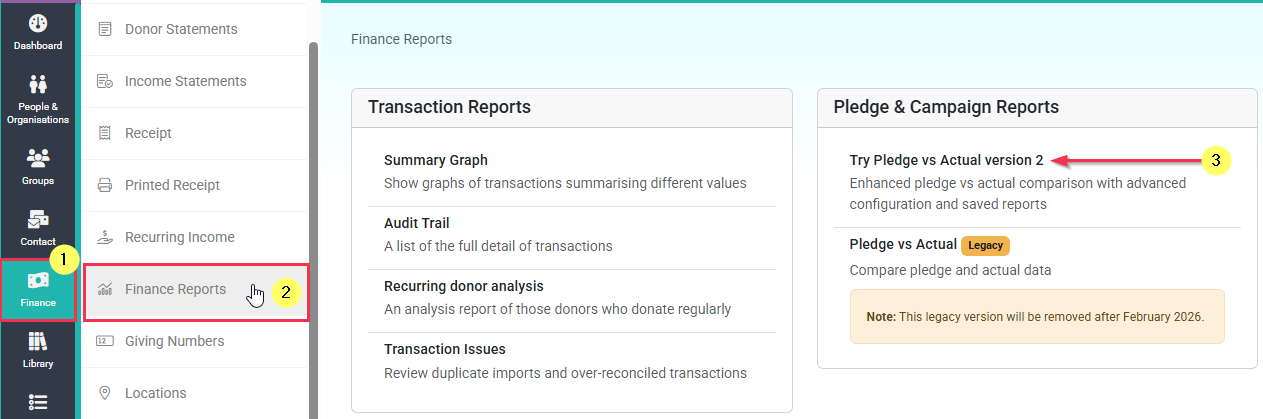
This Report can be accessed via Finance > Finance Reports and selecting the Pledge vs Actual Version 2 option.

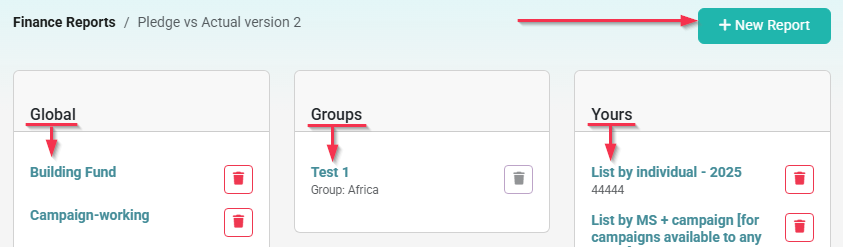
On the Report screen you can then select to load any of your Previously Saved Reports, or you can click the + New Report button to start creating a brand new Pledge vs Actual Report.

Creating a Pledge vs Actual Report
Start by clicking '+ New Report' on the top right of the report screen. This will present you your default set of fields for you to specify settings for.
Report Settings:
The primary settings you will need to configure are the Report settings

- Report Purpose - Tells the report how to summarise the report.
- Output - You can choose whether to put out all three items or just one of Pledge, Actual or Balances. In general you would exclude those individuals or campaigns (from the purpose option) that have no activity, or you can choose to include them here by ticking the option to include lines with no Activity.
- Output Format - Here you can choose to generate the report output to be displayed on screen, or choose to have it downloaded to your device in either CSV or Excel file format
Click here to see the explanation below of each of the available fields on your screen.
Generating/Saving the Report
Once the settings have been configured, you can then click the Run Report option to output the Report in the specified format. You can also click Save Report Template to save the current settings for future use by yourself or other users.

The report output includes a breakdown as per the requested settings - separated by month. Included are balances, cumulative balances and differences to quickly identify anomalies in data together with the ability to forecast projected income. Below is an example report generated to display on screen but these reports can also be exported to Excel or CSV files.

Saving Reports
When choosing to save the Report template, this will save it with all the current Configurations and settings, and you can give the report a Unique Name as well as a Description. You can also choose to save this report as a Personal report just accessible for your user login, accessible for a select Group of Users, or accessible Globally to all users with the ability to run Pledge vs Actual Reports.
Note that any report you can run can be used as a basis for a new report. You can edit the configurations and save as a new report according to your permissions. You can only update a report if you have permission to do so.

If using a Previously saved Pledge Vs Actual Report, you have the options to save any changes made, choosing to either Update Report Template or to Save as New Template

When saving new reports and updating existing reports the following restrictions apply:
- Personal Reports - Any user (with access to Finance Reports) can use this to create/update their own reports. The saved report is restricted to just the user to see and use.
- Group Reports - To Save to, and Update a Group report, you need to be administrator of the group or have the 'Maintain all groups' role permission.
- Global Reports - To Save to and Update a Global report, you need to have the 'Manage finance configurations' role permission.
If a user does not have access to Update an existing report they can still save a copy as a new template, in line with the access the user has for saving reports.
Configure Pledge vs Actual Report Options
In addition to the standard Pledge vs Actual report settings, you now have the ability to configure additional options for the report, either when creating a new PvA report or after loading a previously saved PvA report. The Configuration options give you a more advanced control over what report controls and options will be listed as available, and also what configurations of Custom Field data you want to include in the report purpose options and/or report output data.
Pledge vs Actual Report configurations are a Per Report configuration allowing you to manage the additional settings to use for this specific report, and then save them as part of the report when saving/updating the report template.
These configurations will not be saved per user, or as a site wide configuration.
Each time when creating a new report the default configuration is loaded
Click the Configure Options button at the top of the screen to view and change configuration

Note that for Report Configurations, any user (that has access to the Finance Reports area) can get to the configuration options screen. The normal permissions restrictions apply when saving these configurations as part of a new report, or for updating an existing report.
Report Controls and Options
Under the Configure Available Report Options you can choose to Show/Hide the various controls available when creating reports as well as configure additional options.
Any user (with access to Finance Reports) can get to the configuration options screen so that they can create a report based on an existing report - however, the permissions apply when saving the report.
Be sure to click the Apply Configuration button at the bottom of the screen to save any changes you have made, or use Reset to Defaults to restore the default configuration.

Date Range Controls:
Its preferrable to include some of these settings. Without any date fields, the report will use the current calendar year.

- Start Year - Allows you to specify which year you are starting from
- Start Month - Identifies which month within the start year to start from. All calculations are done on whole months unless using the override option.
- Start Date Override - OPTIONAL - Choose a specific calendar date to start the report from, overriding the "Year/Month" settings
- Number of Months - Allows you to limit or extend the output over many months from the start date/month unless overridden.
- Number of Days - OPTIONAL - Choose a specific number of days for the report output to extend for, overriding the "Number of Months" setting
Filter Controls:
Allows users to determine which aspects they want to filter on. Only enable this if you use them in your site and are useful to the way your data is managed.

- Campaign Type - If you have configured campaign types - which are collections of campaigns, you can choose to filter the output here to one or more campaign types
- Campaign - Allows you to filter the output to a specific campaign. If using a Campaign Type filter, only campaigns of that type will be listed for selection
- Pledge Drive - If you configure pledge drives which transactions can be tagged to, then you can reduce the output to a specific pledge drive here.
- Group Type - If you have configured groups into group types, which are collections of groups, then you can filter the output to people in specific group types
- Group Membership Filter - Choose to filter between Active members of a Group, or contacts that are Past Members of a group
- Bank Account - Filter data to only financials tied to a specific Bank Account
Report Purpose Controls:
Identifies how the report output will be grouped together.

- List by Individual - Show the totals for the individual
- List by Campaign - Show the totals for the campaign
- List by group [campaigns to groups] - Shows totals for each group. Uses only those campaigns that are limited to specific groups.
- List by group [specific campaign] - Shows totals for each group and campaign combination where the campaigns are limited to specific groups.
- List by group [any campaign] - Shows totals for each group and campaign combination regardless of whether the campaigns are limited to specific groups.
- Report at Parent Level - Shows totals for each group found. This can be helpful to create a summarised view for specific groups. Enabling this option will allow you to chose if the report output should show data at the Parent Group Level, or at the Child Group level. This specifically applies only when you are using a Report Purpose option that is listed by group.

For example, if you use Country groups with child/subgroups for State/Region below each Country, you may want the Report output to be listed at the Country parent group level or listed at the child group level by the State/Region Subgroups.
Additional Options:
These give some additional choices for the output of your report. Typically the 'enable output options (pledge/actual/balances) would be selected.

- Show Anonymous Donors - Adds an option to show Anonymous Donors. If you have donors configured to be anonymous, and tick this option, the names of the individuals are replaced with Anonymous. This can be helpful when internal staff are donating to other internal staff and the reports needs to anonymise that. See the Personal Fundraising Settings on the administration screen to use this. Finance Settings
- Giving Number Column - Adds an additional report output column to show Giving Number
- Enable Report by Campaign from Pledge or Transactions - Adds the Report by Campaign from Pledge or Transactions option to the report filter options. This allows you to choose whether the Campaign allocated against the Pledge, or the Campaign allocated to the Transaction should be used when showing the Actuals.

Custom Field Configuration
The Custom Field Configuration section allows you to add one or two of your Custom fields as an additional option under the Report Purpose dropdown list, as well as select up to one Custom field to include as an additional column for display in the report output for individuals.

Enabling Custom Fields
For any of the Custom field options, simply tick the box to enable this custom field, enter a relevant label to be used in display, and then select the relevant Custom field from your list of available custom fields.

List by [Field Name] for Custom Fields 1 and 2
For the Two Custom fields added under Report Purpose these will appear as a new option in the Report Purpose Dropdown, using the specified Label.

In the report Output, the Selected field shows as an additional Column in the output and the data is grouped by the Value in that field, then by the Campaigns

Additional Custom Field
The Additional Custom field option allows you to configure a field to display as an additional column of data in the report output, when the Report Purpose is listed by Individual.

Below is an example of this added column in a Report output on screen.
