Field Presets let you save and reuse your favourite field selections, so you don't have to rebuild them each time.
Create a New Preset
- In the Select Fields tab, check the boxes next to the fields you want to include
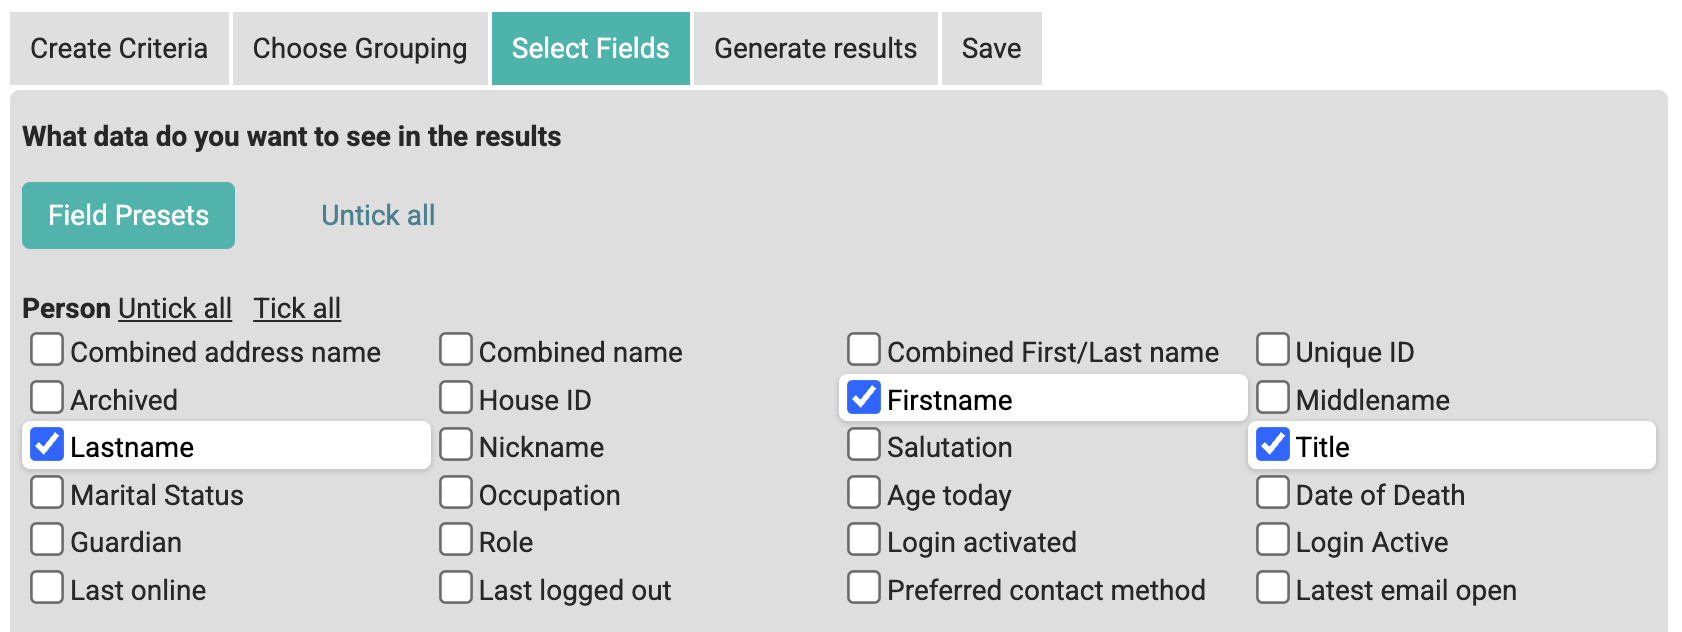
- Click Save as New
- Choose the Permissions of this preset:
- My Selections — Only you can see and use this preset
- Group presets — Share with a specific group (if you have permission)
- Global presets — Available to all users with report access (if you have permission)
- Enter a Preset name (e.g., "Finance Overview" or "Group Membership Summary") and optionally a description
- Choose the Visibility of this preset:
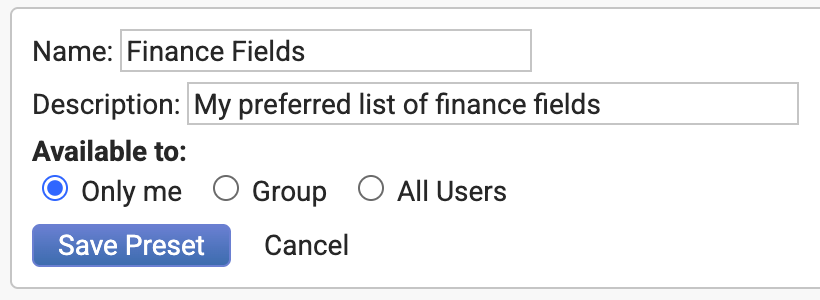
- Only me
- Group
- All Users
- Click Save Preset
Your preset is now saved and will appear in the Field Presets list.
Use a Saved Preset
- In the Select Fields tab
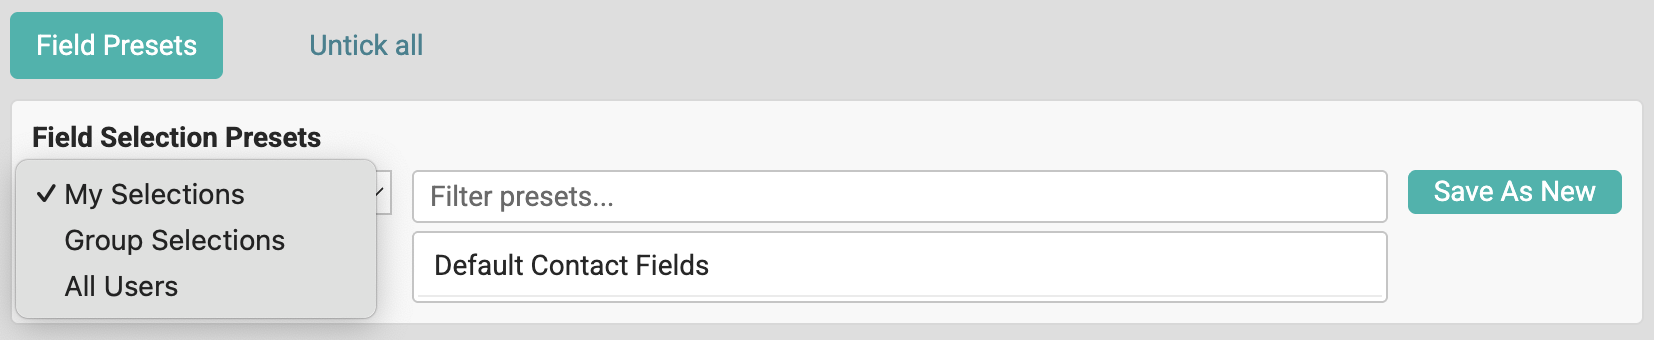
- Click Field Presets
- Select the category (e.g., "My Selections", "Group presets", or "Global presets")
- Click the preset name you want to use

The fields will automatically be selected to match the preset
Set a Default Preset
To make a preset your personal default (automatically loaded each time you create a report):
- Click Field Presets
- Select the preset you want
- Click Set as Default
That preset's fields will now load automatically whenever you create a new report.
Update a Preset
To modify an existing preset:
- Load the preset (see "Use a Saved Preset" above)
- Change the field selections (check/uncheck fields as needed)
- Click Update to save changes to the existing preset, or Save as New to create a new preset instead
Related Pages