The Printed Directory is a special report which enables you to print a directory of either all the active (not archived) people, or a specified group of people.
It's a simple process so take a look at the step by step instructions below!
To generate a printed directory
-
On the main Navigation Menu select Reports.
-
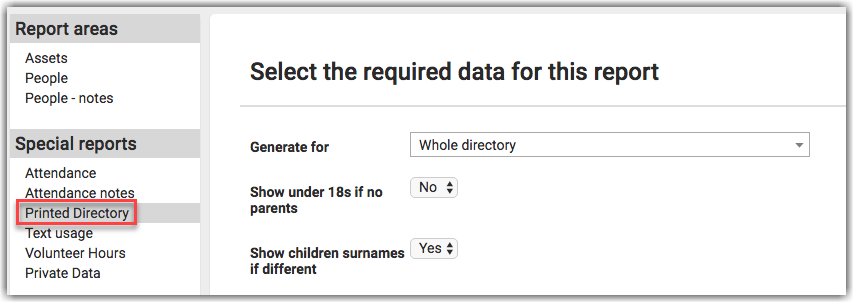
Under Special reports select Printed Directory.
-
In the Generate for drop-down menu either select Whole Directory or the group that the Directory relates to.
-
Check the rest of the criteria on the form ensuring it is set correctly for your printout.
-
Choose from one of the Page Layout formats.
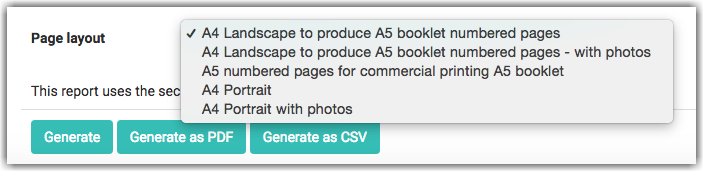
Note the options that include a photo - this has to be a an Organisation or Household photo - personal photos can't be selected for printing.
If a photo is required, set the household or organisation photo to be the same as the personal photo (if set).
For information on photos, see Adding a Photo
- Select either:
- Generate to see the list on the screen so that you can check the layout before printing.
- Generate as PDF to produce the directory as a PDF format.
- Generate as PDF to produce the directory as a text CSV file (photos aren't included).
1. How to Print a Directory (length: 2:15m)
2. Ordering Contact Data (length 6:44m)