A design is a PDF that you can prepare in advance and upload to infoodle to be used with either a receipt template or a statement template. A design is required (and needs to be set up first before setting up the receipt or statement template) as the design tells infoodle where to put the header, footer and body text as well as gives the opportunity to add your own letterhead or marketing messages as part of the document. it also sets your margins for your receipt or statement template. When adding a design you have one of two options:
- You can either add your logo, header and or footer here in the design by uploading a PDF
OR - You can add your logo, header and or footer in the actual receipt or statement template headers and footers. If you choose to add your logo, header or footer to the receipt (or statement) templates and not in the design, then you will still need to add a design (because the design is required to set your margins).
When creating a receipt or statement template you need a default design (even if it is blank) so that your margins can be set. You also have the option to create an alternate design which is useful when needing a different design (background) that is set to only be used during a particular time period e.g. a Christmas design or during a particular campaign.
The steps to setting up a design for a receipt or statement template is the same. Let see how to set up a new design:
- Click Finance on the Navigation Menu.
- Click Receipts. (You will need permission in your role to access this).
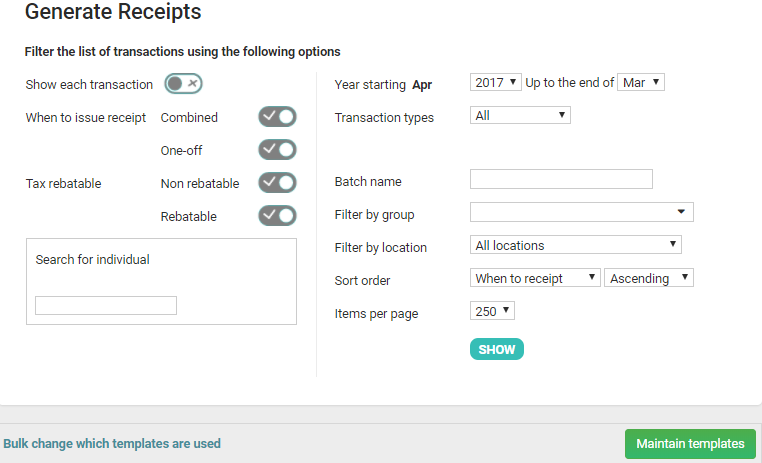
- Click Maintain templates.
- Click Designs.
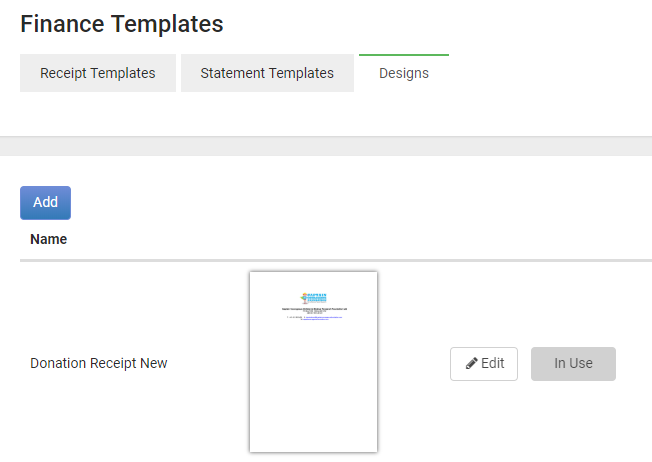
- Click Add.
- If you want a blank page, then click 'The design is empty' and go to step 10. Otherwise select Upload single page PDF including design.

- Click Upload a file.
- Select the pdf file that you wish to upload and click Open. Note the file needs to be in a pdf format and up to a maximum of 3MB.
- Describe the design by giving it a Name.
- Setup the page and where to place the content or leave it at the current defaults.
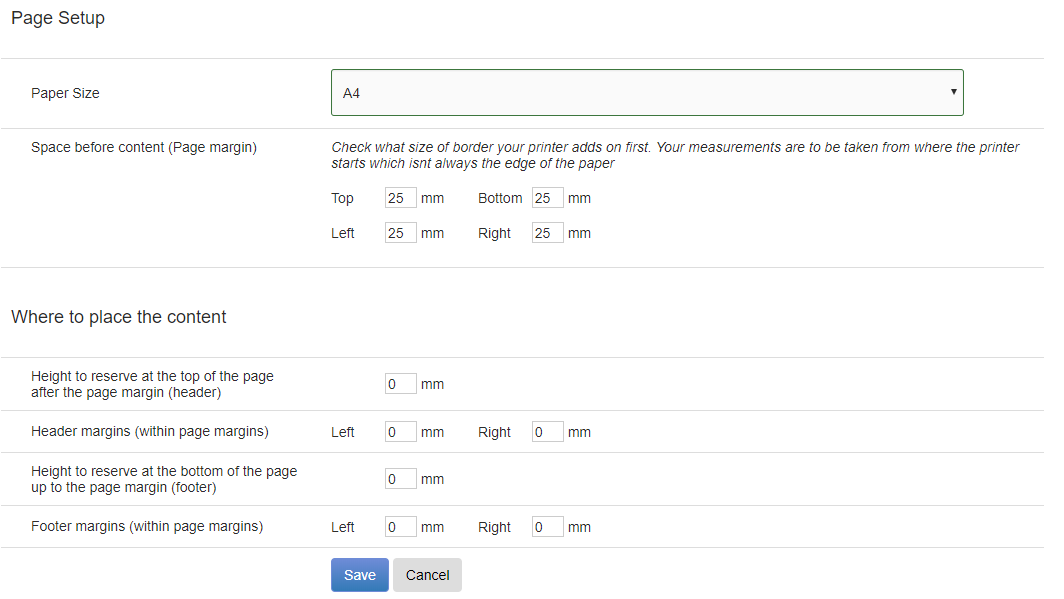
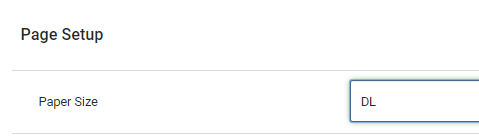
- There is a new paper size that has been added namely DL, which is for printing directly to envelopes. So if you are wanting to send your receipts out by envelope then select this Paper Size and make sure to use this receipt template only for printing out the names on the envelopes for the receipts to be sent out by envelope. Click here for the steps to print receipt recipients details on an envelope.
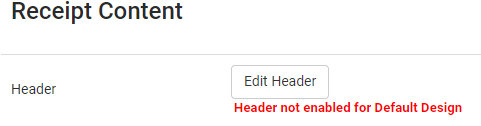
- If you are wanting to add content in the header or footer of a receipt or statement then you need to make sure that the values do not stay as 0mm in the Where to place the content section as in the screenshot above. If you do leave them as 0mm then the receipt or statement will still work but the header or footer content will be left off and you will be presented with an error in the Receipt or statement template screen saying Header not enabled for Default Design (as in the screenshot below).
- If you are getting an error similar to the one in the screenshot below then you will need to convert the PDF to A4 size with some sort of PDF writing program (Click here for help on how to convert it). The reason that infoodle doesn't allow a pdf with the incorrect dimensions is because you would get all sorts of mismatches when positioning things on the page.
https://help.infoodle.com/application/files/7115/3489/0022/AddPDFDesign.PNG
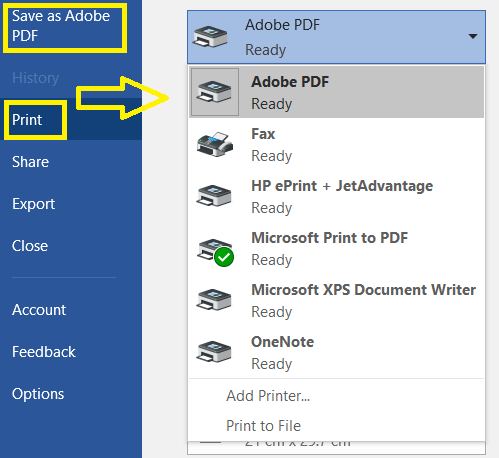
NOTE: if you have the original document in a Word format make sure that you do not use the Microsoft print to pdf option when printing to pdf. Rather use the Print to Adobe PDF or** Save as Adobe PDF** option (as in the screenshot below).
If you do not have this as an option then you will need to download Adobe Reader. Click here for the free download link (Remember to untick the optional offers (see screenshot below)
Once you have added your PDF then click Save.
Now you are ready to add your design to your receipt template.