What is the purpose of using Merge Tags when sending emails?
Our Email Merge Tags (formerly called Personalisations) are a way of automatically inserting information from your infoodle Database into your email content.
This allows you to have your email correspondence automatically personalised to individual recipients when sending out bulk emails or when creating/using email templates, such as an Initial Welcome email or a Thank you email.
In addition to the standard information fields (such as names, contact details, address, etc.), you can also use your own Custom Fields from infoodle as Email Merge Tags. This allows you a great amount of flexibility in how you make use of the information in your database.
Document Content:
- What Are Merge Tags
- Merge Tag Headings
- Emails and Receipt Merge Tags
- Using Merge Tags in your emails
- Mailchimp Designs and using the {content} Tag
- Merge Tags and Privacy of Data
What Merge Tags Are
infoodle will generate Merge tags based on the name of the Field they are tied to. For example, the merge tag for First Name is: {first_name}.
When the email is sent out the merge tag is automatically replaced with information from that field on the Contact Profile of the Recipient(s). If there is no data present in that field for a person (e.g. missing first name) the there will be a blank space inserted instead.
If we sent out an email with "Dear {first_name} {last_name}" to Dave Jurgensen, he will receive an email that says: Dear Dave Jurgensen.
In the example below we have also included the {signature} tag, which will be covered in more detail below.
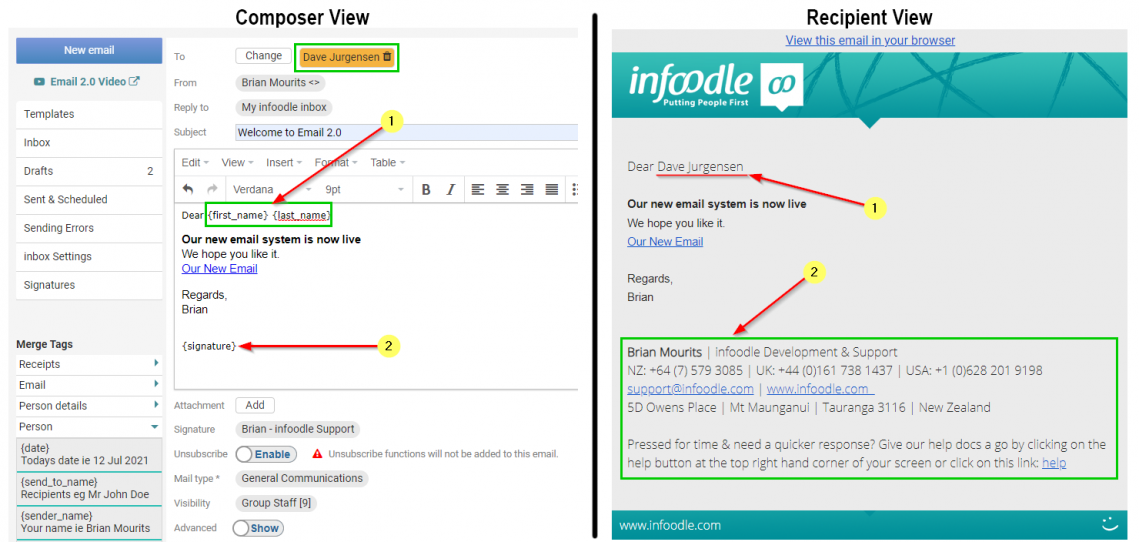
When you use the Send Test Email function then that email will be sent to, and using data from the Contact Profile you are currently logged in as. If your Test email shows any blank spaces for some Merge Tags, then check if those fields on your Profile have data entered.
Merge Tag Headings
The method for adding in Merge tags when creating an email will depend on if you are using the Basic Emailer or the Email Designer.
Despite this, however, the Merge tags available to use will be classified and grouped in the same way using Merge Tag Headings.
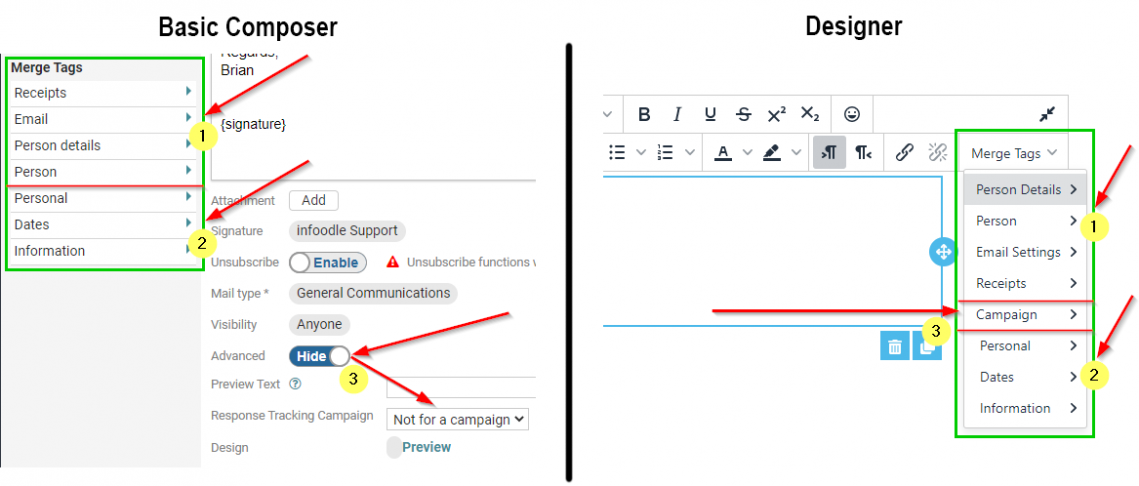
The first four headings shown above (Group 1) are Standard infoodle Headings that will always contain the same Merge Tags:
- Receipts (Finance) - Contains Merge Tags relating to emailing Receipts. Only those with the Finance Package enabled will have access to this
- Email - Merge tags for Email Signature and "View email in Browser" option
- Person Details - These are merge tags relating to Personal information such as Contact information, Address lines, Nicknames etc.
- Person - Merge Tags related to addressing correspondence, such as "Recipient's Name" options as well as Today's date, Sender's name, etc.
The next three headings shown above (Group 2) are also Standard infoodle Headings but these can optionally be customised.
These headings are tied to specific Tabs that display on a Profile page and so will display Merge Tags relating to custom fields in that Tab.
- Personal - Tab: Profile Main Page (Personal - initial page) - Merge Tags for fields set to Display on a Profile main page in the "Personal Info" section
- Dates - By default will have Merge Tags relating to the Dates tab. This tab can be edited/ renamed/ deleted; the Merge Tag Heading will match any changes
- Information - By default will have Merge Tags relating to the Dates tab. This tab can be edited/ renamed/ deleted; the Merge Tag Heading will match any changes
As you create your own additional Profile Tabs you will see these listed as new Merge Tag Headings, likewise the custom fields that you create and store in Tabs will be listed as Merge Fields under that Heading when composing an email.
For more information on Custom Fields and Tabs, see: About Custom Fields
For Campaign Tracking (Group 3) use the Response Tracking options from the Advanced Settings or Merge Tags for Campaign Tracking.
For information on Campaign Tracking, see" Campaign Tracking
Email and Receipt Merge Tags
Rather than just inserting data from a field, the Merge Tags under the Email and Receipts headings are instead tied to specific functions.
There are two merge Tags that can be inserted from the Email Heading
- View Email in Browser Link - {site_view_url} - Use this to insert a Clickable link that Recipients can use to view the content of the email in their internet browser
- Signature - {signature} - This Tag tells infoodle where to insert your email Signature if you have one set up.
For more information on Email Signatures, see: Email Signatures
Reciepts (Finance Package Only)
These tags are used for financial communications, such as creating an email template to use when issuing receipts via email. For an email template to be listed as an option on the Receipts screen it must contain a receipt link or url merge tag.
- Receipt Link - {receipt link} - This will create a link that the Recipient can click to view their receipt, and from there download or print it.
- Reciept URL - {receipt url} - Just the URL of the Receipt. If you wish to make a clickable button or image for the purposes of downloading a Receipt, use this tag when prompted for a URL. For example when using Create/Edit Link option in Basic Email, or in settings for Button or Image content in the Email Designer.
- Giving Number - {giving number} - If you make use of Giving numbers in infoodle, use this Tag to insert them into email content. Click here for more information.
For more information on Emailing Receipts, see: Emailing Receipts or Statements
Using Merge Tags in your emails
Basic Email
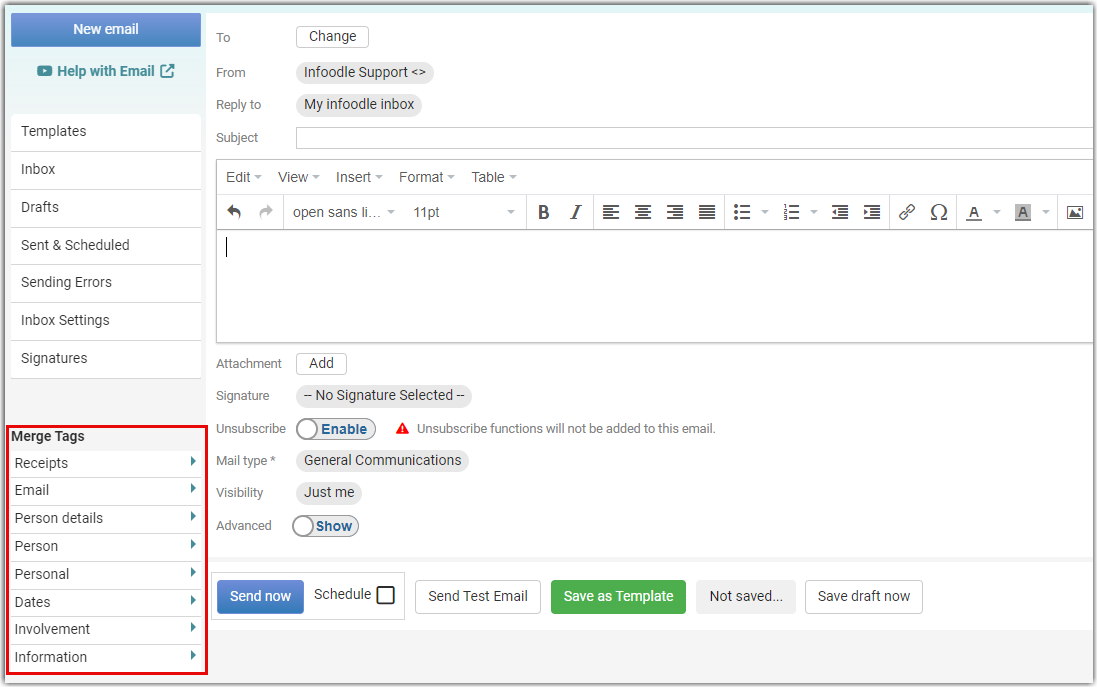
When composing an email or template using the Basic Email option, the Merge Tags that are available for you to use will appear on the left hand side of the page, below the Email Menu.
For example:
When you insert the {email_address} tag to insert the contact's email, and if the contact has more than one active email address, then all of those addresses will be inserted into the email.
To insert only the address being used for this email, use this tag instead: {{address.email}}. This tag is not included in the list of merge tags and will need to be manually added.
If you are sending an email to all of the contact's active email addresses, then each email will display only the email address for this email.
For more information on Using Merge Tags in Basic Emailer, see: Using Merge Tags in Basic Email
Designer Email
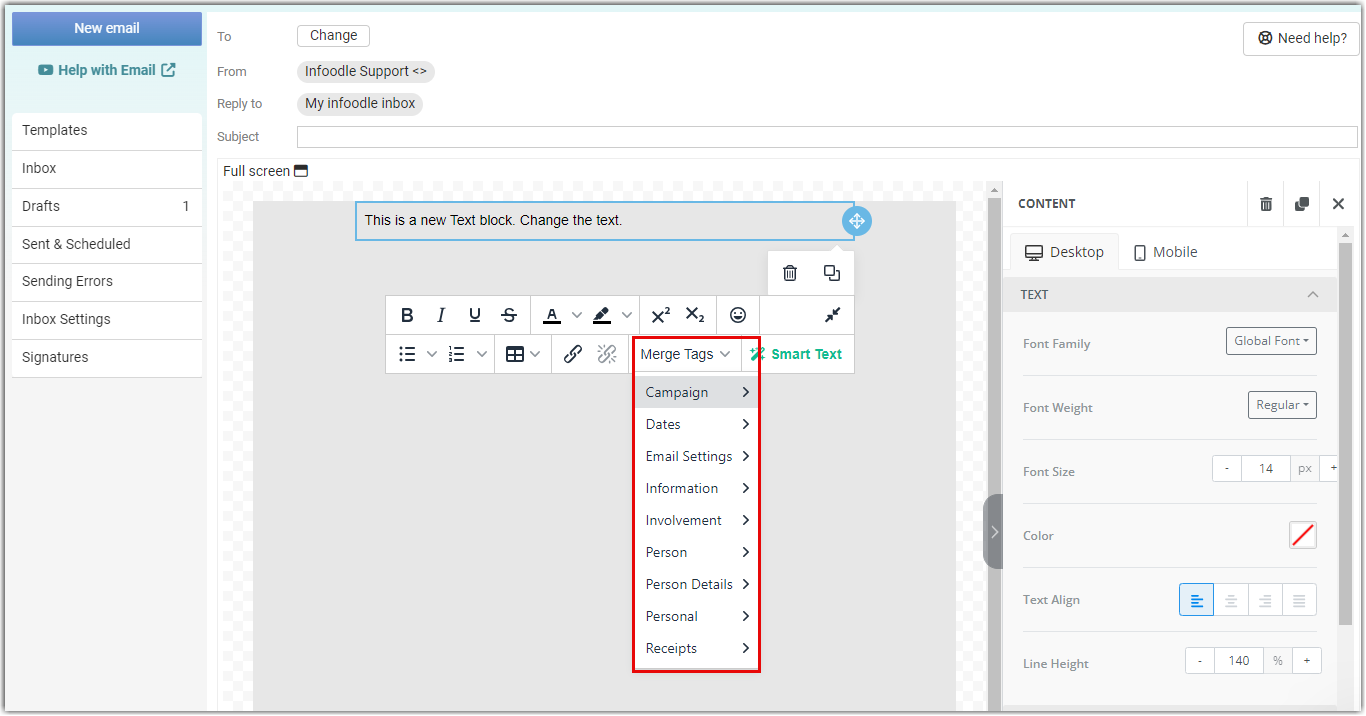
If you are using the infoodle Designer to create your email, then the Merge Tags that are available for you to use will be listed as a series of dropdown Menus from the Text Toolbar. Which will appear when adding or editing a Text or Heading content block.
For example:
When you insert the {email_address} tag to insert the contact's email, and if the contact has more than one active email address, then all of those addresses will be inserted into the email.
To insert only the address being used for this email, use this tag instead: {{address.email}}. This tag is not included in the list of merge tags and will need to be manually added.
If you are sending an email to all of the contact's active email addresses, then each email will display only the email address for this email.
For more information on Using Merge Tags in Designer, see: Using Merge Tags in the Email Designer
Mailchimp Designs and using the {content} Tag
If you are using Mailchimp to create your email designs/templates then you can still choose to use the infoodle Merge Tags in this email.
To do this, you must select the Use As Design option when choosing your Mailchimp template as this will allow you to compose content within infoodle, to then be inserted into your Mailchimp Email Design.

In order for infoodle to know where to insert the additional email content, you must use the Content Merge Tag.
From Mailchimp, make sure that you have included {content} within your design at the point that you want infoodle to add information.
If you select a Mailchimp Design that does not contain that merge tag then you will see the following message:
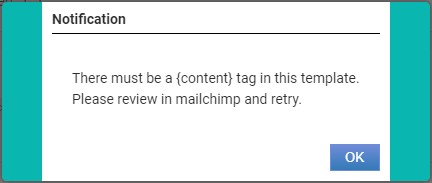
If that happens, return to Mailchimp and add in the {content} tag to the design where you wish to insert email content.
Merge Tags and Privacy of Data
Through the creation of Custom Fields, infoodle allows you to capture and store all sorts of information that is relevant to your needs.
Some of this information within your database may be sensitive or privileged information that only certain people are permitted access to and as such the visibility of it within infoodle may be restricted to certain users based on the Role that is assigned to them.
Because the infoodle Merge Tags are automatically created from the infoodle Custom Fields, there is also a requirement for enforcing Data Privacy settings around the access to, and use of the Email Merge Tags.
For this reason, the list of Merge Tags that are displayed as available for an infoodle user to use will be controlled/restricted based on the Permissions allocated to their Role.
Likewise, the information that is inserted into an email will be controlled this way, if they were to view the sent email from within infoodle, such as from the History section on a contact persons profile.