These determine how, what and when a group is communicated to in regards to the roster.
To access these settings:
- Searching for a Roster.
- Alongside the Roster click Action and then Edit/View.
- Select the group you wish to change the settings of by selecting the group heading.
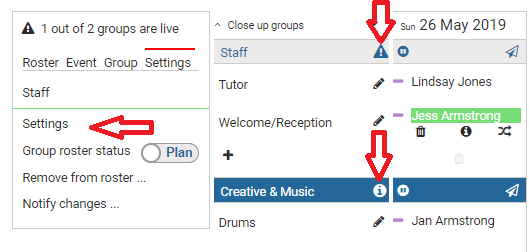
- Select either:
- Settings in the group panel on the left,
- The blue and white triangle icon in the group heading, or
- The white and blue i icon
- Change the relevant settings and select Save.
Who will receive any information about this roster?
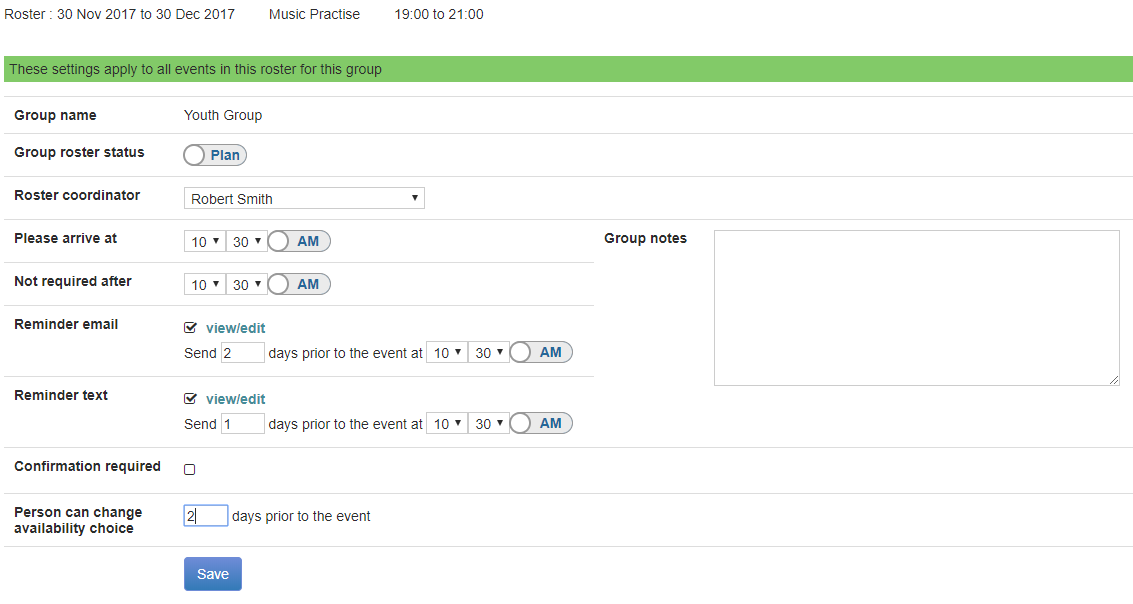
Set the Roster coordinator to be either yourself, or someone who has the administrator permission in the group.
Anyone rostered will receive this information via the reminder set by you on the Group Settings page.
Passing on information to those who are rostered
Use the Please arrive at and Not required after fields to communicate timings.
Use Group notes to communicate specific information.
Sending reminders
Use the Reminder email or Reminder text settings to tell infoodle when to send reminders.
Select View/Edit to set and change the email or text message template that will be sent to this group.
Ask people to confirm their rostered positions
By ticking Confirmation required the user is prompted with a confirm or reject option in their My Calendar screen. It's helpful to include the confirm/reject link in the email or text template.
When can the person change their mind?
Plans change and people can confirm one day and reject the next. Specify how many days prior to the event you allow this to happen by entering a number in the Person can change availability choice field.
Make sure you have enough credit allocated to the Roster coordinator if you are sending texts, one credit per person per reminder