For those organisations who recognise both the contact who makes the donation as well as the contact who receives the donation, we have now provided the ability to send income statements to those recipients.
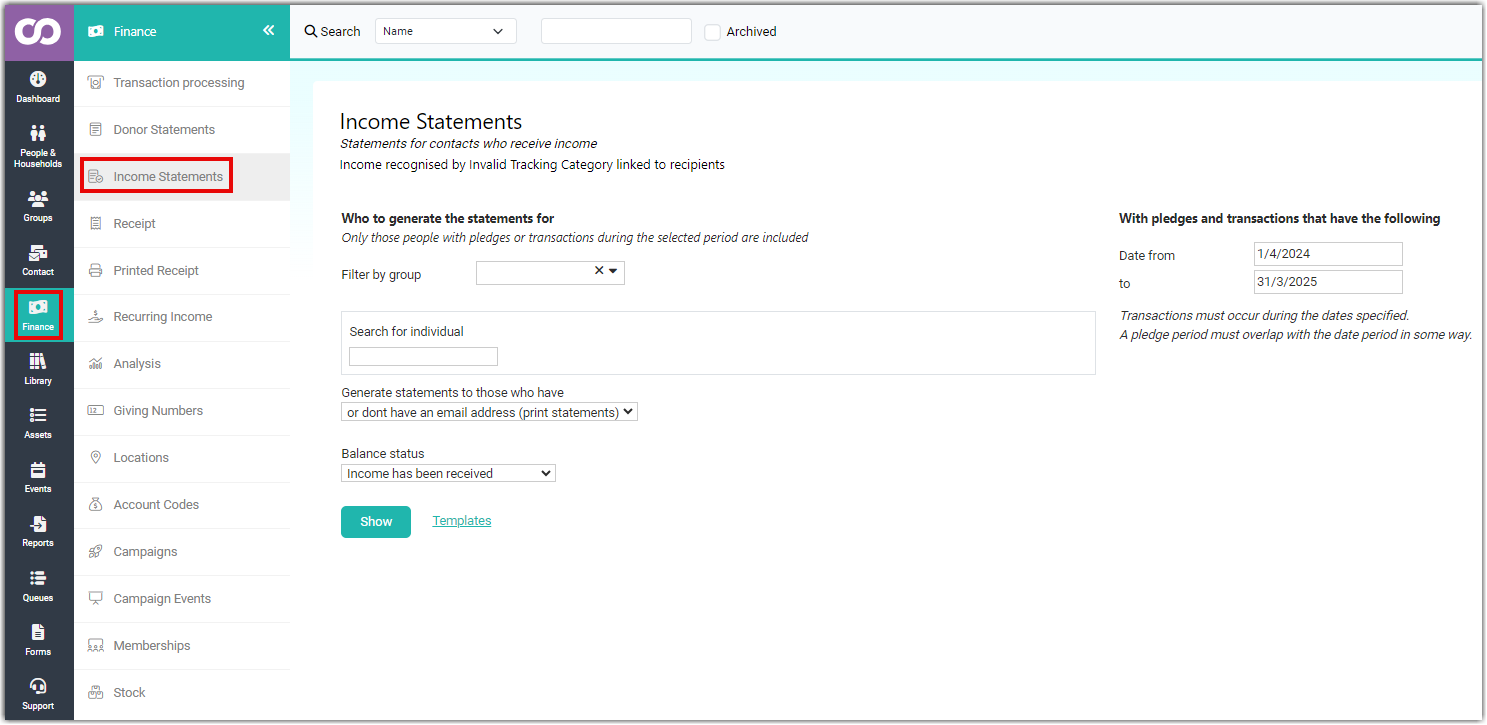
1. Filtering Transactions
Choose Income Recognition Method - select either Tracking Category or Campaign based on your organisation's preferences.
Apply Filters - use the available filters to narrow down the transactions you want to include in the statement. These may include:
- Date range
- Donor name
- Account code
- Campaign name
- Tracking category
2. Selecting a Template
Choose a statement template that aligns with your desired format and content. Templates may include options for:
- Overall layout
- Included information (e.g., transaction details, totals, pledges)
- Branding and styling
3. Generating the Statement
Print for this page - generate a single PDF containing statements for the contacts shown on the current page.
Email all - place a request to email statements to all contacts in the search results.
4. Viewing and Downloading
Once the statement is generated, you can view it directly on the screen or download it as a PDF.
Additional Notes
Testing - to test a statement before generating it for all contacts, go to a profile page of any contact that has transactions, click "Finance," and then click "STATEMENT."
Account Code Filtering - on a person's finance tab, you can now filter by account code for more specific transaction inclusion.
Income Recognition Methods
-
Tracking Category - transactions are linked to a "contact who receives income" through a tracking category.
-
Campaign - transactions are linked to a campaign, which can then be linked to an individual.