If you are using Stripe as a payment gateway provider, then this can be further configured to enable Apple Pay and Google Pay as payment options.
Not all user devices will be compatible with this feature. Be sure to review the Supported Devices section for each payment option below.
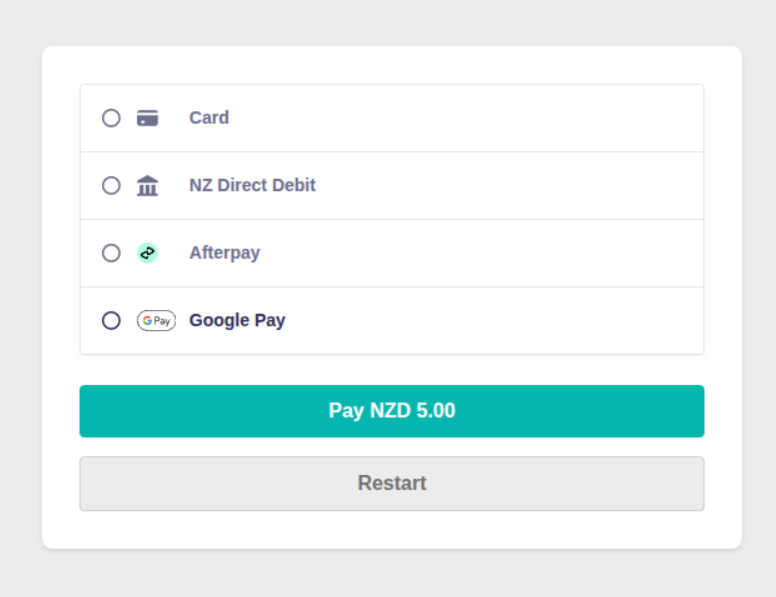
A user will still select your Stripe Payment method when paying by infoodle form, but on the payment screen they can then select to pay using a card that is saved to their Apple or Google Pay.
Below is an example of selecting Google Pay instead of entering card details.
Enable Apple Pay or Google Pay
Both Apple Pay and Google Pay settings can be accessed via the Payment Methods configuration settings from your Stripe Dashboard.
Google Pay may already be enabled by default, but Apple Pay will need to be enabled and then configured.
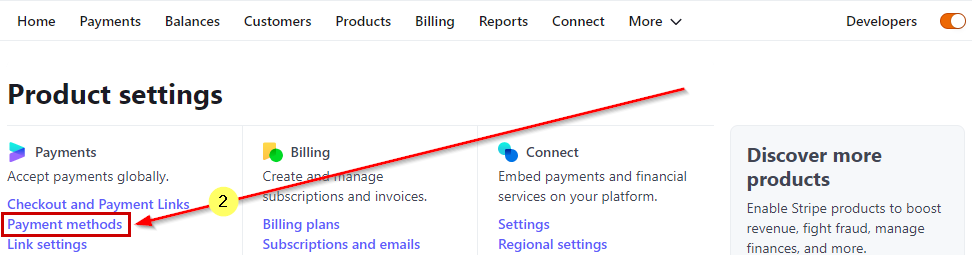
To Access these settings in Stripe:
- Click the Settings Cog in the top right of the screen

- Select Payment Methods under the Payments section
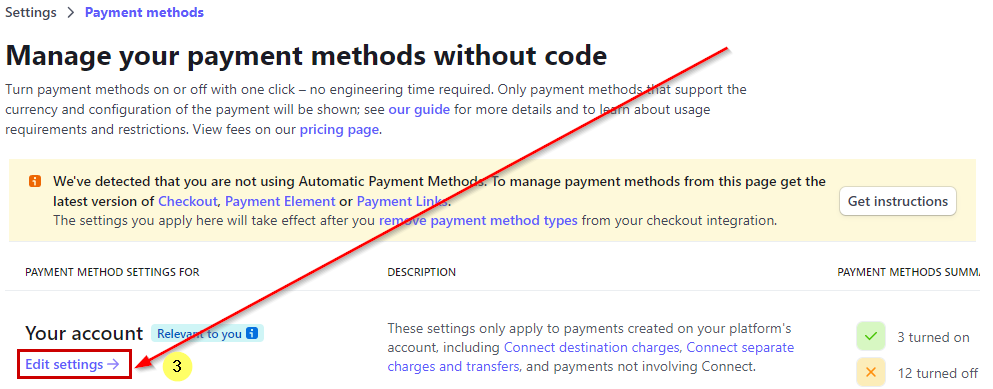
- Under the Your Account section, select Edit Settings
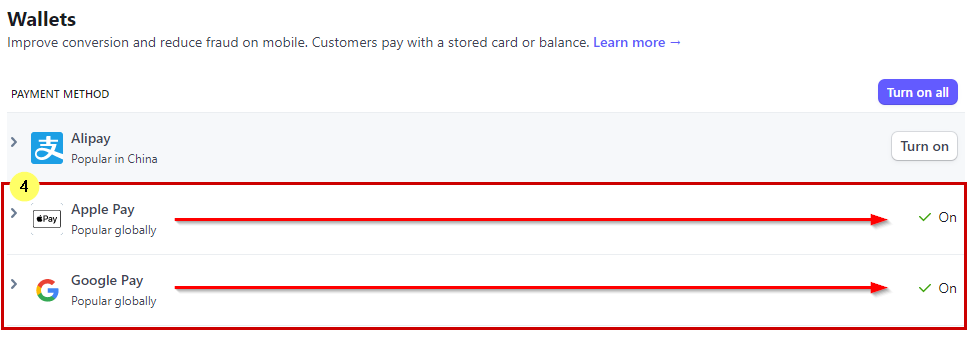
- Scroll down the list to turn on Apple Pay and/or Google Pay
For Apple Pay, you will need to configure additional settings as outlined below.
See Supported Devices for Apple Pay for device compatibility info.
For Google Pay, once this is enabled there is no additional configuration required.
See Supported Devices for Google Pay for device compatibility info.
Configure Apple Pay
To set up Apple Pay on your Stripe account for the first time, you will need to configure additional settings after enabling this as a payment method. To set this up to work with your infoodle site, you only need to complete the below configuration:
-
Click on Apple Pay under the Payments section of your Stripe Settings
-
Click Configure

-
Under the Web Domains section, click Add new domain

-
Add your infoodle site URL (e.g. https://mysite.infoodle.com/)
-
Then click Add
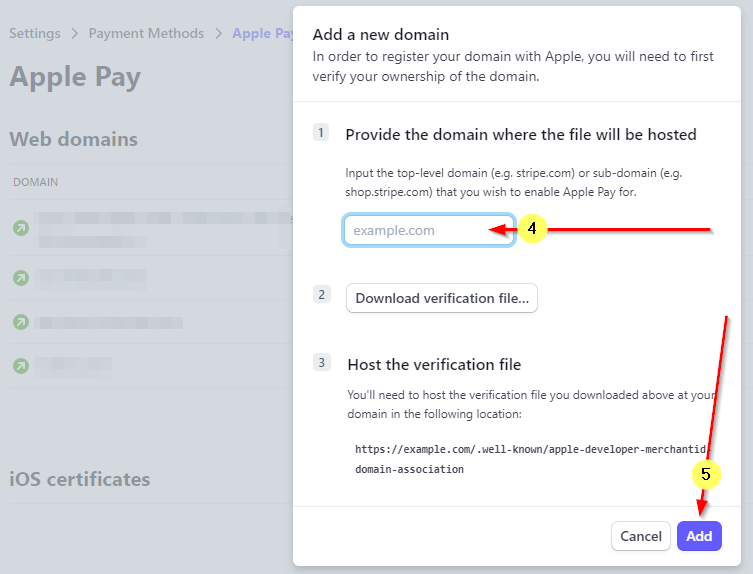
You do not need to worry about the Verification File settings when adding your infoodle site, as this component is already configured for infoodle.
If you are unsure of your infoodle site URL, then you can check this when you are logged in via your web browser.

If needed, the full Apple Pay configuration settings are covered on Stripe's help page, Enable Apple Pay on your Stripe account
Supported Devices for Apple Pay
Apple Pay can be used on supported Mac, iPhone, iPad and Apple Watch devices.
For the full Apple Pay compatibility information, see the Apple support article Devices compatible with Apple Pay
Compatible iPhone models
- iPhone models with Face ID
- iPhone models with Touch ID, except iPhone 5s
To see if your iPhone supports Apple Pay, identify your iPhone model
Compatible iPad models
- iPad Pro, iPad Air, iPad, and iPad mini models with Touch ID or Face ID
To see if your iPad supports Apple Pay, identify your iPad model
Compatible Mac models
- Models with Touch ID
- Models introduced in 2012 or later with an Apple Pay-enabled iPhone or Apple Watch
- Mac computers with Apple silicon, paired with a Magic Keyboard with Touch ID
Supported Devices for Google Pay
Google Pay is compatible with the majority of modern Android devices across a wide variety of manufacturers and form factors, including mobile phones, tablets, and Wear OS by Google devices.
For the full compatibility information, see the Google Pay support article Supported devices