There are times when you realise that you have made a mistake on a printed (generated) receipt where a transaction was incorrectly allocated to an account code, campaign, person, etc, or you have issued a receipt in one persons name but they wish to have the receipt in both husband and wife's name.
There are a few steps to rectify this:
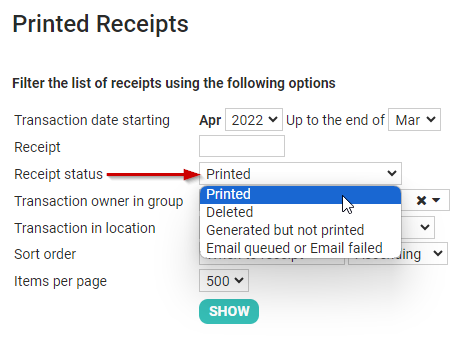
Step 1 - Search for the Printed Receipt (via Finance > Printed Receipts)
Step 2 - Delete the current printed (or generated) receipt,
Step 3 - Correct the mistake in the transaction,
Step 4 - Re-receipt or receipt the new corrected transaction.
If you have emailed a receipt to the incorrect email address, and no change needs to be made to the Receipt itself, then you do not need to delete and re-receipt.
For information on how to rectify this, see Resending a Receipt.
The Printed status on the Printed Receipts screen will display any Receipts that are in the Finalised (Printed) status. This includes receipts Generated and sent by email as well as those Generated to be printed and posted.
If you cannot find the receipt you are looking for, it may have a different Receipt Status.
Deleting a Receipt
-
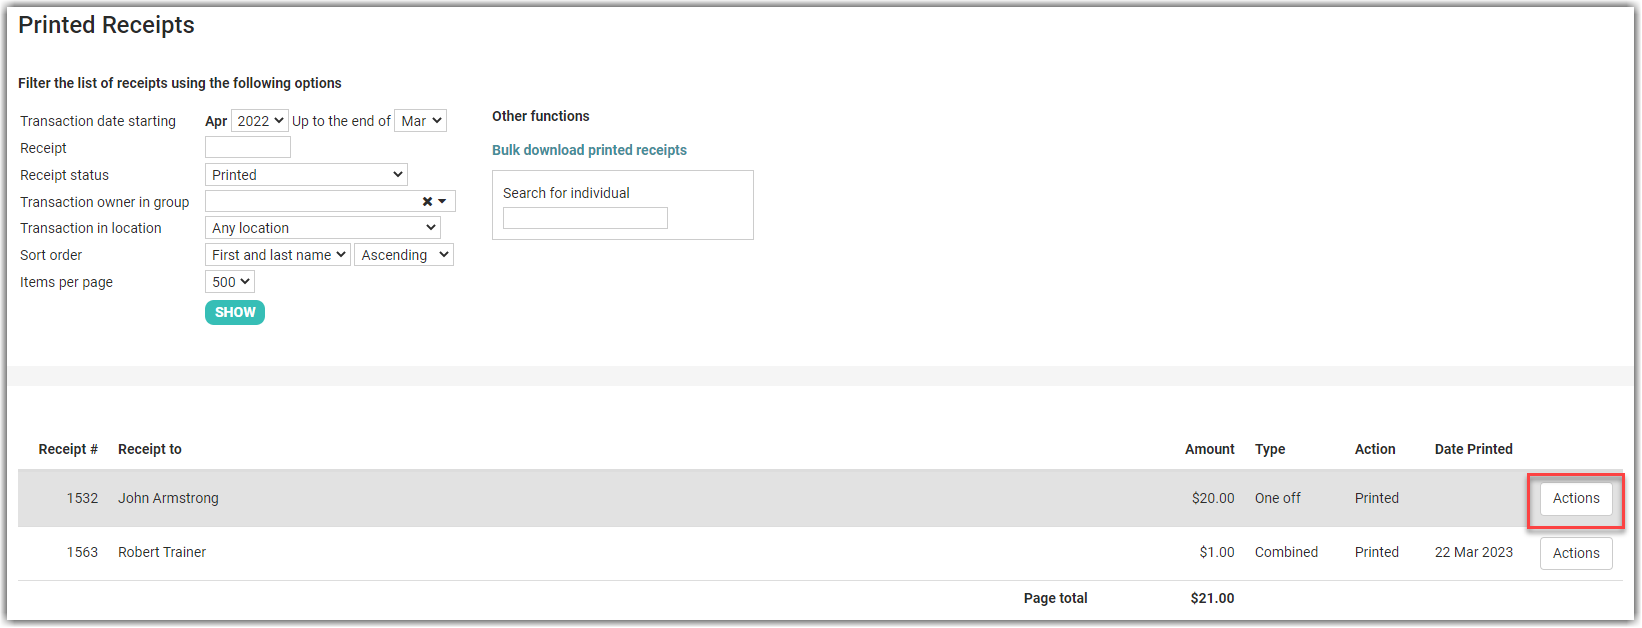
Search for the printed receipt - see Searching for a Printed Receipt and select the Actions button:
-
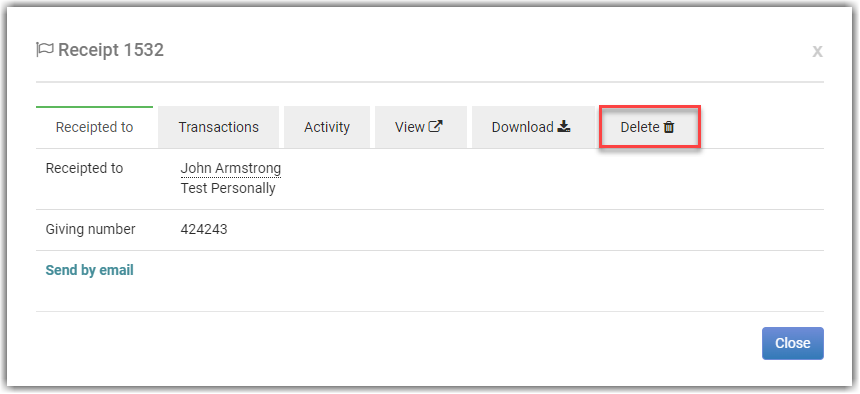
Make a note of the Original Receipt Number, then Select Delete to proceed with the deletion of the receipt:
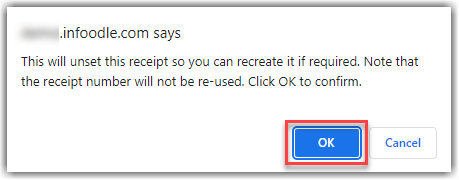
3.After reading the warning notice, select OK to delete the receipt or select Cancel to return to the previous screen.
. 
-
To correct any of the incorrect allocations, see Editing a Transaction or if the transaction if it was a duplicate, see Deleting a transaction
- If you integrate with Xero then instead of deleting the transaction, on the Reconcile screen you can click Don't import.
-
Once the details have been corrected you can now Generate Receipts
If the mistake that you made was to select to only receipt one individual and not e.g. husband and wife then you will need to edit the transaction appropriately and make sure that the couple have been issued joint giving numbers in order to receipt them together.
Note on Reissuing a Receipt
We recommend using the Pre-Edit function when re-issuing Receipts, as the Originally used Receipt number will not be Re-Used for the new Receipt.
Pre-Edit will allow you to make specific changes to individual receipts, such as adding a Note that this is a replacement Receipt, and that the previously issued receipt is now void, as shown below.
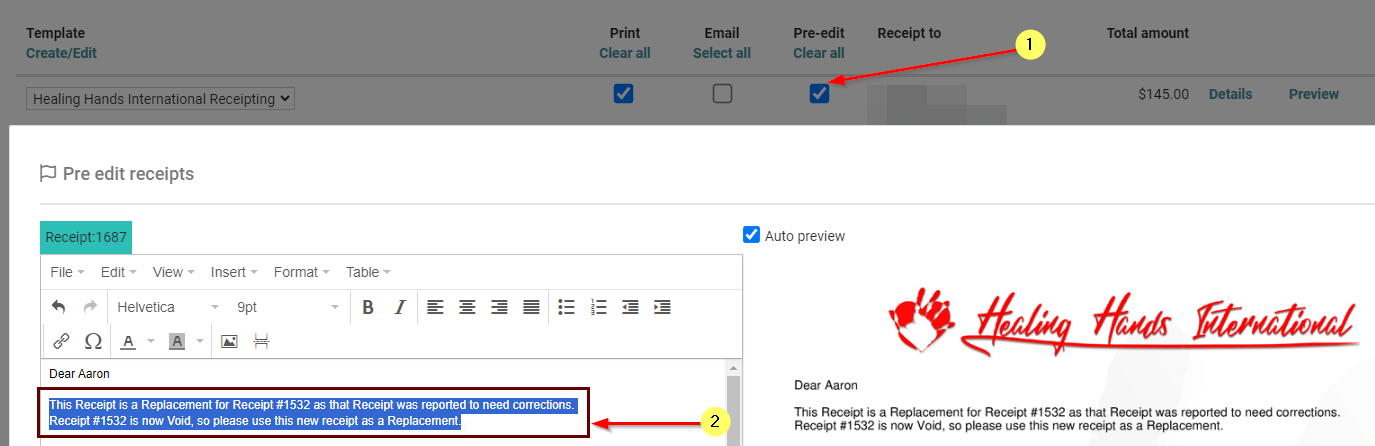
Once you have Pre-Edited all of the selected Receipts, clicking the Save option on the Pre-Edit screen will then proceed to Geerate all of the receipts, as shown in their Preview.