The Generate Receipts screen allows you to generate tax receipts for the transactions that you have reconciled to a contact in infoodle.
For the distinction between receipts and statements, see Finance terms.
When should I generate receipts?
It doesn't matter when you choose to send out receipts as the transactions will be sitting in the Receipts screen, waiting to be receipted. Although there are many different options about when to generate them infoodle best practice is to send out statement(s) during the year and generate receipts once per year.
For more information, see When to Receipt?
The payment or transaction will NOT show up in the contact's profile or in the Receipts screen until after the transactions have come into infoodle (either via Xero or bank statement import) and then been reconciled in infoodle.
If you don't import your transactions into infoodle but rather manually add your transactions into infoodle, the transaction will show after it is reconciled to a contact whilst manually adding it to infoodle.
Before generating receipts make sure that you have read through Checks prior to receipting.
How to generate receipts
Display Transactions
- Select the Financial Year to generate Receipts for, then set the various filters to find the transaction(s) that you wish to receipt.
You can opt to set the financial year in 2 ways:
- By financial Year. This is the most common approach. Infoodle uses the financial month set in your administration area. Choose Year Starting

- If you need to be more exact with the date ranges that you want to receipt, choose Custom date range

infoodle will remember these settings for the next time you use this screen.
For more information, see What Needs Receipting?
- Listed below will be all the transactions waiting to be receipted.
Ensure that the Receipt to column shows the names you expect.
If some are blank, it is likely that you have set the transactions to be issued to the household but don't have a household name. Either add a household or organisation name, or click Details and change the Receipt to to Individual.

Select Template & Preview
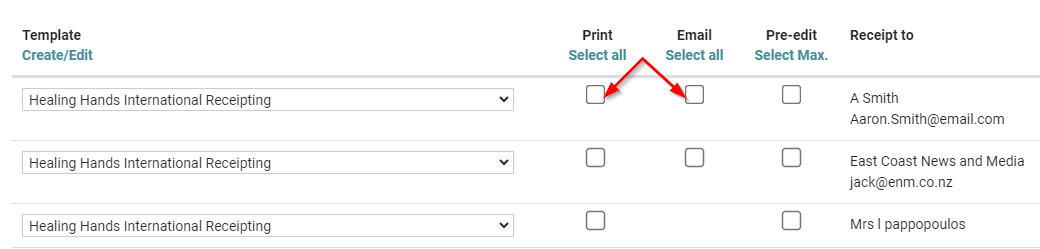
- Once you have identified the transactions you wish to generate receipts for, tick them one at a time, or select the Select all tick box for Email or Print (to post).
- Select the tax receipt template for each transaction. If there are no templates available to select, then you need to create a template. Note that templates are listed in Alphanumeric order with the first listed template being displayed by default.
For more information, see Adding a Receipt or Statement Template
You can choose Templates individually, or at the top of the list, select Bulk change which templates are used, then choose the template name you want, and select Set to change them all.

- You can select the Preview option alongside any receipt you wish to see a preview of. Note that previewed receipts will show the Reciept number as SAMPLE

Generate Receipts
- In the screenshot below, the first row has the email address for Mr F Alexis listed together with a tickbox to enable you to select this row for Email receipting. The second row for A Jackson has no email address and therefore has no tick box under Email.

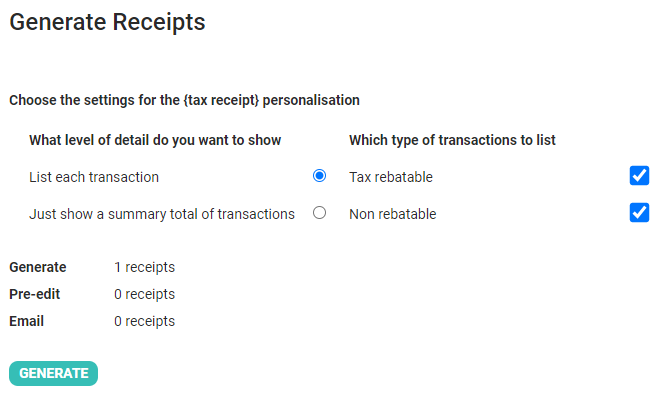
7. Select whether you wish to Print or Email the receipt.
You can choose to generate Printed and Emailed receipts with the same Generate action, but not for the same receipt . i.e. you can print a receipt for one person and email another receipt for another person, but cannot create both a Printed and Emailed Receipt for the same person.
For three things that need to be in place before email receipts, see Emailing a Receipt or Statement.
If you wish to post off your receipts there is a way that you can print the recipients address directly to the envelopes but it is important to ensure that you print the envelopes BEFORE you generate the receipts to put into the envelopes.
For information about setting up for printing, see Printing to Envelope Setup.
Generate with Pre-Edit
- If you wish to edit the receipt before it is generated then also select the Pre-edit tickbox. This will present the generated receipts in a window for you to edit or personalise each individual receipt before sending them.
Pre Edit is intended for when you need to make small tweaks to the base Template for specific Receipts, e.g. Refering to an old Receipt Number if Re-issuing a corrected Receipt.
As such, there is a limit of 20 transactions at a time for the Pre-Edit feature.
The Select Max link at the top of the list of checkboxes will select the maximum.
If you choose to Pre-Edit you must select this for all receipts you are currently generating. That is, as soon as you choose one line to pre-edit, you need to choose this for all selected lines.
Templates using {tax receipt}
If your Template uses the {tax receipt} personalisation:
(If not, skip to Step 10 - Emailing Receipts or Step 13 - Printing Receipts)
- When using the infoodle {tax receipt} personalisation in your Receipt Template you can choose how information is to be listed on the receipt.
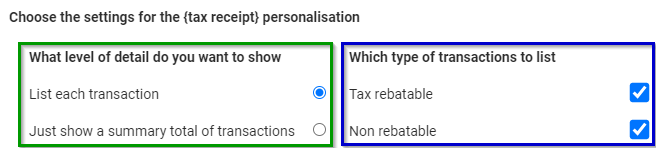
If you have NOT selected Show each transaction in the filters above, you are able to choose:
- Just show a summary total of transactions to just list a sum total without Transactions
- List each transaction along with their dates and amounts.
If you have chosen both Rebatable and Non rebatable in the Tax rebatable filter option, you are asked which types you wish to actually list in the receipt.
Neither of these options affect transactions marked as being receipted or which receipt number they are given, but it will affect the content added to the receipt.
Receipt filenames
By default the filename for a receipt is "Receipt_nnnnn.pdf" where nnnnn is the receipt number. If you want to change this for any reason see 'Receipt filenames'.
Emailing Receipts
If you have selected to Email any Receipts:
(If not Skip to Step 13 - Printing Receipts)
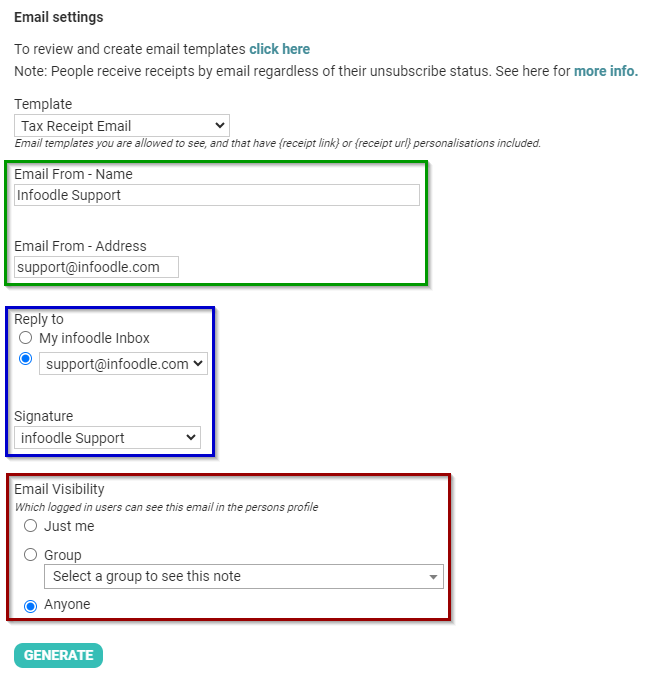
- If You have selected to Email Receipts, select the email template for the email from the dropdown.
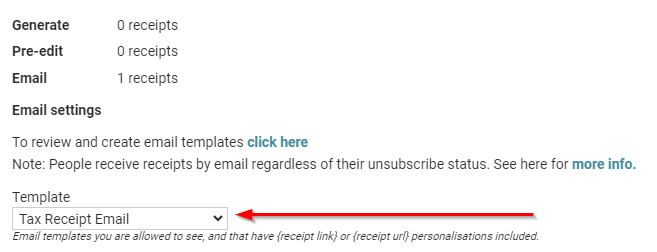
If your email template is not showing up as an option, it means that you have not included a receipt link in your email template.
For more information, see Emailing a Receipt
-
After Selecting your Email Template, you can configure the Email Send From settings which control who the email shows as sent from.
You can also set your Reply To setting and select one of your Email Signatures
Then configure the Visibility of the Emails, to control which users can see this on the Email History Tab of the Recipient's profile.
-
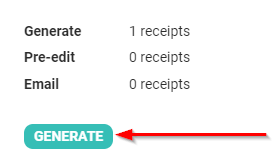
Select Generate to produce the Receipts.
Infoodle will create the receipts and mark them as Printed (Dinalised), then send the Email to the recipient using the email address shown.
If you chose to Pre-edit then see: Pre-editing the Receipt
Receipts selected to be Emailed will be Generated and Sent immediately upon selecting the Generate button (or selecting Save if using Pre-Edit).
If you have not selected any receipts for Printing, Skip to Step 17 - Once Receipts Are Generated)
Printing Receipts
If you have selected to Print any Receipts:
(If not, skip Step 17 - Once Receipts Are Generated)
Printing Reciepts is a Two stage process, and it is important to understand each stage to be able to fully Generate these Receipts
Generate/View
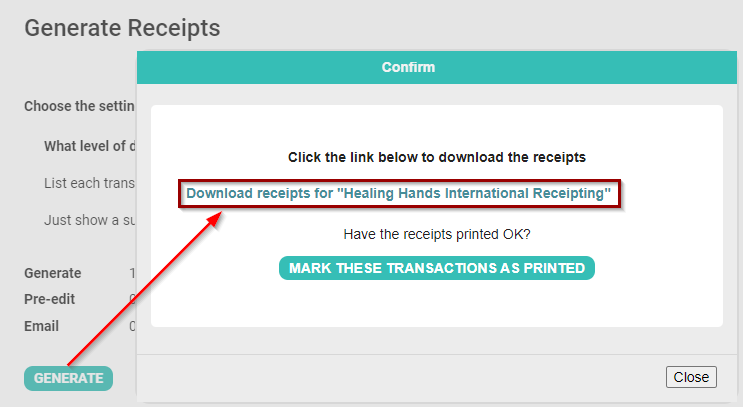
- When using the Print option for generating receipts, click the Generate button (or select Save if using Pre-Edit) and you will see the Confirm window appear.
If you chose to Pre-edit Receipts see: Pre-editing the Receipt
In the Confirm window, use the Download receipts for... link to open the PDF file for printing.
Confirm/Mark as Printed
- Once you have downloaded and reviewed the PDF of the Receipts, you can then Print the Receipts from your computer. Receipts will not be sent to the printer Automatically.
If you are satisifed with the Printed receipts, select MARK THESE TRANSACTIONS AS PRINTED to finalise the receipts.
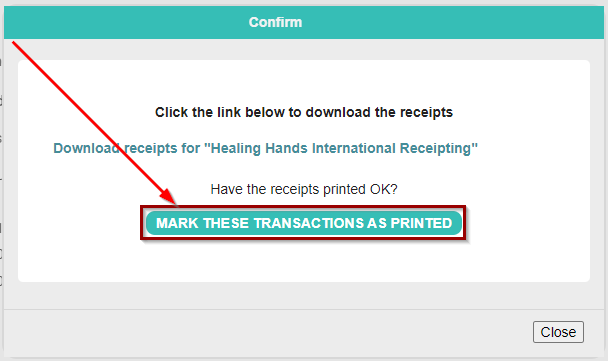
If there is an issue with the Receipts, you can instead select Close to return to the main screen without finalising. This will allow you to re-generate the receipts after making corrections or changes to the templates and/or transactions.
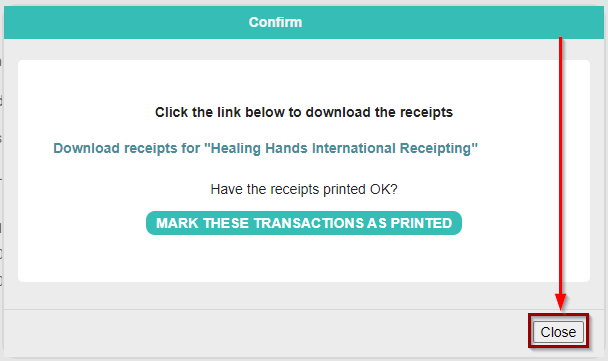
You can re-generate printed receipts as often as required by using the Close option, but once you select MARK THESE TRANSACTIONS AS PRINTED on the popup, the receipt is locked and Finalised.
Receipts you choose not to finalise (i.e. not marked as Printed) will still have a unique number allocated but they will be marked in the database as Generated but not Printed. Consequently you may end up with gaps in your receipt numbers.
Pre-editing the Receipt
If you chose to pre-edit receipts before sending:
(If not, Skip to Step 17 - Once Receipts Are Generated)
-
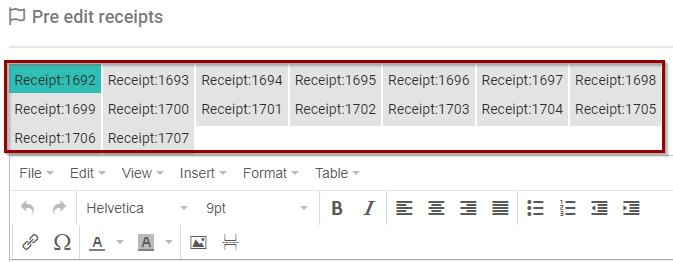
You will be taken to the pre-edit screen, which has one tab for each receipt you have chosen to pre-edit. Review and edit each one as you need to.
Remember the maximum number you can pre-edit at once is 20.
-
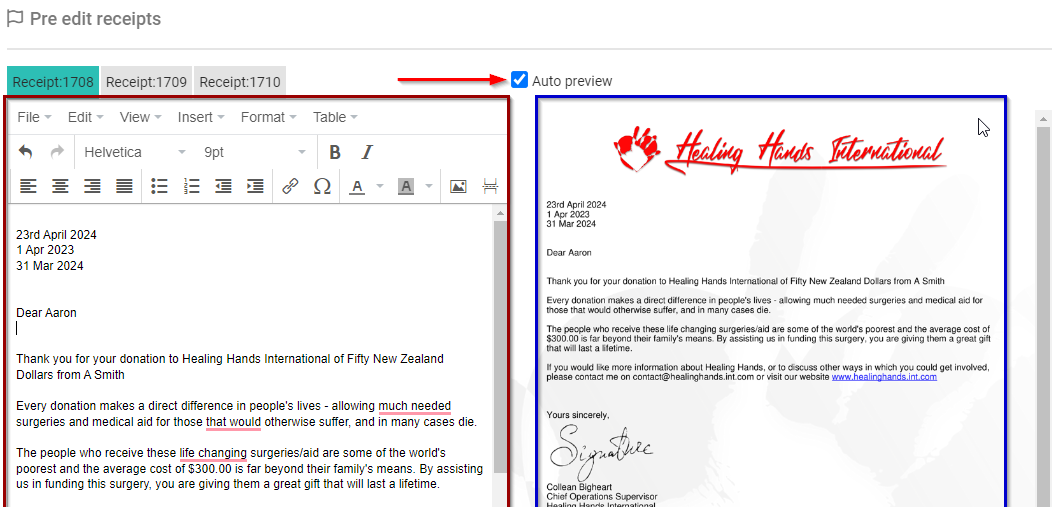
You can make changes to each receipt in the edit window onf the left hand side.
You can choose to auto refresh the preview or request it by selecting the button (this setting is remembered for you for next time but can be changed by unticking the Auto preview box).
If there are any issues then you can go back to a previous step and regenerate the receipts. You can keep repeating this as often as necessary.
Once you have completed editing the pre-edit receipt then click Save
Once Receipts Are Generated
- It is the action of Generating a Receipt which sets the receipt number against the transaction.
Once generated and Marked as Printed, the receipt number is tied to that transaction regardless of how often it is printed.
Emailed Receipts are automatically Marked as Printed (Finalised) when Generated.
Printed Reciptets are marked as printed once you select this option in the Confirm Window)
Once completed infoodle will remove the selected item(s) from the list on the Generate Receipts screen. You can access these at any time via the Printed Receipts screen. For example, if you need to resend an existing receipt or to send it to another email address.
For more informations, see Searching for a Printed Receipt.