Generate Results
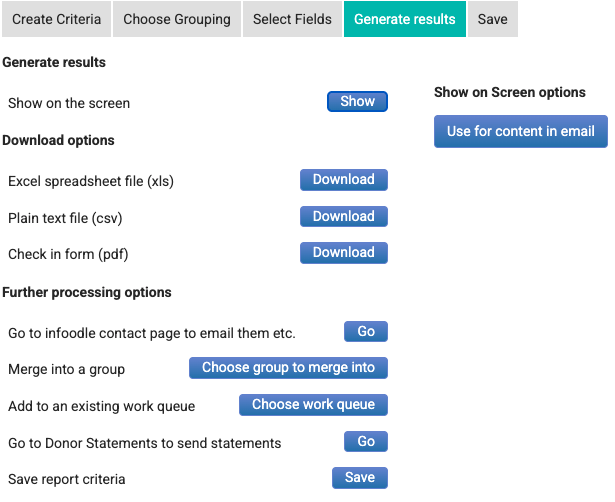
The Generate Results tab provides options for:
- Show - displaying the report directly on the screen
This is the best way to quickly check to make sure the report is outputting what you are expecting.
You can re-order the fields to your preferred order.
- Show the report on the screen
- Click 'Reorder Columns'
- From the field list - drag them to the order you want
- Click 'Done' to save the changes or 'Cancel'
- You can now choose 'Reorder Columns' or 'Save as Default Order'
- These changes are only for your login.
- The order is saved with this report when you save the report, it does not affect any other existing reports.
- The order will not affect new reports unless you have clicked 'Save as Default Order' in which case the next new report will use this order.
- Download options - exporting the report as an Excel or CSV file
Note that the order of the columns matches the order of the screen, so if you re-order them as above - the export will match.
- Further processing options
- use the report results as destinations for an email.
- add the results to an existing or new group. See Add to a group below.
- add the results to a Work Queue for later processing. See Add to an existing Work Queue below.
- Save report criteria - for information on this, see Saving a Report.
Merge into a group
Use this feature to take the list of people that will be generated from the report and add these as new members in bulk. This will leave the existing group members in place and add the new ones. It will also replace the members if they are already there but with the new permission specified.
Note that if the selected group is a sub-group of another, infoodle will add them to this group and its parent group.
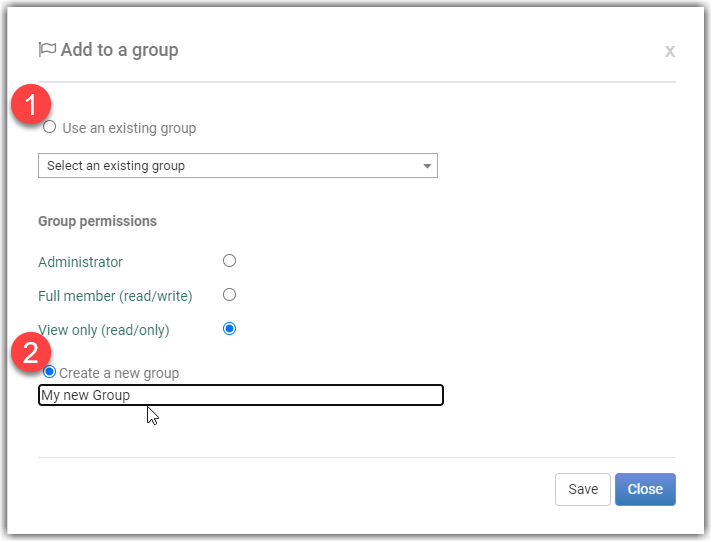
If you select the option to Create a new group, after you have entered a name for the new group and selected Save, the group, with the report results (individuals or organisations/households), will be created immediately.
Add to an existing Work Queue
A work queue is a list of people that require some manual processing. An example would be a follow up is required once a person has joined your organisation.
When you select this option the list of Work Queues that you have access to will be displayed:

Select Add to add the report result contacts to the required Work Queue.
For information on printing the results, see: Printing a Report
Go to Donor Statements to send statements
This option will take the details of the contacts that are generate from the report and make them available in the statement screen as the list of contacts selected. This provides a more flexible way of identifying the contacts you want to send the statements to.
When on the statement screen an additional box is then available for you. For example: