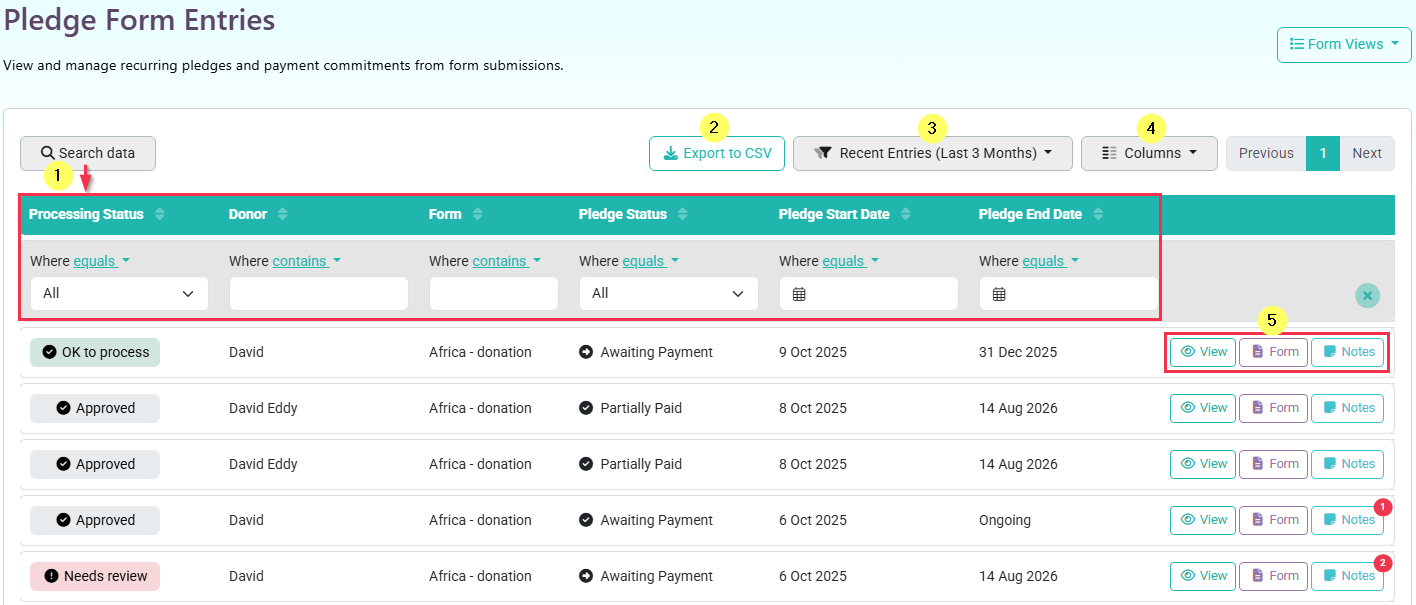
The Pledge Form Entries screen is a Form Entry view that is set up specifically to view and manage recurring pledges and payment commitments from form submissions regardless of the form they are associated with.
From the Forms Screen click Form Views and select the Pledge Form Entries option.

If a form entry has a Financial Pledge associated with it (via the Recurring Period form field) then it is available to access here. Unlike the other form view screens, this screen will show both Unapproved and Approved form entries from any form, as well as various options to search, filter and manage the listed entries. The entries shown are still based on your permission to see them.
From this screen you can access the following areas and options:
- Search Data - Search/Filter the Form entries listed using one or more data columns
- Export to CSV - Export the currently listed entries to a CSV File download
- Select/Manage Filters - Your Default filter is shown when you load this screen, use this dropdown change between saved filters, or Manage your saved and default filter settings
- Columns - Use this to configure the displayed columns and column order. It will also determine the data columns included in the CSV Export
- Form Entry Options - For a specific entry, use these buttons to View the form entry itself, access the corresponding Form the entry was submitted under, or access and manage the Notes added to the Form entry/Pledge
While you can view the Processing status of a Form entry on this screen and filter using this data, managing the status itself for a form entry is done by viewing the Form entry itself, and updating the Status setting under Step 1 on the form entry Approval screen.
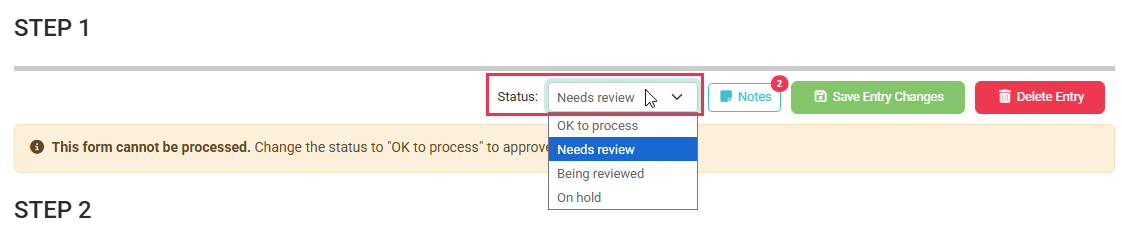
Only unapproved Entries can have a specific status allocated, and only entries with the Ok to Process status will be able to be approved. Once an entry has been approved it will always use the Approved Processing status
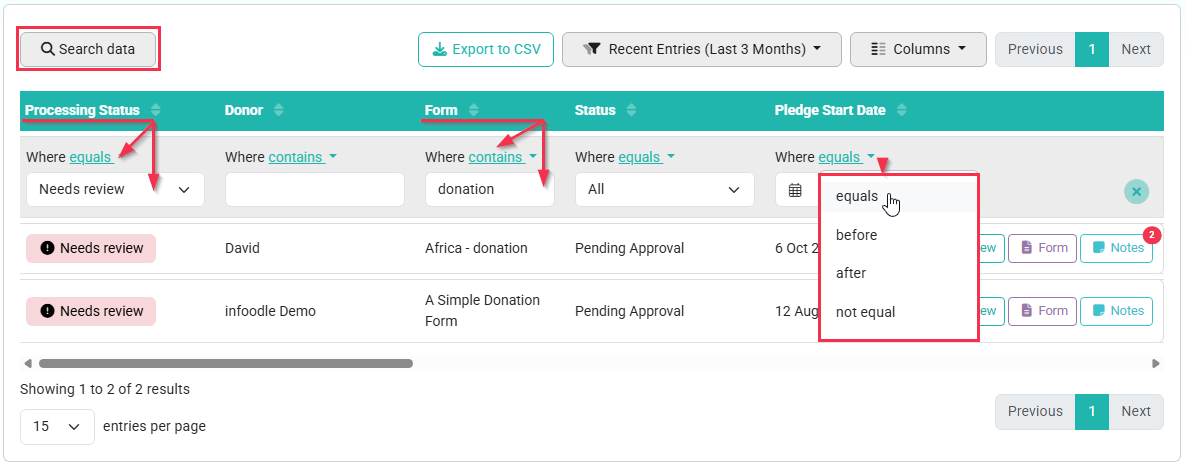
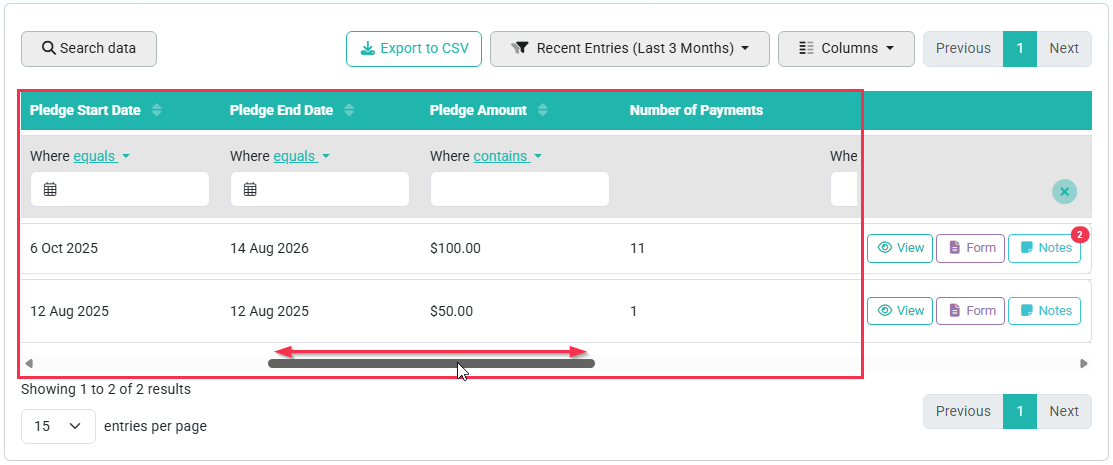
Search or filter Data
When using Search Data you can filter information using one or more Columns.
For each column you can configure the Where setting such as "Equals", "Not Equals" or "Contains" and then specify the data or data option to filter that column by.
Once you have set up a filter you are able to save this for future use as well as make this the default filter applied when you open the Pledge Form Entries screen.
Note that if you have a large number of Columns set to be displayed, you can use the Scroll at the bottom of the list to scroll back and forth to view the additional columns
Select or Manage Saved Filters
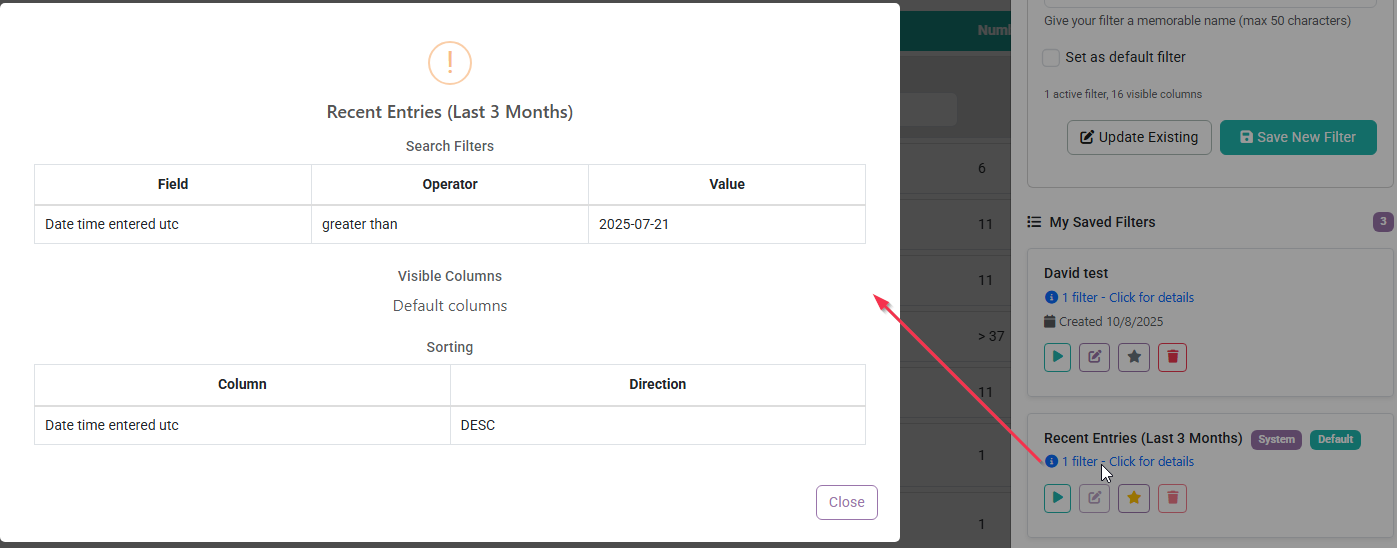
The System Default filter is Recent Entries (Last 3 Months)
If you click the name of the currently active filter, you can then select a different saved filter to use, or clear the filter settings currently applied. In this Dropdown you can also click the Manage Saved Filters option if you wish to Save or Update the current filter settings.
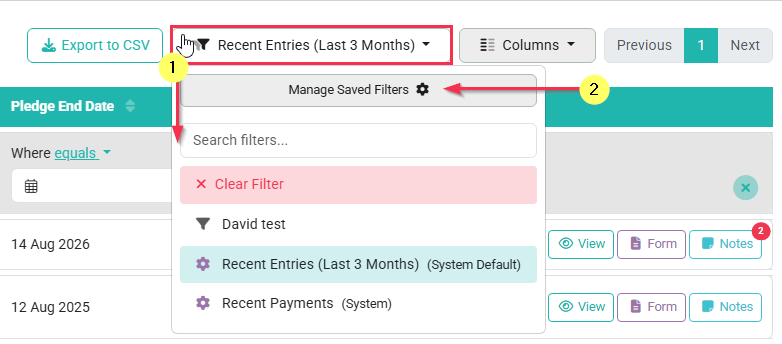
When managing saved filters, you have the option to set a Name for the current filter, can optionally apply this as your default filter, and then can Save this by Updating the current filter or Save as a New filter. Note that when saving you will see a summary of how many Column filters are active and how many columns are visible.

For currently saved filters you are able to:
- Apply this Filter
- Edit Filter
- Set as Default
- Delete Filter
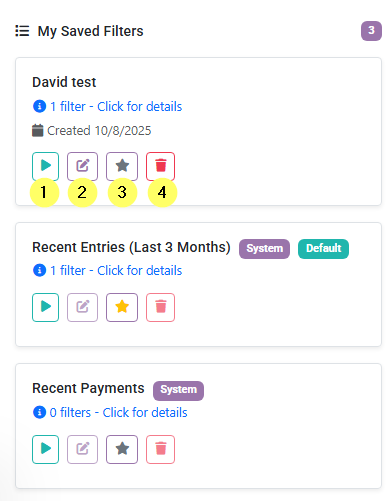
Note that System filters cannot be Edited or Deleted.
You can also use the Click for details link display an overview of a specific filter in a Pop Up window, for ease of reviewing.