The left hand navigation menu is the slide-out menu in your infoodle App. App users open it by tapping the burger menu (the three-line icon) in the top left of the app home screen. It holds the menu sections you build, and each section can contain your own menu items: links to webpages, PDFs, your directory, groups and more. This is a flexible way to organise your app content, for example a section for resources that links to PDFs, or a section of videos for a sermon series. This article shows you how to build and organise that menu.
The left hand navigation menu is different from the footer navigation bar. The left hand menu is the slide-out menu of sections and items you create here. The footer navigation bar is the small strip of built-in icons that stays on most app screens. To set up the footer instead, see Configuring the Footer Navigation.
Before you start
Role Permissions
- Update System information: lets you open the Phone App settings under Administration and add or change app menu sections and items.
See People Roles and Permissions for what this role permission means and how an administrator turns it on under Settings, Roles.
You will also need:
- The infoodle App enabled for your site. If you have not done this yet, see Enabling the infoodle App. The Menu Sections settings only appear once the app is enabled.
How the left hand menu is structured
The left hand menu is built from two levels:
- Menu sections: the top-level entries in the slide-out menu, for example Connect to us or Donations. Each section is a heading that opens a page of items.
- Menu items: the entries inside a section. Each item links to something, such as a webpage, a PDF, your directory or a group.
You create sections first, then add items to each one. Menu items use the same options as home page items, so if you have set up your home page the fields will be familiar.
Step 1: Open Menu Sections
- Click the administration cog in the top right hand corner to open Administration.
- Open Phone App.
- Click Menu Sections.
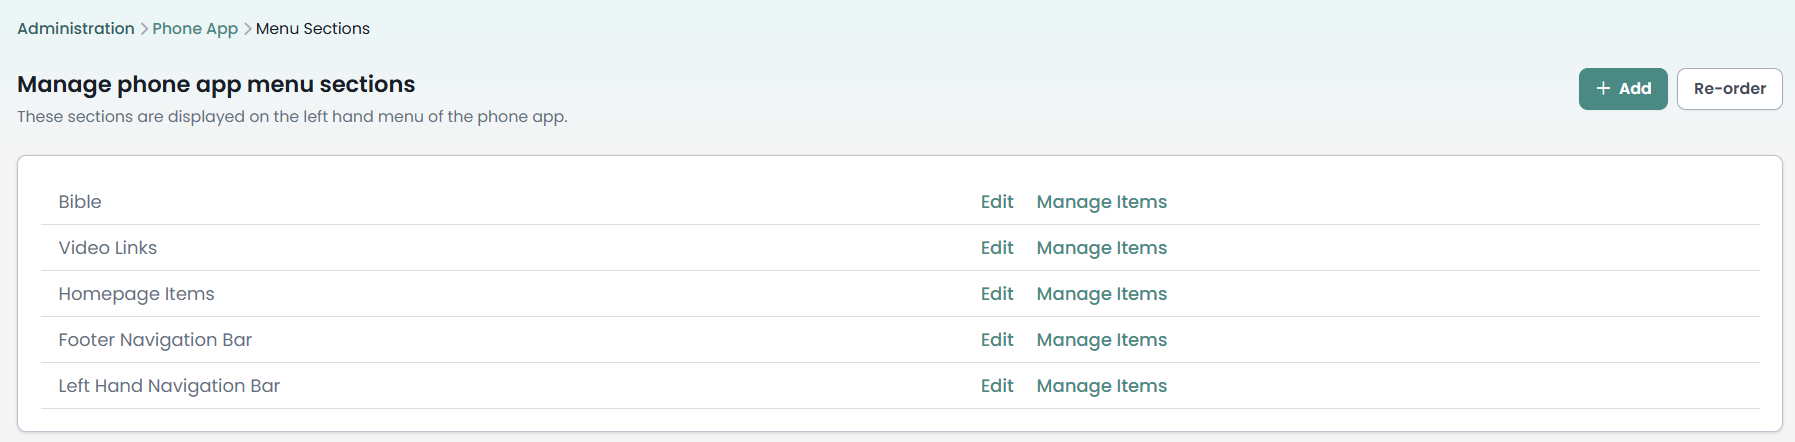
The Menu Sections page lists your current sections. Each section has an Edit link to rename it and a Manage Items link to work on the items inside it.
Step 2: Add a menu section
- On the Menu Sections page, click Add.
- In the Label field, type the name for the section as it should appear in the app menu, for example Resources.
- Click Save.
infoodle saves the section and opens its (empty) items list, ready for you to add items.

Step 3: Add a menu item to a section
- On the Menu Sections page, click Manage Items next to the section you want to add to.
- Click Add. This opens the Add a Menu Item form.

Step 4: Fill in the menu item details
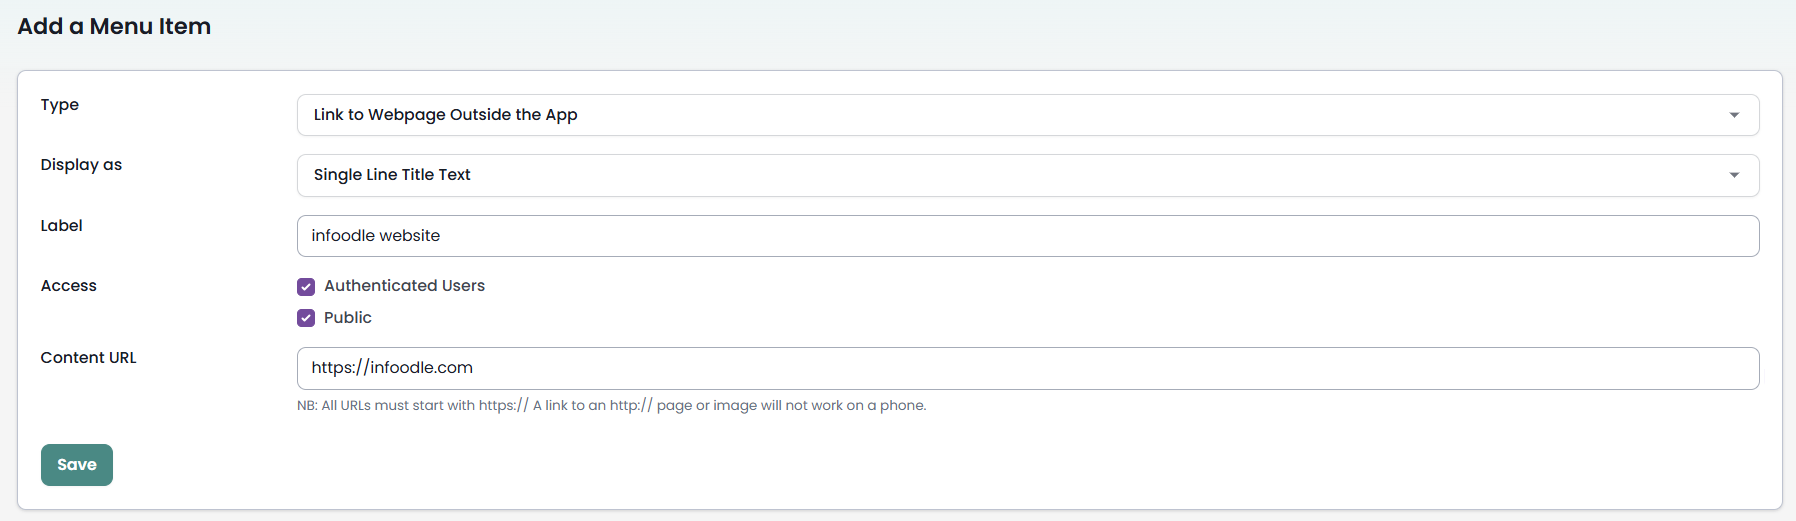
The Add a Menu Item form shows the fields in this order. Fill them in top to bottom:
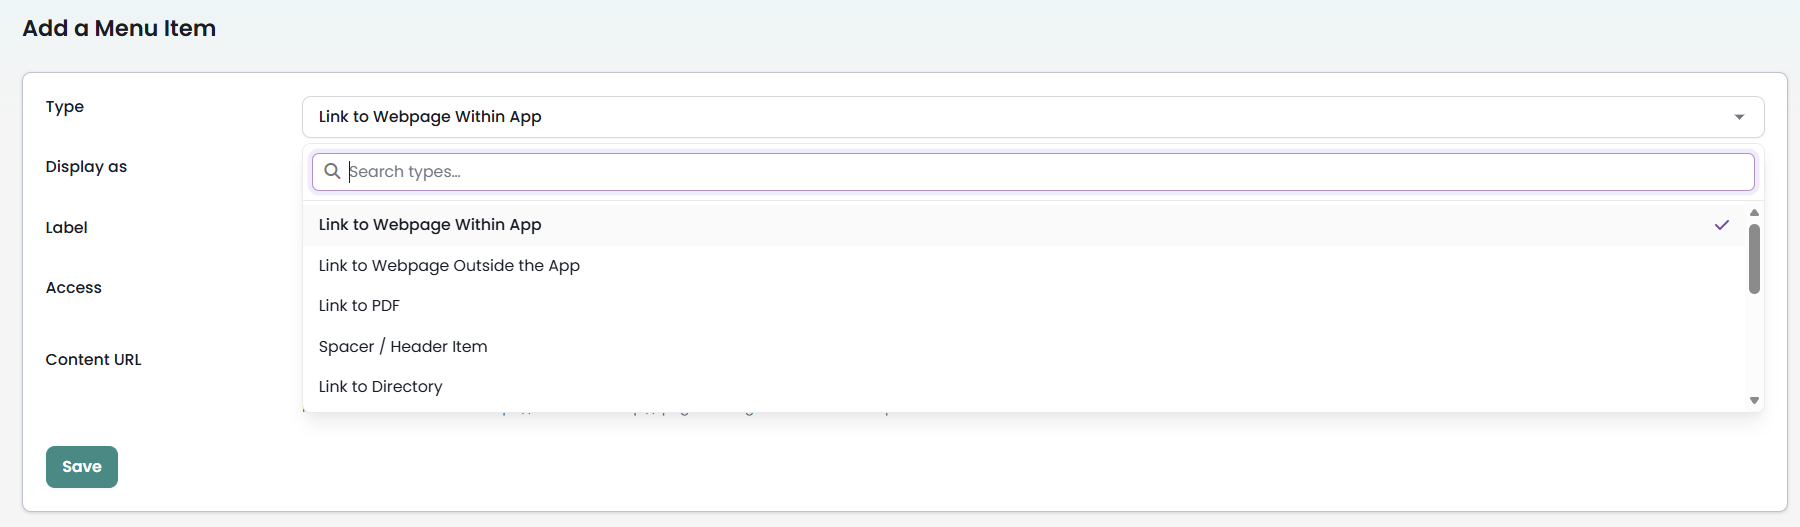
- Type: choose what the item links to. The common choices are:
- Link to Webpage Within App: opens a webpage inside your app, so users stay in infoodle.
- Link to Webpage Outside the App: opens a webpage in the phone's own web browser instead.
- Link to PDF: links to a PDF, either by web address or by uploading the file.
- Link to Directory: opens your infoodle online directory.
- Link to Users Groups: opens the groups the logged-in user belongs to.
- Link to Show All Groups: opens the full list of groups.
- Spacer / Header Item: a plain heading or gap to organise the list, with no link.
- Link to Infoodle App Tools: links to the built-in app tools.
- If Events is turned on for your site, extra event choices also appear, such as Link to Live Event Page, Display Todays Events, Link to Calendar and Link to Users Own Roster.
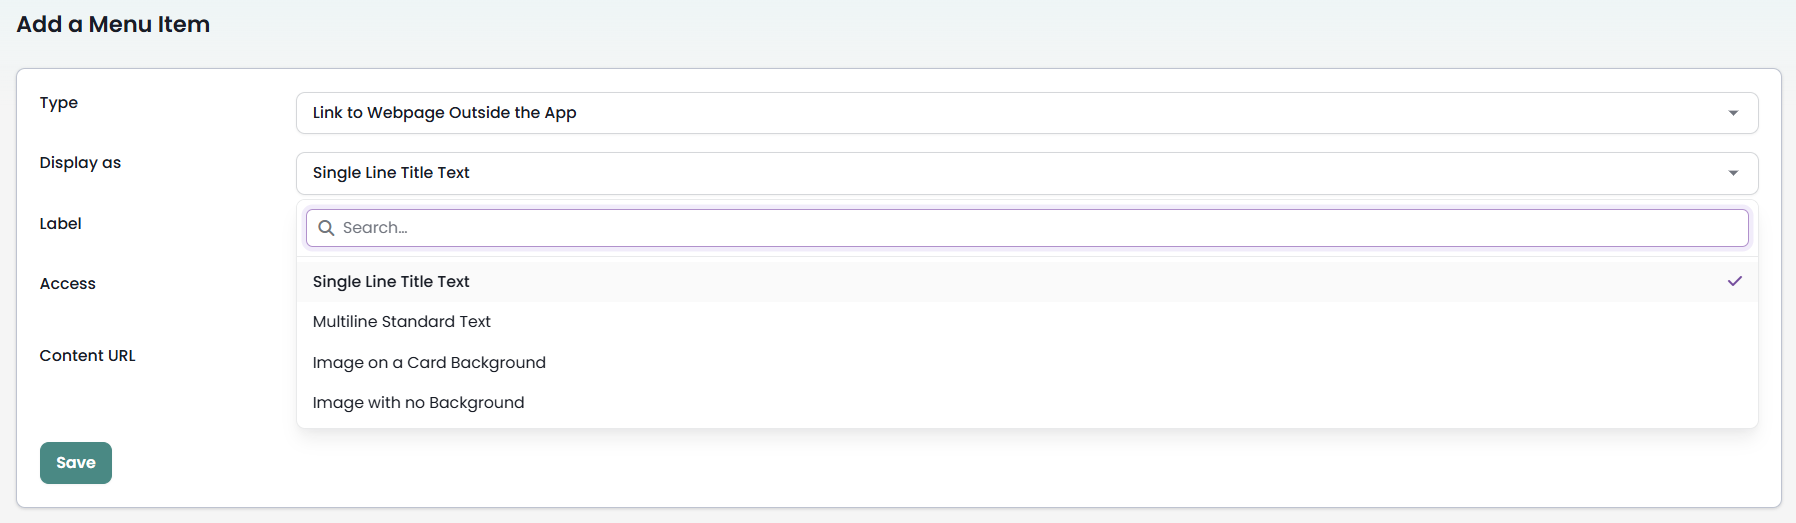
- Display as: choose how the item looks in the menu. The options are:
- Single Line Title Text: a single line of text, using the Label you enter.
- Multiline Standard Text: a longer label that can run over more than one line. The Label is plain text only, so links, images and formatting are not available.
- Image on a Card Background: shows an image inside a card.
- Image with no Background: shows an image on its own.
- Label: the text shown for the item, for example Bible or Weekly Notices. When you choose one of the image displays, an Image URL field appears so you can point to, or upload, the picture to show.
- Access: choose who sees the item in the app. Authenticated Users covers people who are logged in to your app and is ticked by default for a new item. Public covers people using the app without logging in. Tick both if you want everyone to see it.
- Content URL: for the webpage types (both Link to Webpage Within App and Link to Webpage Outside the App) and Link to PDF, paste the web address the item should open, for example https://www.infoodle.com. Use the https:// version of the address: an http:// link will save, but it will not open on a phone. This field does not appear for types that do not need a web address, such as Directory or Spacer / Header Item.
Step 5: Save the item
Click Save. The item is added to the section and appears in that section's list. Repeat Step 3 and Step 4 to add more items to the section.
Reordering sections and items
You control the order that sections and items appear in the app menu.
- Reorder sections: on the Menu Sections page, click Re-order, drag the sections into the order you want, then click Save.
- Reorder items: open Manage Items for a section, click Re-order, drag the items into the order you want, then click Save.
The Re-order button appears once a list has more than one entry.
Editing or removing a section or item
- Rename a section: click Edit next to it on the Menu Sections page, change the Label and save.
- Edit an item: open Manage Items for its section, then click Edit next to the item.
- Delete an item: open the item with Edit, then click Delete on the form.
- Delete a section: first remove the items inside it, then click Edit next to the section and click Delete.
A section can only be deleted once it is empty. If you try to delete a section that still contains items, infoodle keeps the section and tells you the items must be removed first. Delete or move the items out of the section, then delete the empty section.
Common questions
What is the difference between the left hand menu and the footer navigation bar?
The left hand navigation menu is the slide-out menu of sections and items you build here. It opens from the burger menu in the top left of the app home screen. The footer navigation bar is a separate, smaller strip of built-in icons that stays on most app screens. See Configuring the Footer Navigation to set up the footer.
How many sections and items can I have?
You can add as many sections as you need, and as many items within each section as you need. Use Spacer / Header Item entries and the re-order controls to keep long menus tidy.
Can a menu item link to something other than a webpage?
Yes. As well as webpages, an item can link to a PDF, your online directory, the groups a user belongs to, all groups, the app tools, and, when Events is turned on, event pages such as the calendar or today's events. Choose the matching Type on the item form.
Why should the Content URL start with https://?
A webpage or file address that starts with http:// will save, but it will not open on a phone. Use the https:// version of the address so the item opens correctly in the app.
Next steps
With your sections and items in place, you can add richer content the same way. Add another menu item that links to a webpage, for example a Bible reader, a sermon video or a live stream page. You can also arrange the same options on your app home page.