This feature allows you to enter a collection of transactions that have been gathered by one individual or organisation on behalf of multiple individuals, and which need to be receipted to each of those individuals.
For instance, you could have received several donations for your general funds on Sunday and another collection for the building project. You can load both into the same batch using the Add collective transaction screen.
Before you start
Role Permissions
You will need Finance Admin or Finance User permissions to add transactions. For more information, see Packages and Views.
Getting Started
- Click or hover over Finance on the Navigation Menu on the left
- Then click Transaction Processing
- On the next page, click Transactions, then Add collective transaction.

Transaction Settings
You have the option to choose an open batch to add the collection of transactions to, create a new batch, or rename an existing batch.
- Select a batch from the Batch dropdown, or click + New to create a new batch. For more information, see: Adding a Batch or Renaming a Batch
- Select a Bank account from the dropdown (optional).
- Collective Transaction — check the box "Allow line-specific recipients and receipt settings" if you want to set different receipt options for each person in the collection. When enabled, you can assign individual receipt settings to each line item.

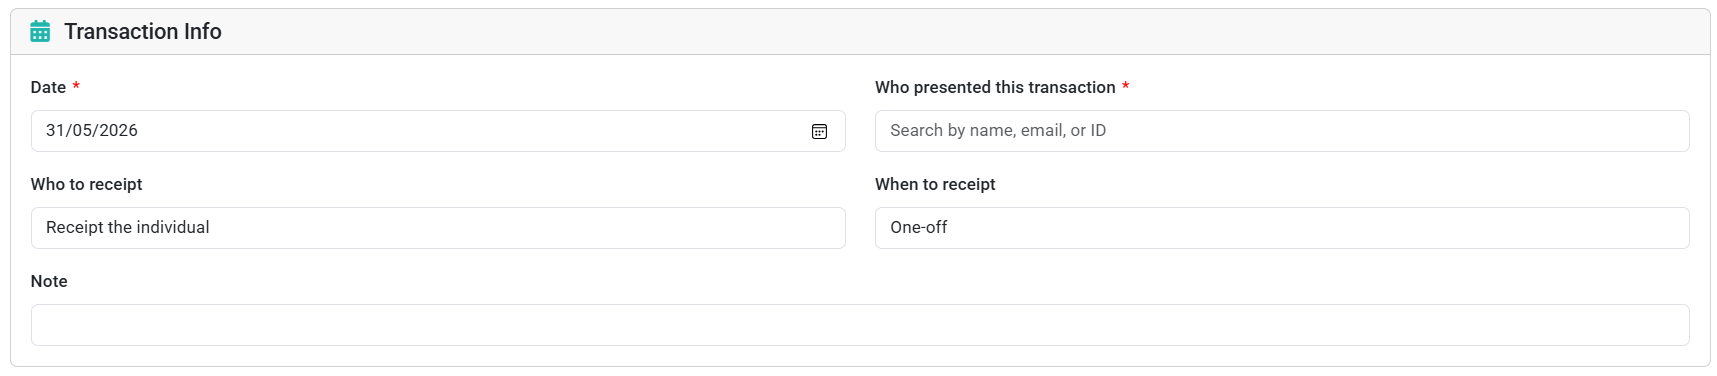
Transaction Info
- Select the Date box and choose the date on the calendar when the transaction was processed or the date on the cheque.
- Who presented this transaction — Search for the person who presented the combined transactions by typing the first few letters of their name. As you type, infoodle will search and show a list of possible matches.
- If a match is found, select it. To view a popup containing more information about the person, select Details.
- If the person is not currently in the database, select Quick Add to add their name and address. Additional details can be added later.
- Who to receipt — Choose whether to issue the receipt in the name of the individual(s), household(s), or organisation(s). (Note: This field is optional when "Allow line-specific recipients and receipt settings" is enabled, as you can set receipt options per line item.)
- When to receipt — Select from the dropdown options:
- Combined — receipt at the end of the year
- One-off — receipt ad-hoc
- This is used to filter transactions on the Receipts screen and has no other specific meaning.
- Note — Add any additional notes as necessary.
Payment Method
Select a Payment method from the dropdown. Depending on the method chosen, different additional and optional fields will be available. For example:
- Cheque — allows you to store cheque details, which will show in the batch report (useful if using the batch report as a payment slip)
- Bank transfer — use the Branch code field (six-digit NZ bank code) or enter manually if not found
- Credit Card — do NOT store credit card details in infoodle (not authorised to do this)
- Cash and other methods — additional reference fields may appear

Transaction Details
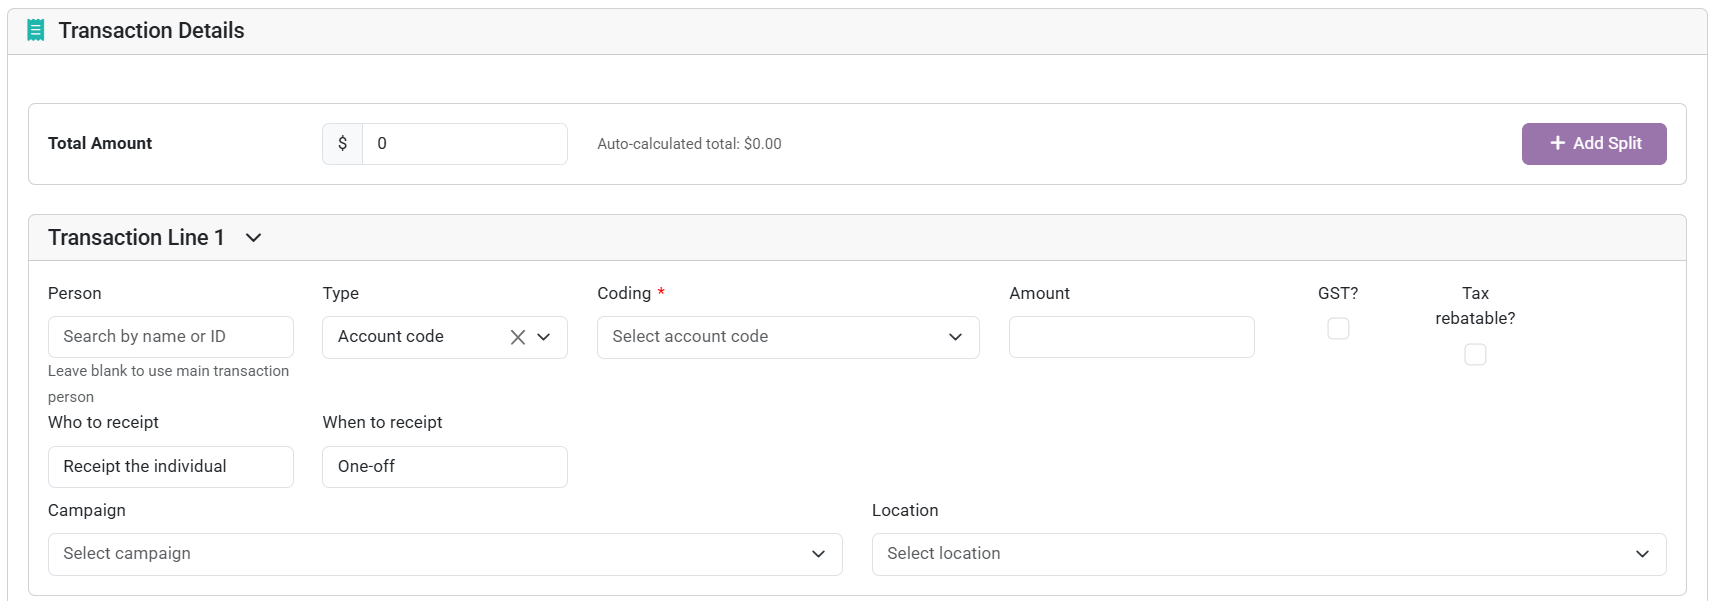
- Total Amount — Enter the total amount presented. As you enter the number, additional fields will appear. The system shows an "Auto-calculated total" of all line items.
- If you need to split the amount across multiple codes or people, click + Add Split to add additional lines.
- Transaction Line 1 — Complete the transaction details for the first person:
- Person — Leave blank to use the main transaction person, or search for a specific person by name or ID. You can also search by email address, ID, or giving number. See Searching Options below.
- Type — Select the transaction type (e.g., Account code)
- Coding — Select the account code from the dropdown
- Amount — Enter the amount for this line
- GST? — Check if this line is subject to GST
- Tax rebatable? — Check if this amount is tax rebatable
- Per-line receipt settings (when "Allow line-specific recipients and receipt settings" is enabled):
- Who to receipt — Choose recipient type for this line (individual, household, organisation, or no receipt)
- When to receipt — Choose timing for this line (Combined or One-off)
- Campaign and Location — Select from the dropdowns as needed.
For more detailed information on these fields, see Transaction Details.
Searching Options
-
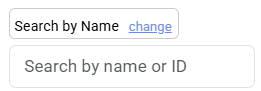
Click Search by name or ID then click change to modify your selection.
-
Click the dropdown menu to search for a person using one of these methods:
- Name — type the first few letters of their name
- Email address — enter their email address
- ID — enter their person ID number
- Giving Number — enter their giving number
-
As you type, infoodle will display matching results. Select the correct person from the list.
To clear the current selection and leave it blank (using the default person), leave the search field empty and select the option "Leave blank to use main person".
Saving the Transaction
- Click Save Transaction at the bottom of the form.
The Save Transaction button only appears when:- The total amount at the top matches the sum of all line items
- The "Amount to allocate" value is zero
Viewing Collective Transactions
Individual amounts entered as part of a collective transaction can be viewed in the Finance section of each person's profile:
- Open the person's profile
- Select the cog icon to the left of their name
- Select Finance to view their individual transactions
For more information on how to add the Finance tab, see People Function Menu.
If you are ready to receipt, see Receipts.