Manage Views allows you customise which tabs of information can be seen on each persons profile based on the type of contact the contact is. For example, a donor, a sponsor, a business, etc. Each type of contact is assigned a Contact Type, and each Contact Type can be set to display profile tabs and custom data fields that are relevant to that contact.
In this article we will cover how to manage these views.
There are three steps to setting this up:
- Creating a Lookup List to contain the different types of contacts
- Creating the Custom Field that will use the Lookup List contact types
- Setting up the Custom Views that will be displayed with each contact type
Create Lookup List
The Lookup Lists and Custom Field optons are found in the main menu under Administration > Custom Fields:

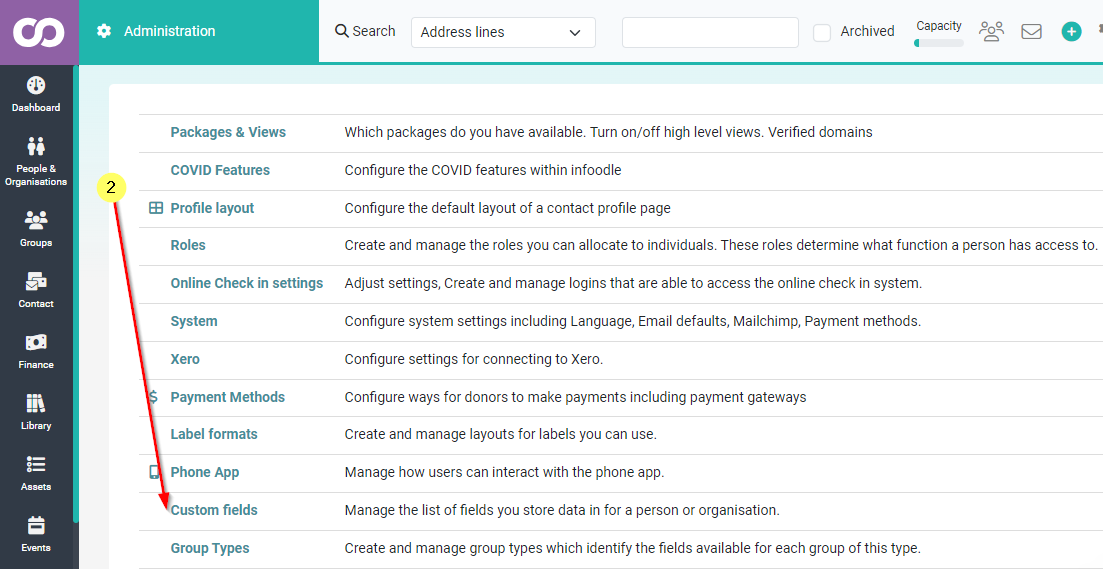
From there to Lookup Lists:
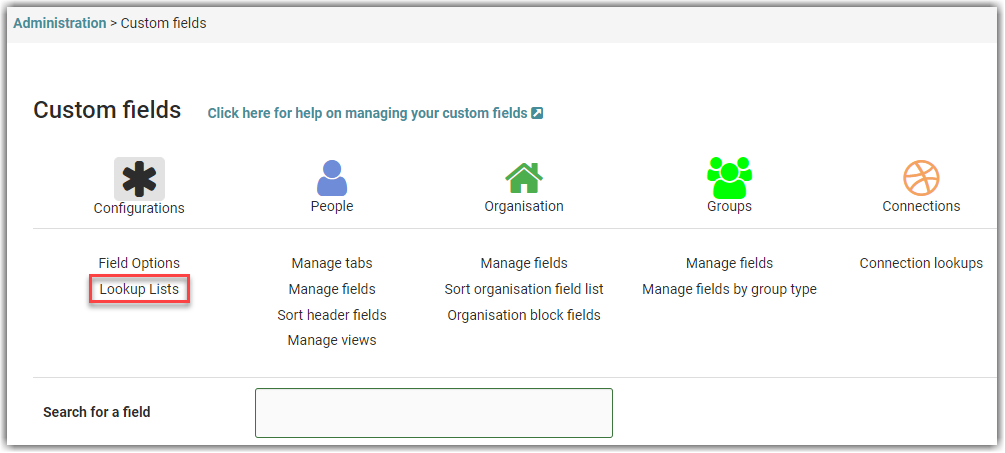
See Lookup Lists for Custom fields for additional instructions.
Create Custom Field
Go to Administration > Custom Fields > People > Manage fields
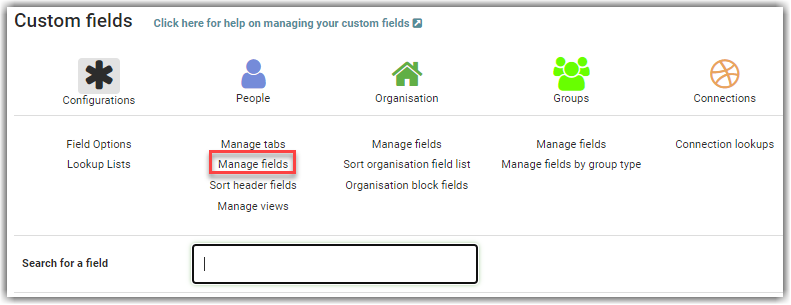
- A new custom field needs to be created from the Manage Fields menu under People.
- Name - we suggest calling it something like:Contact Type, or Contact Type View.
- Default Tab - this must be Personal - Initial Page
- Type of field- must be Lookup
- Which lookup list to use - Select the Lookup List you created previously. For example Contact Type
The other options are voluntary however you may want to set This field is mandatory to Yes - this will force this Custom Field to list values when adding or editing contacts.
Also, you may want to set Make available as a criteria in reports to Yes to enable this custom field to be available as a Report > Criteria option.
See Manage Fields for addtional instructions.
Create Custom Views
Navigate to Administration > Custom Fields > Manage Views.
Setting Contact Type Field
Select the Contact Type custom field created earlier, and click Select to apply this.
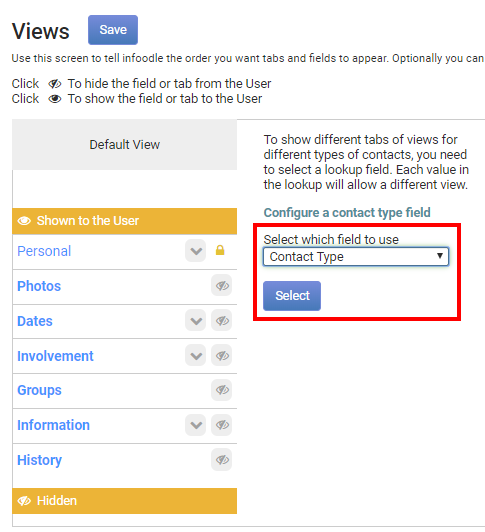
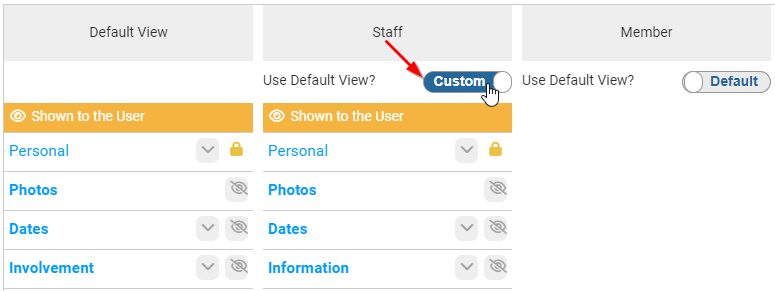
Each of the Contact Type value from your list will now be displayed as a column on the screen. The Default view is applied to each Contact Type initially. To customise one of the contact types, click the slider from Default and change it to Custom:
The default view will apply to people in the database who are not assigned a contact type, and the contact types set to default.
Customise Profile Tabs and Person Fields
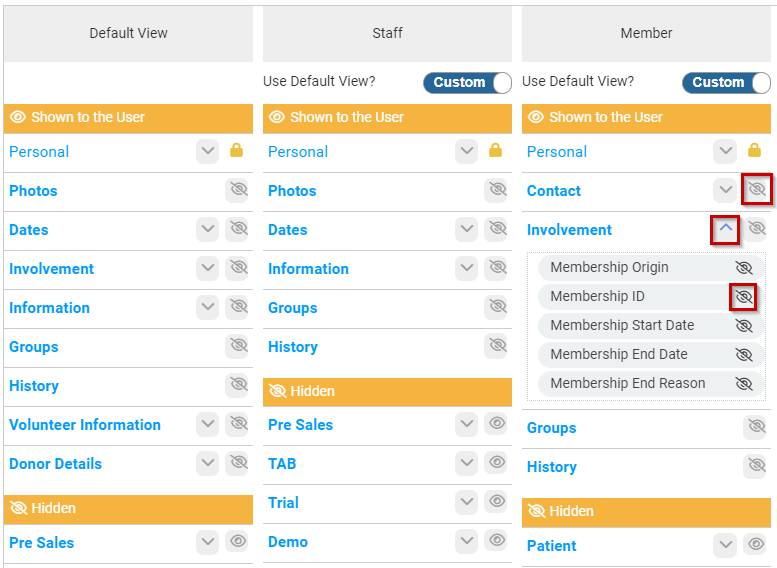
Select which Tabs and Fields to Show/hide for that particular Contact Type by clicking on the eye icons. To hide a field, click the drop down arrow for the tab, and click the eye icon for the field you wish to hide. Hidden tabs and fields are located under the Hidden heading in yellow. To un-hide, select the eye icon on the item;
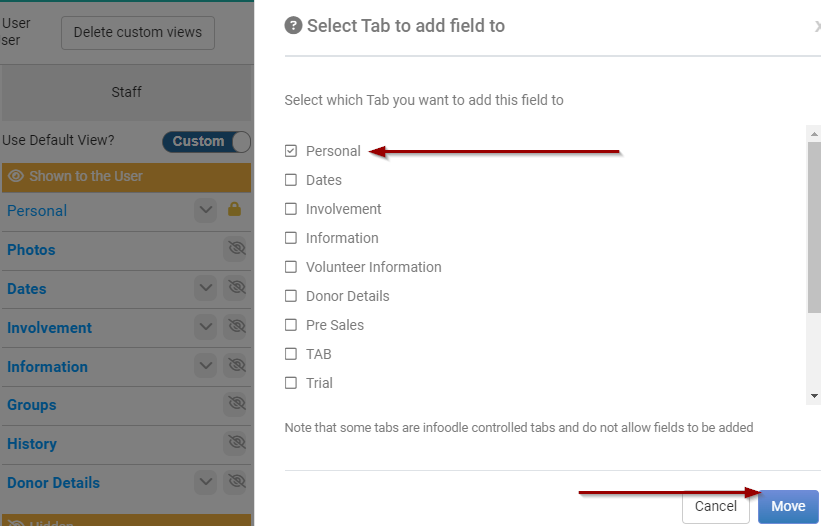
When changing any Field from Hidden to Visible, you can select which of the Active Tabs for that view you wish to display the field under. This allows the Same Data field to be dislayed in a different profile tab for different Contact Types.
For Example, Date of Birth may show on the "Personal" tab for a Staff contact type, but show on a "Volunteer Info" tab for a Volunteer Contact Type.
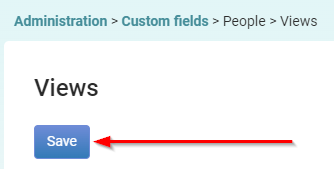
Be sure to click Save once once you have finished any changes.
Customise Profile Content Blocks
The Profile view in infoodle has many different Profile Content Blocks that can be displayed or Hidden from the profile view based on the indivudual user's Profile Layout Preferences.
You are also able to Customise this Profile Layout configuration via the Manage Views screen to have a greater control over what information is displayed for each type of contact.
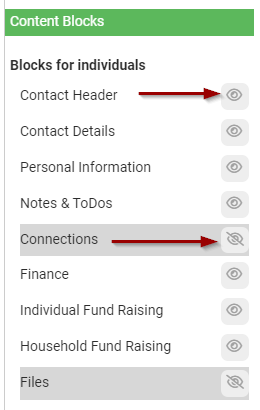
These are found under the Content Blocks section for each View.
Click the Eye Icon next to any Content block to show/hide that block. Elements that are set as hidden will be outlined in a Grey colour.
See: Profile Layout for more information on Page Layout and Content Blocks.
Blocks for Individuals
There are two key Types of contact blocks that relate to individual Contacts:
- Profile view only - When hidden, this information will not be displayed elsewhere
- Profile or Tab view - These sections normally can be shown on the Main Profile or as a Profile Tab. When Hidden, they will not be available as a Profile Tab for that contact type
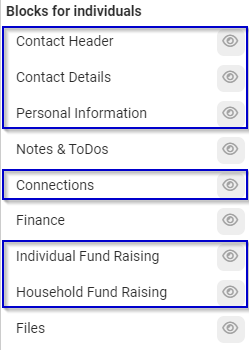
The Six Profile View only blocks are:
- Person Header - The profile image/Icon and fields in the Profile header
- Contact Details - The Phone Number/Email address data
- Personal information - All People custom fields under the Personal section
- Connections - Any connections set up for this contact (See: Connections)
- Individual Fund Raising - The Individual Fundraising summary (Requires Finance)
- Household/Organisation Fund Raising - The Household/Organisation summary (Requires Finance)
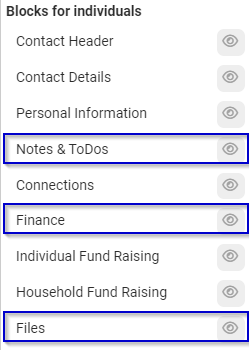
The Three Profile or Tab view blocks are:
- Notes and ToDos - The Notes/To Do's section for the Profile.
See: Notes and To Do's - Task Reminders - Finance - The Profile Financial section (Requires infoodle Finance)
See: Finance - Files - The individual and Household Files folders section.
See: Files
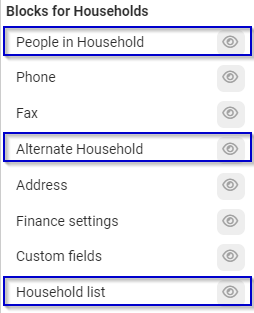
Blocks for Household/Organisation
There are two key Types of contact blocks that relate to Households/Organisations:
- Household/Organisation Data - Fields of information that can be Added/Editied
- Household/Organisation Details - Sections that display additional Details
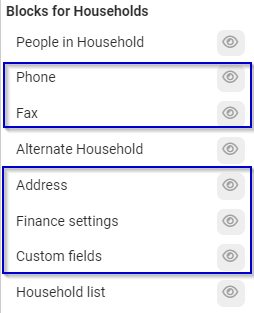
The Five Data Field blocks are:
- Household/Organisation Phone - The Phone number field in the Address Fields section
(Requires Address block Enabled) - Household/Organisation Fax - The Fax number field in the Address Fields section
(Requires Address block Enabled) - Address - The Address Section and Fields including Household/Organisation name
- Finance Settings - The Finance Default Settings (Requires infoodle Finance)
- Custom Fields - The List of Custom fields for Households/Organisations
The Three Household/Organisation Details blocks are:
- People in Household/Organisation - Profile Section to list other members of the same Household/Organisation
- Alternate Household/Organisation - Shows if the Contact is part of any Additional Households/Organisations. Required for Removing or editing this data
- Household/Organisation List - Displays the Members of the Household/Organisation as well as any Additional members, and optionally, certain Custom field Data for these contacts.
Assigning a Contact Type/View to Profile
Assign contact profiles to the applicable contact type. This can either be done on each individual's profile, or through the use of reports, groups, and workflows to bulk update people's profiles.
See Workflows for more information for bulk updating.
From an individual profile, click the Contact Type field, and choose the contact type from the drop down menu.

New layout of the profile of a person with an assigned contact type and custom view:
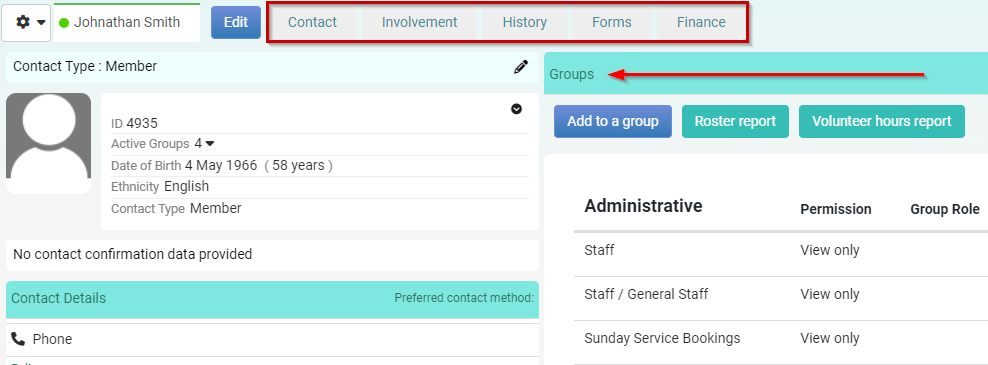
Note on Johnathan's profile, the contact type is Member.
As per our view for Member above, the tabs Dates and Information and others are no longer displayed, while the Contact tab is now visible.
Also, the Photos profile section is now hidden so the Groups Section is now displayed at the top right side of the main Profile view instead.