When using Workflows, it may be necessary to review what actions have been triggered for a specific person, or if using the Wait workflow step, you may need to manually stop the Workflow from proceeding further. All of this can be done via the Workflow Timeline tab on the Person's Profile Page.
Overview
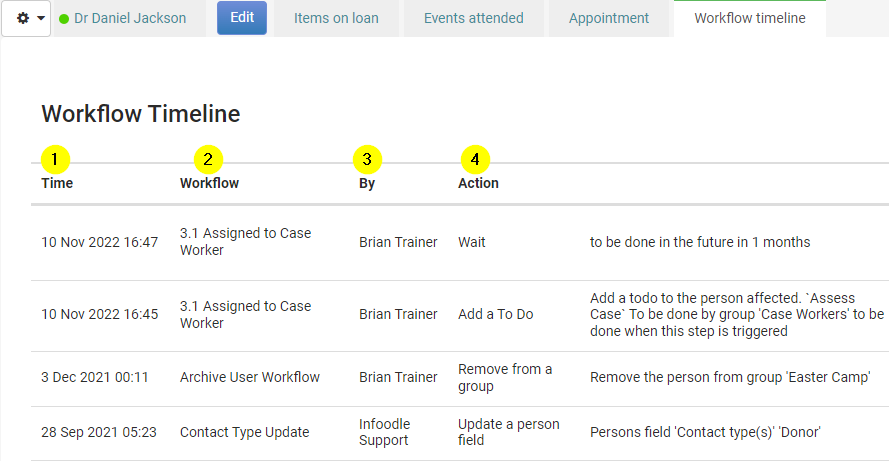
The Workflow Timeline will list actions in date order with the most recent listed first.
There are four key sets of information:
- Time - the Date and Time the action was triggered
- Workflow - the Name of the Workflow that this action is part of
- By - the User that triggered the workflow, or completed an Action step (e.g. a To-Do)
- Action - this is the Name and detail of the Workflow Step or Action that occurred.
Show Workflow Timeline
To access the Workflow timeline for a Contact, use the Settings "Cog" from their Profile, and select Workflow Timeline.
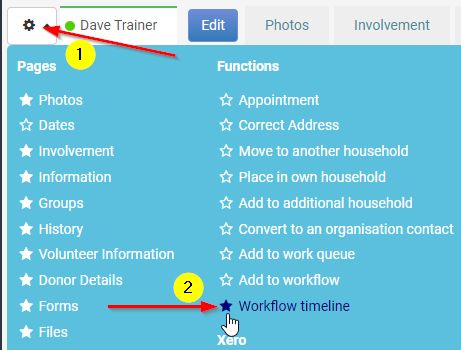
You can also click the Star icon to Pin or Unpin the tab from your Profile view.
When this Tab is Pinned (solid star) it will appear in the list of Tabs for any profile that you view.
End Now via a Wait Action
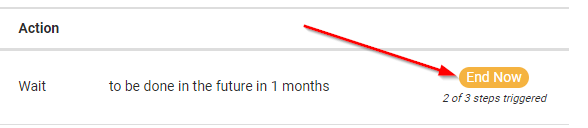
If you are using the Wait step in a Workflow, you are can remove the person from that workflow via the Workflow timeline, by clicking End Now.
You will also see the current number of steps triggered out of the total steps for that workflow.
End Now will only be available within the timeframe the Wait is active. For example, if the Wait was tiggered on Sunday 6th November and had a duration of seven days, you can only end the workflow within that seven day period, not after.
Once ended, a workflow cannot be restarted from that step at a later date.
You would need to restart the entire Workflow by re-triggering it for that contact.