An email template saves the makeup of an email so you can reuse it. It stores the subject line, the email body and its design, the from and reply-to settings, any attachments, the mail type and the signature. The people you are emailing are not saved as part of the template, so you choose the recipients fresh each time you use it. Templates are handy for anything you send more than once, such as a welcome email, a monthly newsletter or an event invitation.
This article covers creating a new template and editing an existing one. For organising templates into categories and copying or deleting them, see Managing Email Templates. For the different places you can use a template once it is saved, see Using Email Templates.
Before you start
Role Permissions
- Contact people: gives you access to the Contact area where email is composed.
- Contact people by email: lets you compose and send email, which is where templates are created and edited.
- Maintain common templates: required only if you want to create or edit Global templates that everyone can use. Private templates need only the two permissions above.
For an explanation of what each role permission means and how they are assigned, see About Permission Roles.
Create a template
You build a template on the email screen in the same way you compose an email, then save it for reuse.
Step 1: Open the email screen
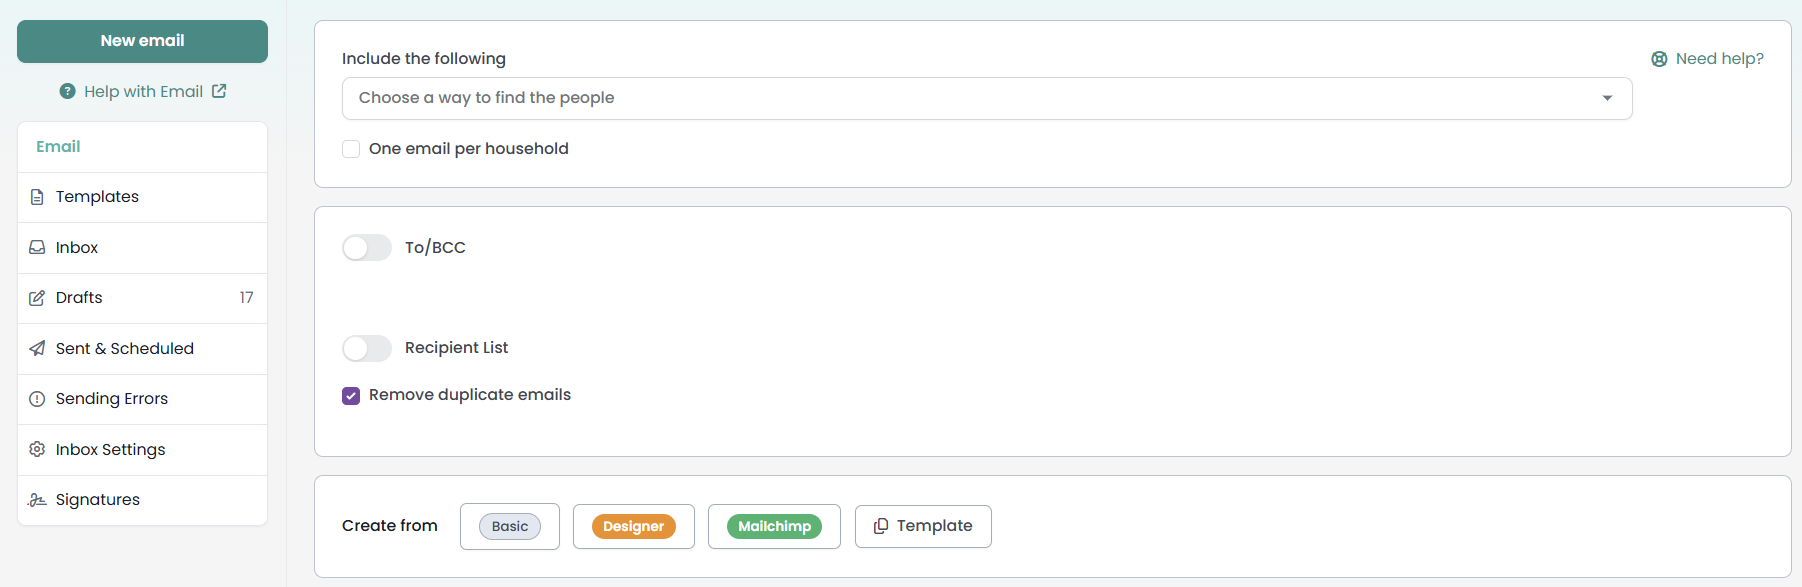
Click or hover on Contact on the main menu bar on the left, then click Email. The email screen opens ready for you to start a new email.
Step 2: Choose how to create the content
Under Create from, pick the kind of email you want to build:
- Basic: a straightforward rich-text editor for text, links and simple formatting. Best for everyday messages.
- Designer: a drag-and-drop editor for laying out a designed email with images, columns and buttons.
- Mailchimp: brings in the HTML from a template you have set up in a connected Mailchimp account.
Step 3: Fill in the email details
Complete the parts of the email you want the template to remember:
- From: the display name the recipient sees.
- Reply to: choose your infoodle inbox or your own email account for replies.
- Subject: the subject line. You can include merge tags here, for example a first name.
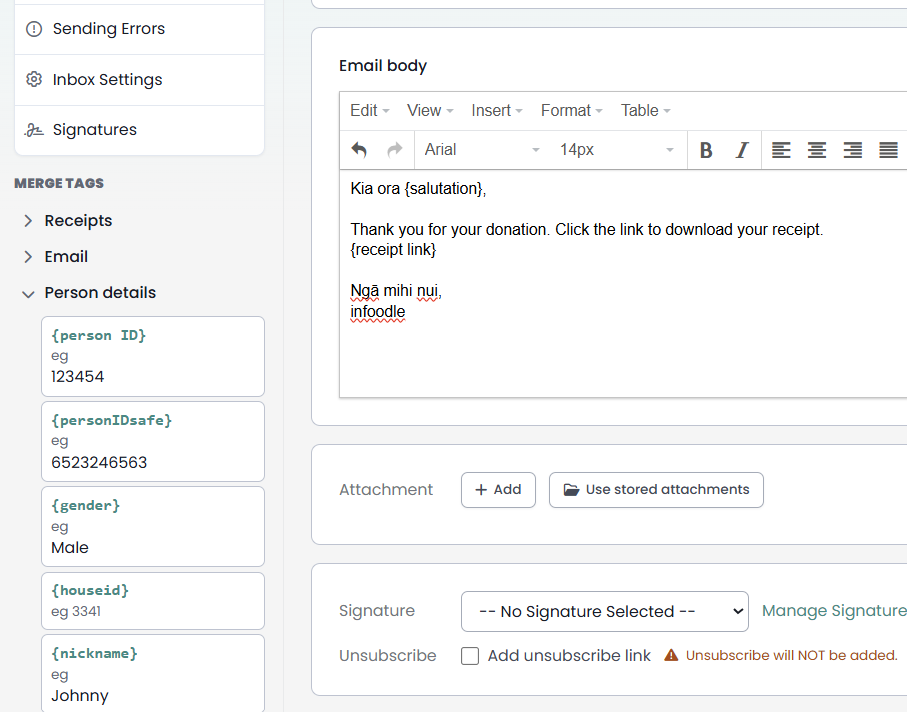
- Email body: the content of the email. Add your text, links and images.
- Attachment: add any files that should go out with every send.
- Signature: choose a saved signature to append.
- Mail type: the category the recipient can unsubscribe from, such as General Communications, Newsletters, Financial Appeals or Event Comms.
Step 4: Add personalisation with merge tags
Merge tags pull each recipient's own details into the email when it sends. First click into the Subject or Email body where you want the tag to appear, then open a group in the Merge Tags panel on the left and click a tag to insert it at your cursor. The tags are grouped by type. For example, {salutation} sits under Person details and becomes the recipient's salutation, while {first_name} sits under Person and becomes their first name.
Step 5: Save as a template
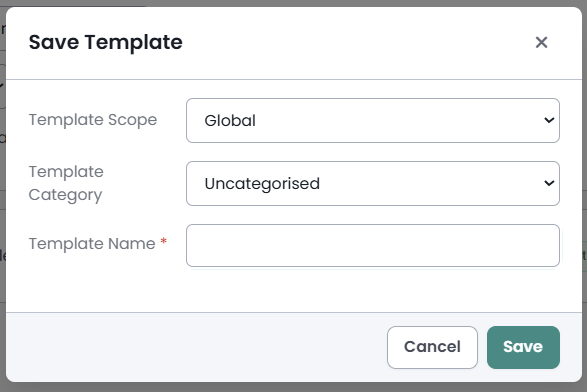
Click Save as Template at the bottom of the screen. In the Save Template window:
- Set the Template Scope. Private means only you can use the template. If you have the Maintain common templates permission, the dropdown also offers Global, which makes the template available to anyone who can send email. Without that permission, Private is the only scope shown.
- Choose a Template Category to file it under, or leave it as Uncategorised.
- Enter a Template Name. The name must be unique within its scope.
- Click Save.
Edit a template
You edit a template by opening it back into the email editor, making your changes and saving again.
- Click or hover on Contact on the main menu bar on the left, then click Email.
- In the left menu, click Templates.
- Use the scope selector to switch between Private and Global, and click a category to narrow the list. You can also type in the Search templates box.
- Click the template you want to change. It opens in the email editor with its saved content.

- Make your changes to the subject, body, design or settings.
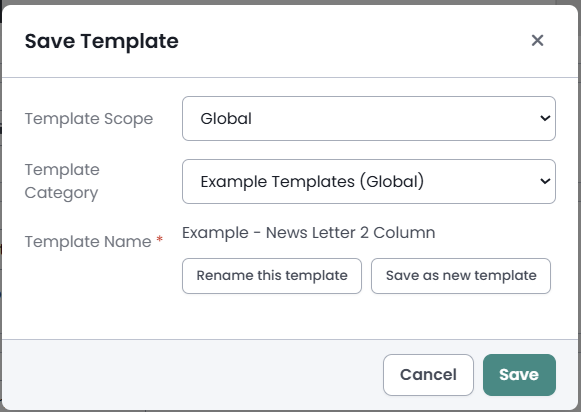
- Click Save as Template. Because you opened an existing template, you can choose Rename this template to update the one you opened, or Save as new template to keep the original and create a copy.
Common questions
Does the template store who I am emailing?
No. A template stores the content and settings only. You choose the recipients each time you use the template, so the same template can go to different people.
What is the difference between a Private and a Global template?
A Private template is only available to you. A Global template is available to everyone who can send email. Anyone can use a Global template, but creating and editing Global templates needs the Maintain common templates permission.
infoodle says the template name already exists
Template names must be unique within their scope. Change the name, then save again. If you are updating a template you opened for editing, choose Rename this template rather than Save as new template.
Can I change a Basic template into a Designer template?
The content type is set when you first build the email. To move to a different editor, create a new template using the Designer or Mailchimp option and rebuild the content there.
Next steps
Once your template is saved, you are ready to send with it. See Using Email Templates to send a template from the contact screen, a workflow or a form response.
Related articles