As of May 2023 Mailchimp made changes to its API system, which has changed how infoodle is able to access Mailchimp Templates.
You can use Mailchimp to create templates, add them to a Mailchimp Campiagn and then access these Campaigns to send emails via infoodle.
Here's how:
-
Login to your account at mailchimp.com
-
Go to Templates and start creating.
-
You can add videos, images, complex layouts and can use the prebuilt templates as well
-
Add the Template to a Mailchimp Campaign, so that it can be accessed in infoodle
The goal here is to do ALL the work of creating the template in Mailchimp. Once you import it into infoodle, you won't be able to edit it again. Therefore, you cannot rely on the mailmerge fields that Mailchimp has.
Mailchimp merge fields start with */ and end with /*
You can't preview the email and you can't forward it to a friend using the Mailchimp process. So basically, the header and footer areas should be removed.
Using Mailchimp templates
-
Make sure you have added your Mailchimp API key into infoodle
For more instructions on how to find your key and where to add it to infoodle, see infoodle and Mailchimp - (Administration > System > Mailchimp).
-
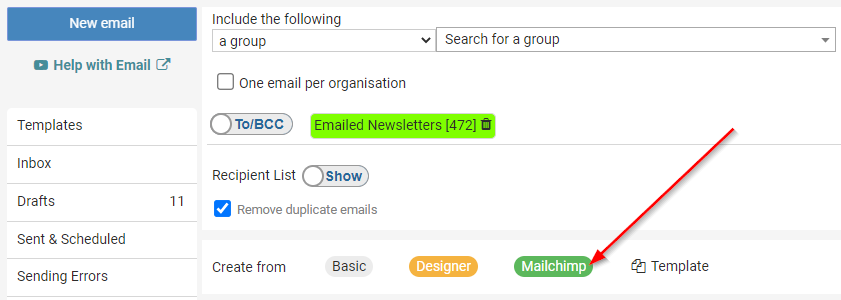
When you are in the Contact > Email tab, you will be able to add email Recipients.
In the Create From section click Mailchimp to use a Mailchimp template
-
For each Campaign you have three options:
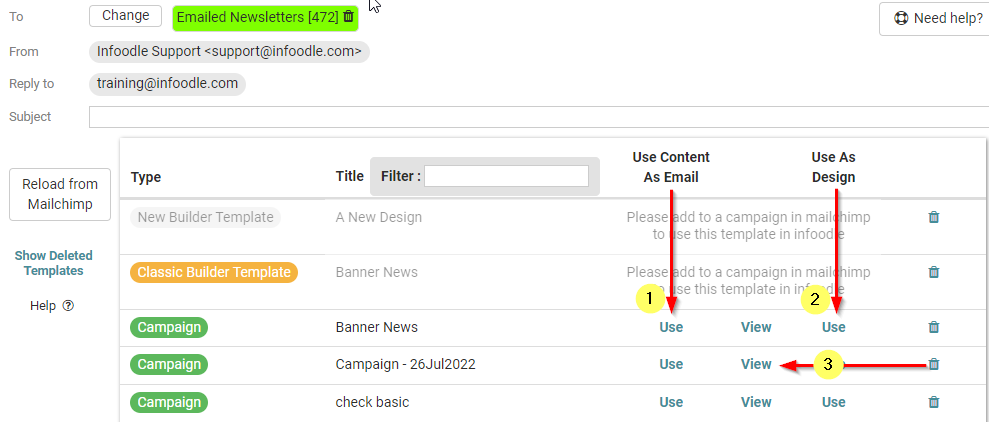
1) Use Content as Email - this allows you to use the Mailchimp template as a whole and not add anything to it. The benefit of doing it this way, versus sending it from Mailchimp, is that there will be a history of the email sent to each recipient within infoodle.
2) Use as Design - this allows you to use the Mailchimp template as a background design and then add content in the infoodle Basic editor, e.g. personalisations or other content.
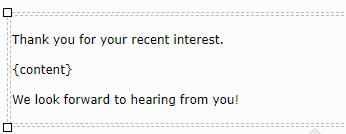
If you select this option you will need to make sure that there is a {content} tag somewhere in the Mailchimp template (in Mailchimp before importing it to infoodle) to indicate to infoodle where it must place the content.
If you have not put this tag in then return to Mailchimp to add it and then reimport the saved Mailchimp template in infoodle (see below for more detailed information).
3) View - select this option to view an image of the mailchimp template.
- You can now add all the other information about the email e.g. email subject, Send from settings, attachments etc.
infoodle can only access and use Templates from Mailchimp that are part of a Campaign. See Add Template to Mailchimp Campaign for more information. You will need to use Mailchimp to edit the templates.
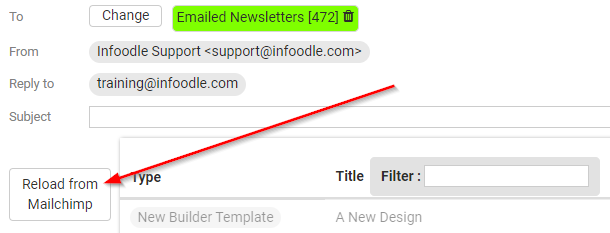
Update template from Mailchimp
-
Return to Mailchimp and make the relevant changes.
-
Return to infoodle Contact > Email > Mailchimp screen and then click on the Reload from Mailchimp button
-
From here, continue and send your email as usual.
infoodle has the ability to keep your Mailchimp lists up to date based on the data in infoodle by using the infoodle Workflow feature. For more information about infoodle and Mailchimp working together, see infoodle and Mailchimp