Now that you've built your form the next step is to select the Form Settings tab and set the associated options. These determine, for example, what the form looks like, and what happens when the user has submitted the form.
Work through the Form Settings options using the information below to help guide you.
1. Description
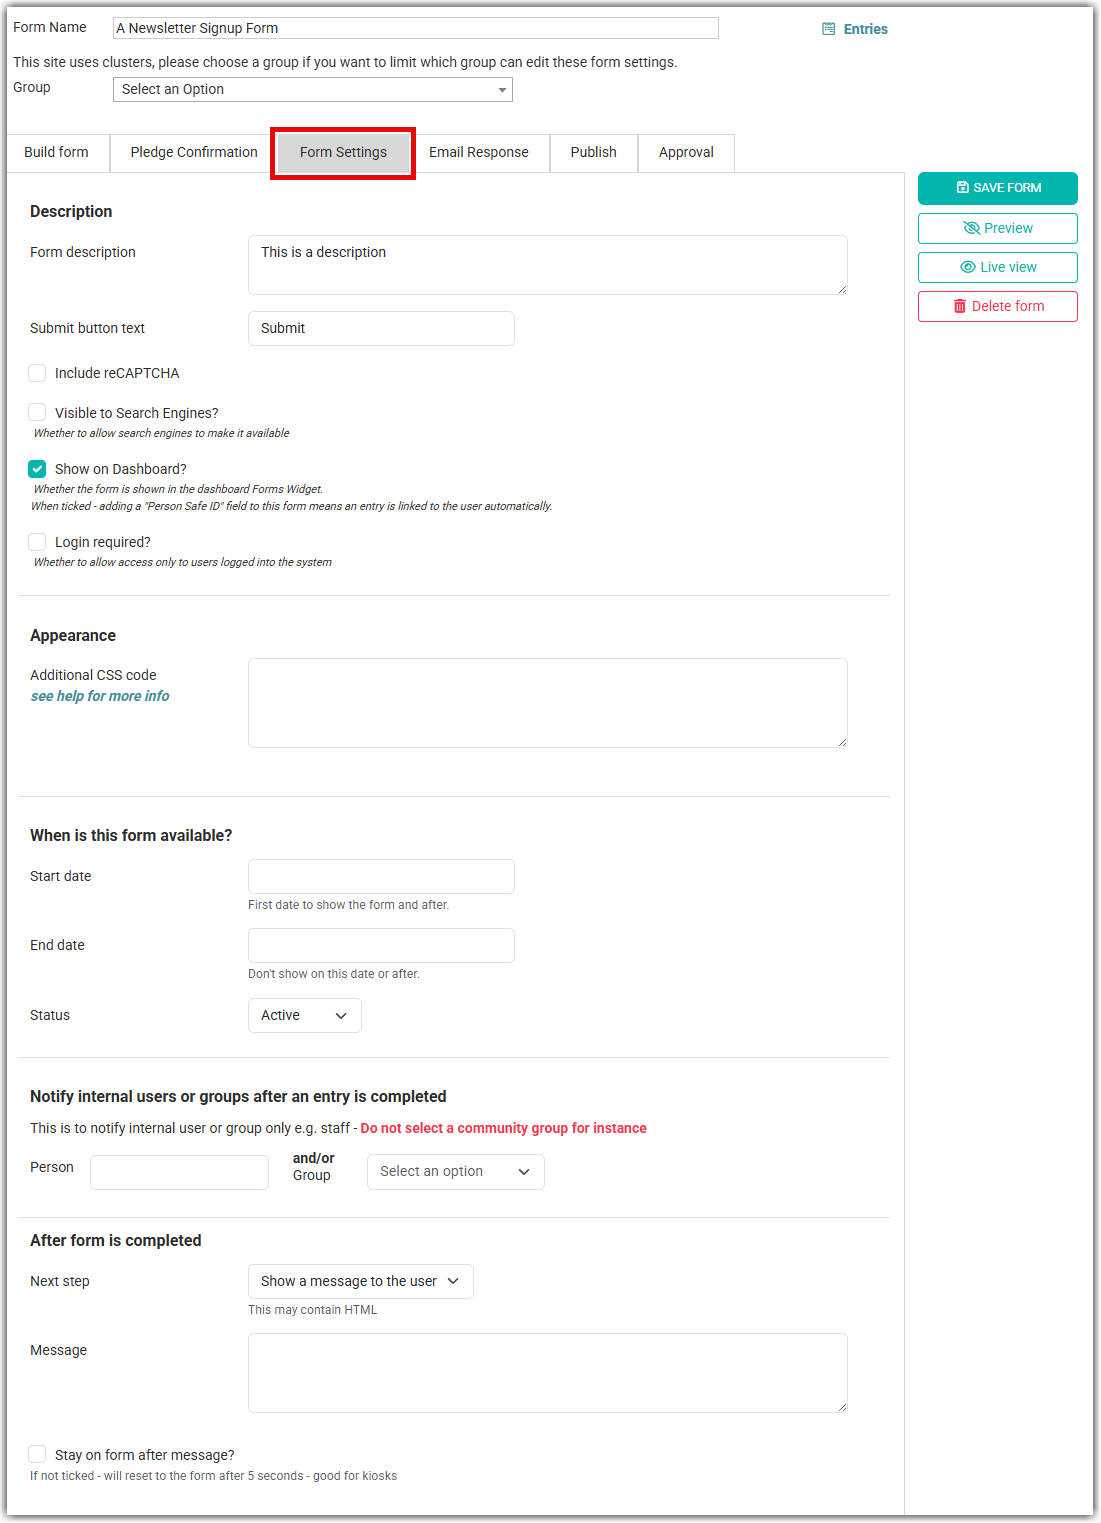
Form Description - You can add some text notes about this form. It can remind you why you created it etc.
Submit Button text - if you want to add a Submit button type in the text you want to appear.
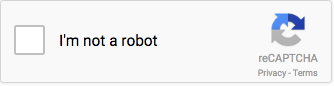
Include reCAPTCHA? - select if you want to include a reCAPTCHA tick box.
Example:
Visible to Search Engines? - this adds properties to the form to deter search engines from including it in their listings.
Show on Dashboard? - whether this form should be available to the Forms Widget on the dashboard.
Login required? - whether this form can only be accessed by someone who is already logged into infoodle.
2 Appearance
For those of you who are more technical, you can use this field to create CSS to further add styling to this form.
For more information on using CSS see CSS Code Advanced
3. When is this form available?
You must set the status to Active so the form once published will be accessible. A form that is not active cannot be completed.
Also you can also specify dates when the form is active by setting the Start and/or End dates.
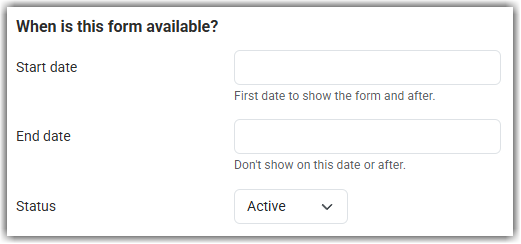
The End Date is the day that the form will be made inactive, and no new entries will possible on or after that date.
Status - the options here are:
- Active - the form is available to receive submissions
- Not Active - the form is not available to receive submissions and if embedded into a webpage, will no longer be displayed.
- Deleted - when set to this state, you will only be able to list the form if you explicitly set the form list search filter to All of Deleted. It is not actually removed from infoodle.
4. Notify internal users or groups after an entry is completed
.png)
Person and/or Group - You may choose to email a copy of the information to a person and/or group. Select them here. If you don't choose anyone, no emails are sent.
If a Group is to be notified, what information is sent? - If a Group has been selected to receive notifications, you have the option to send just a notification as opposed to all of the form details being sent.
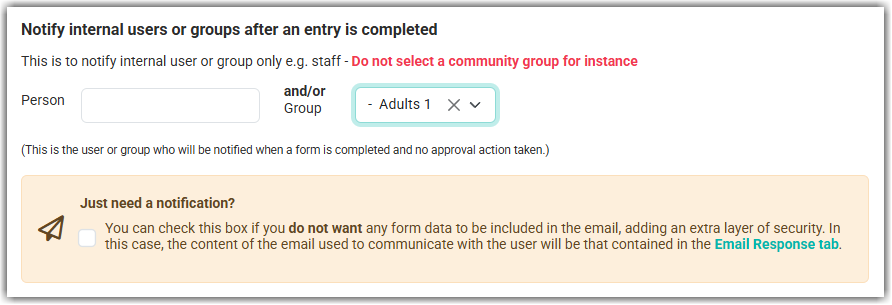
By default, this is not selected and all of the details entered into the form are sent to all of the group members.
The notification email sent includes the Entry ID in the subject.
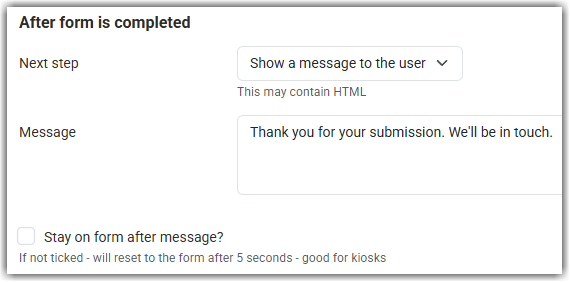
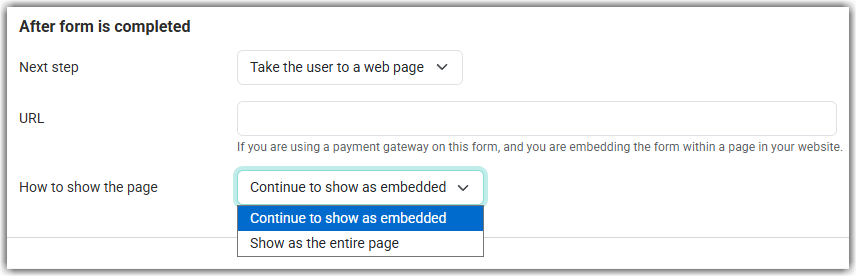
5. After the form is completed
Once the user clicks Submit you can choose what happens next. You have two options:
-
Show a message to the user - Most often a simple message saying Thanks, we will be in touch is sufficient.
-
Take the user to a web page - alternatively you can direct them to a specific page on your website, or you could create another infoodle form. Either way, you place the entire URL (page address) including the https:// etc. into the area provided.
Additionally, you can have the page the user is sent to, become the entire page or continue to show it embedded on the page. This will replace the embedded part of the page only.
To review your form at any stage click the Build Form button which will take you back to the screen where you can make changes by clicking on the pencil icons.