infoodle Email is the built-in way to write to the people and organisations on your site, from a one-off note to a single person right through to a designed newsletter sent to thousands. You build a recipient list from the contacts, groups and reports you already have, write the email in infoodle, and infoodle sends it, records it against every contact's history, and honours each person's subscription choices. This article is the starting point for the whole email area: it shows you where everything lives, walks you through your first send, and points you at the detailed article for each part.
Before you start
Role Permissions
- Contact people: opens the Contact area.
- Contact people by email: opens the Email page and lets you build and send an email.
- Search People: needed to find an individual to add to your recipient list.
- Has infoodle inbox: adds the Inbox and Inbox Settings, and lets replies come back into infoodle instead of your own mailbox.
- Run reports: needed to create and save the reports you later pick from. You do not need it to choose a report that is already available to you.
- See emails others have sent: lets you search other people's sent email from Sent & Scheduled.
- Update System information: only needed for the administrator setup below, not for sending.
See Contact Permissions for what each of these role permissions means, and People Permissions for how an administrator turns them on.
You will also need the following in place before your first send.
- You will need an email address on your own person record. It becomes the From address on the emails you send. Without one, infoodle uses your site's default email address instead, and the compose screen tells you so.
- You will need at least one mail type. Every site starts with General Communications, which is enough to send. An administrator manages the list under Administration > Mail Types.
- You will need a verified sending domain if you want your own address to appear as the From address. infoodle support sets these up for you. Until a domain is verified, infoodle sends from your infoodle inbox address instead and routes replies back to you.
While your site is brand new, or on a trial, infoodle limits how many people a single send goes out to. Anyone over the limit is not sent to, so send to a small list until the limit lifts. Your dashboard shows the date that happens. See Verifying Email Domains for the domain verification step, which is worth starting early.
The Email page
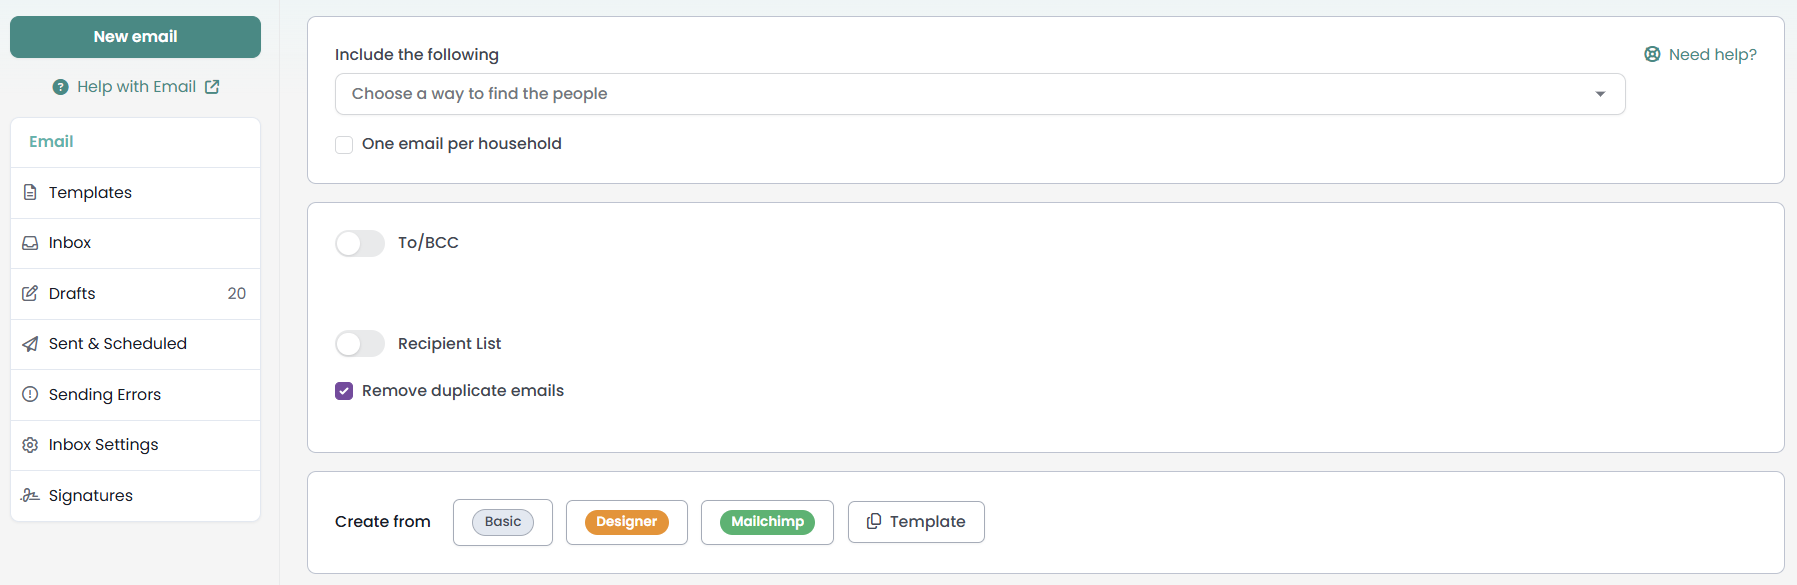
Click or hover on Contact on the main menu bar on the left, then click Email. The Email page opens with New email at the top of the panel on the left, and the rest of the email area listed below it.
- New email: starts a fresh email and returns you to the compose screen.
- Templates: the reusable emails your site has saved, ready to load and send.
- Inbox: replies that came back into infoodle rather than to your own mailbox.
- Drafts: emails you have started. infoodle saves a draft as soon as you begin composing.
- Sent & Scheduled: the history of what you have sent, plus anything queued to go out later.
- Sending Errors: addresses that could not be delivered to, so you can correct them.
- Inbox Settings: forwarding and out-of-office settings for your infoodle inbox.
- Signatures: create and manage the signatures you drop into an email.
Send your first email
- Click or hover on Contact on the main menu bar on the left, then click Email.
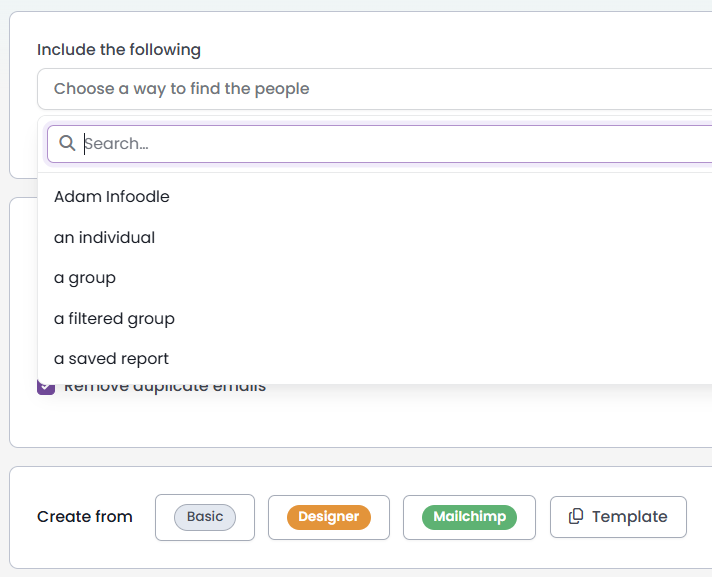
- Under Include the following, choose how to find your people: an individual, a group, a filtered group, or a saved report. Add as many sources as you need, and tick One email per household if you want households to receive a single copy.
- Turn on the Recipient List toggle if you want to check exactly who is included before you write anything.
- Under Create from, click Basic for a quick, plain email. Picking one option hides the other three, so if you want a different one, click Change on the To row, then Change type to bring all four back.
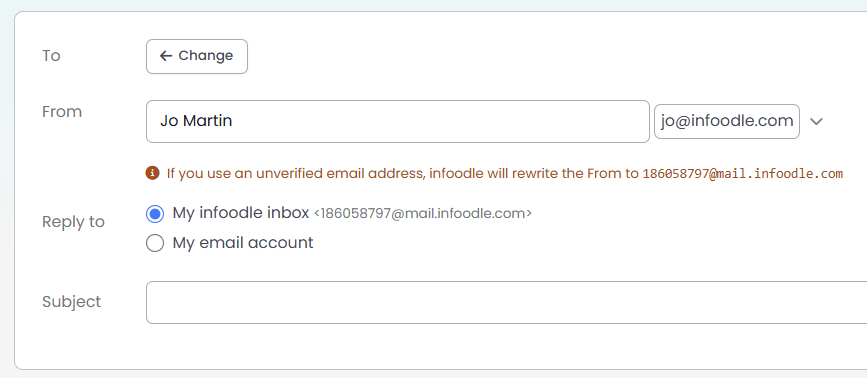
- Check the From and Reply to rows, then enter your Subject.
- Write your email in the body, and add attachments or a signature if you need them.
- Choose a Mail type. This is the subscription your recipients can opt out of, so pick the one that describes what you are sending. infoodle preselects General Communications, so change it if that is not what this email is.
- Click Send now. To send later instead, tick Schedule, set the date and time, then click Schedule.
infoodle confirms how many emails were queued, then keeps a running count of what is still to go out, both yours and everyone else's on the site. Once your own queue has emptied, that count is replaced by Your emails have been processed. Large sends take a little while to work through the queue, and you can carry on working while they do. Use Send Test Email at any point to send yourself a copy first.
Four ways to write an email
The Create from row offers four ways to build the email. They all use the same recipient list, mail type and sending settings, so the choice is only about how you write the content.
| Option | Best for | Where to learn more |
|---|---|---|
| Basic | Quick, mostly-text emails written in infoodle's editor. | Using Basic Email |
| Designer | Newsletters, appeals and campaigns with images, columns and buttons. | Using Email Designer |
| Mailchimp | Reusing a design you already built in Mailchimp. | infoodle and Mailchimp |
| Template | Starting from an email your site has saved and reuses. | Email Templates |
Merge tags let you personalise any of them, so one send can greet every recipient by name.
Who receives your email
Two separate things decide who an email reaches.
- Your recipient list is who you asked for: the people, groups, filtered groups and saved reports you added under Include the following. You only ever see contacts you already have permission to view.
- Each contact's subscription is who is willing to hear from you. Every email you write on the compose screen carries a mail type and is checked against all three subscription settings, so anyone who has unsubscribed from that mail type, unsubscribed from all email, or paused their email is left out of the send.
Turn on the Recipient List toggle before sending to open Details of people selected to receive this email. It lists every contact, marks any whose address is a duplicate of an earlier row, and lets you exclude individuals from this send. Anyone who has unsubscribed from all email is removed while that list is built, so they never appear in it. The mail type and paused checks are applied as the email goes out, so those people are still listed.
See Selecting Email Recipients for building the list, Who will receive this email for reading it back, and Mail Types for how subscriptions work.
After you send
- Sent & Scheduled holds every email you have sent, along with anything still scheduled. Open one to see delivery statistics and exactly who it went to.
- Sending Errors lists the addresses that could not be delivered to, so you can fix them at the source.
- The History tab on a contact's profile lists the emails they were sent, so the record sits with the person as well as with the send.
See Managing Email for the Inbox, Drafts, Sent & Scheduled and Sending Errors screens, and Why Did My Email Fail? when a message does not arrive.
Common questions
Can I start an email from somewhere other than the Contact page?
Yes. Clicking an active email address on a person's profile opens the compose screen with that person already added, and the Functions menu on a group's page has a Contact this group option that adds every member. See Email Methods.
Who does the email appear to come from?
Your own email address, when your site has a verified sending domain that matches it. Otherwise infoodle sends from your infoodle inbox address, which looks like something@mail.infoodle.com, and sets your own address as the Reply to, so replies still reach you. Your name in the From line also gains an [on behalf of your.address@example.org] suffix, and that is what recipients see in their inbox list. The From picker marks each of your addresses as verified or not, and shows the replacement under Will be corrected to. See Verifying Email Domains.
Where do replies go?
Wherever you set Reply to on the email. My infoodle inbox brings replies into the Inbox inside infoodle, where they are attached to the contact's history. My email account sends them straight to your own mailbox. You can set a default so you do not have to choose each time, in Configuring your infoodle Email.
What happens if I forward an email from Sent & Scheduled?
A forward is treated as a new email from you, so it carries your reply-to settings rather than the original sender's. Replies to the forward come back to you.
The Mailchimp option says it is not configured. What now?
Clicking Mailchimp shows Mailchimp is not configured for this site. Mailchimp needs to be connected to your site first. Until it is, use Basic, Designer or Template. See infoodle and Mailchimp.
Can I save an email to use again?
Yes. Click Save as Template on the compose screen and it joins the Templates list for you. If your role has Maintain common templates, you can also set Template Scope to Global so everyone else on your site can use it too.
Next steps
Once you have sent your first email, set your defaults so you do not have to repeat the same choices: your From address, your Reply to preference, and your signature. Work through Configuring your infoodle Email, then create a signature in Email Signatures.