Basic Email is infoodle's plain email composer — type a subject, write a body, pick who it goes to, and send. Use it for short, direct messages: announcements, prayer requests, quick updates, or anything text-led with no need for images or layouts.
For more visually polished emails, use Email Designer.
Before you start
You need two role permissions: Contact people and Contact people by email.

For help with roles, see what are roles.
For best deliverability, send from a verified domain. See verifying email domains.
Note: Recipients need an active email address on their person record. People without one, or with email turned off, are skipped automatically.
Step 1 — Choose your recipients
- Click Contact in the main navigation, then click Email.
- You will then see a page to choose who to send the email to.
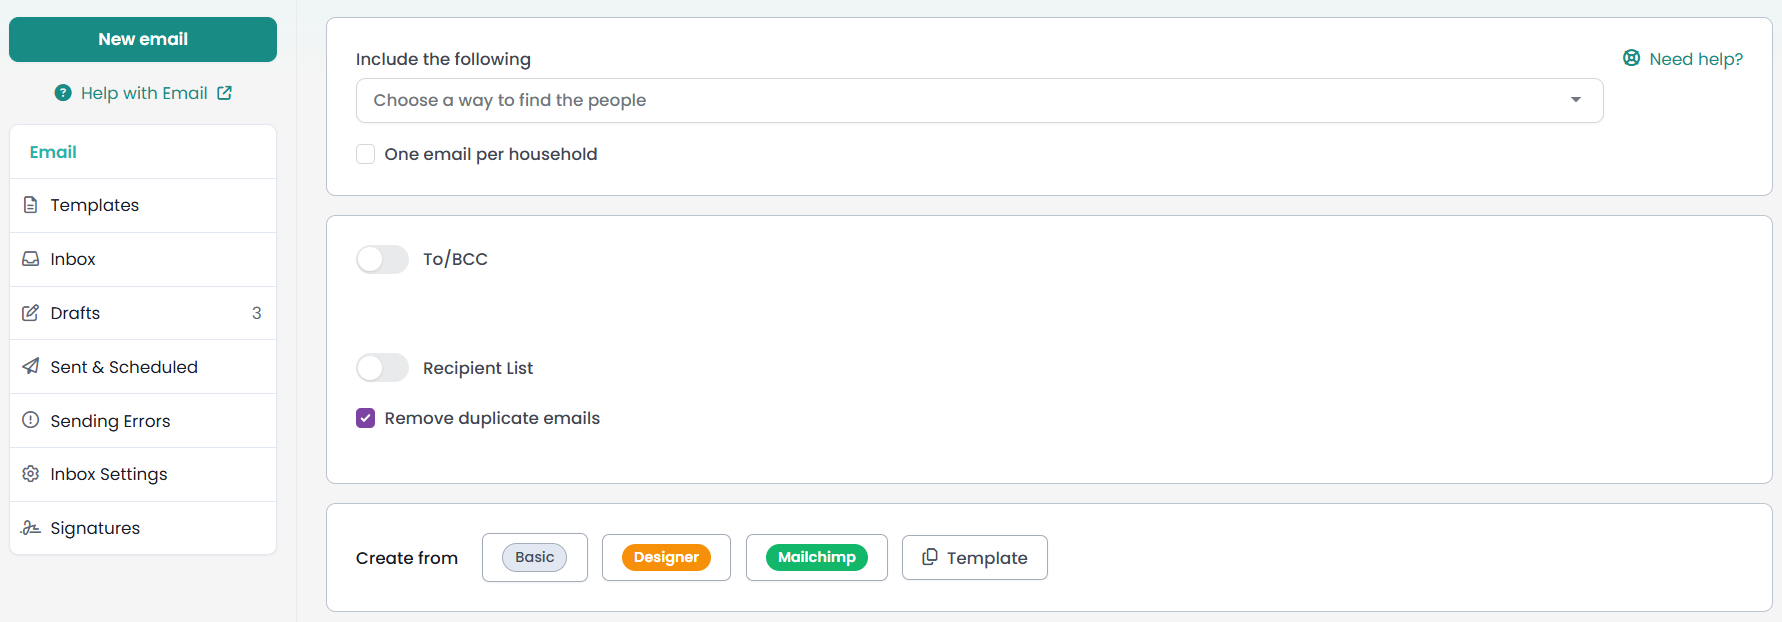
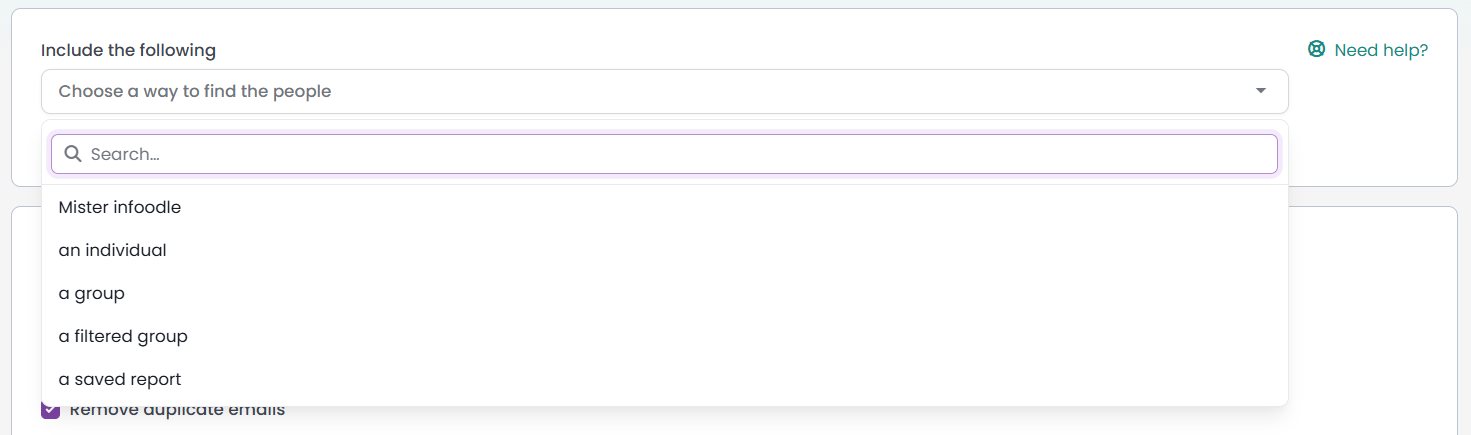
- The Include the following dropdown is the first thing you see. Choose one of these options:
| Option | What it does |
|---|---|
| An individual | Type a name and pick one person |
| A group | Everyone in the group with an active email address |
| A filtered group | Start from a group, then narrow it down with a filter |
| A saved report | Use a previously saved report as your recipient list |
You can add multiple recipients as infoodle de-duplicates automatically. Remove duplicate emails is ticked by default.
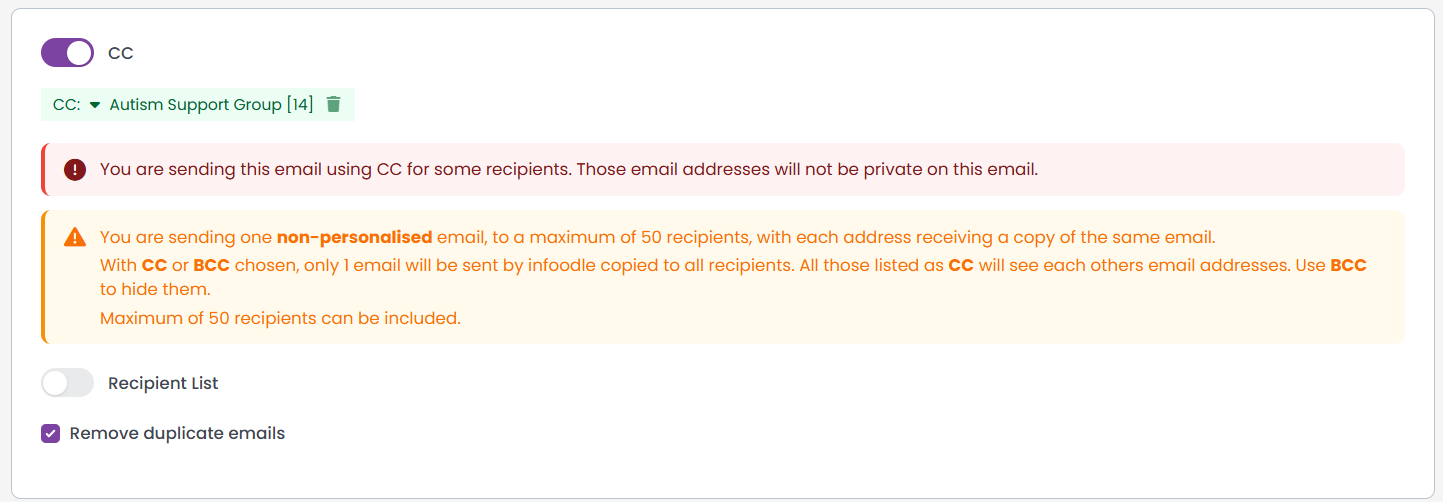
CC and BCC
Toggle CC on to copy a group into the email. Note the warnings infoodle shows when CC is enabled: all CC recipients can see each other's addresses (use BCC to hide them), and CC mode sends one non-personalised email to a maximum of 50 recipients.
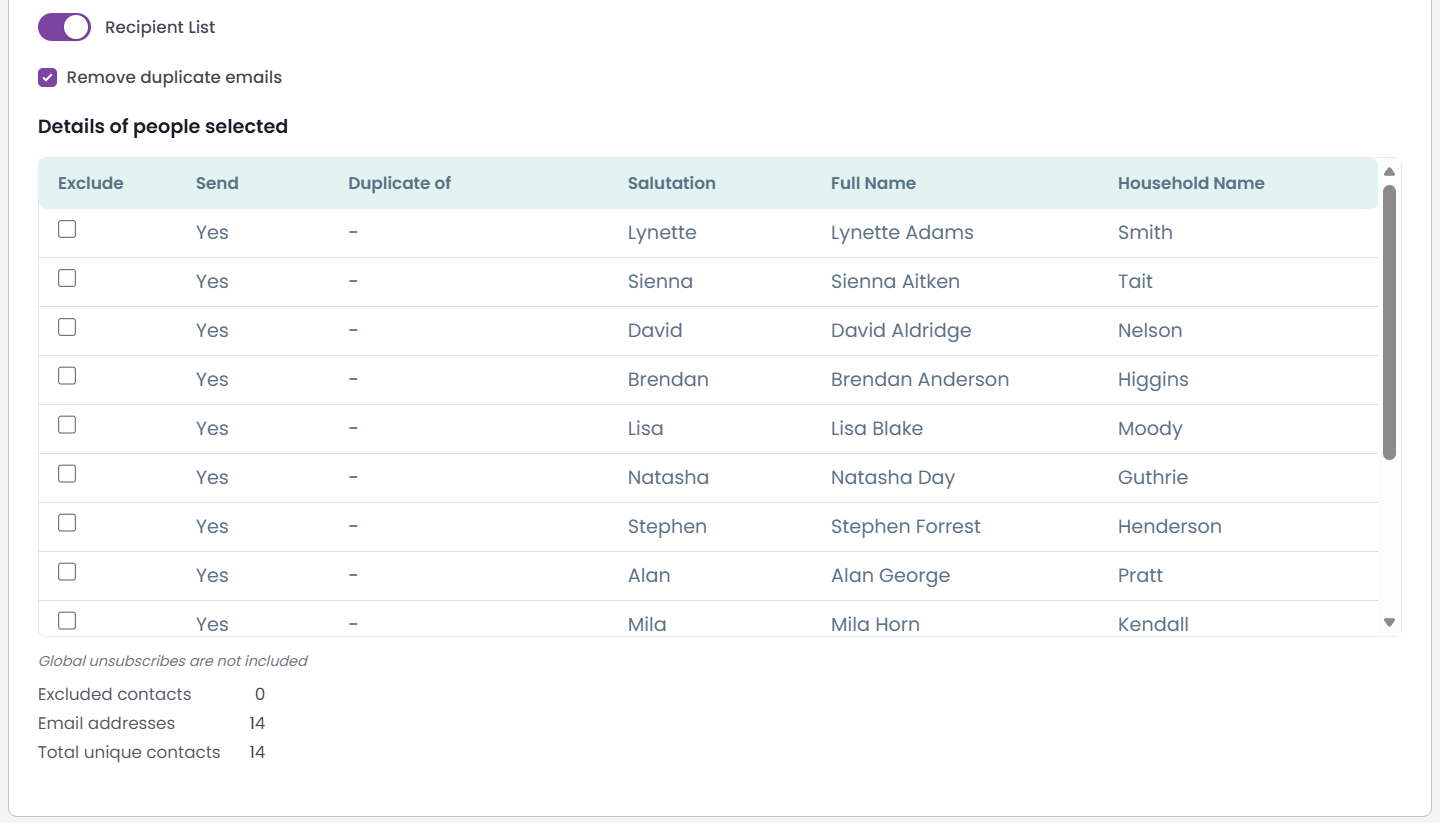
Recipient List
Toggle Recipient List on to see exactly who will receive the email before you send. The table shows each person's Send status, whether they're a duplicate, their Salutation, Full Name, and Household Name. Use the Exclude checkbox on any row to remove someone. The summary at the bottom shows excluded contacts, total email addresses, and total unique contacts.
Once you're happy with your recipients, click Basic next to create from to open the email composer.

Step 2 — Compose the email
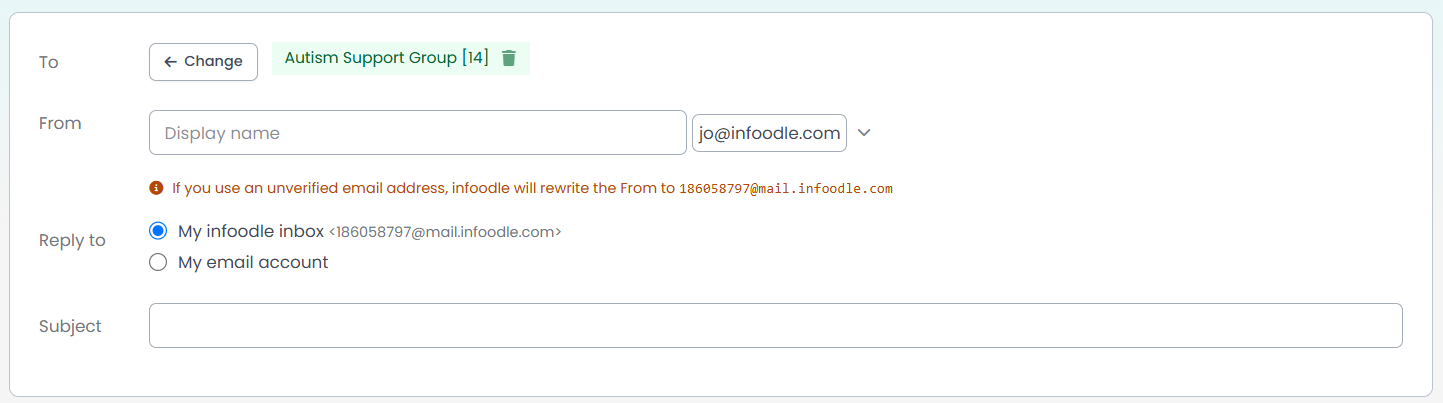
To — shows your selected recipients with a Change button if you need to go back.
From — your name and sending address. If you use an unverified address, infoodle rewrites the From to an @mail.infoodle.com address — verify your domain to avoid this.
Reply to — choose My infoodle inbox to keep replies inside infoodle, or My email account to have replies go to your own inbox.
Subject — keep it short and specific (phones show around 35–60 characters).
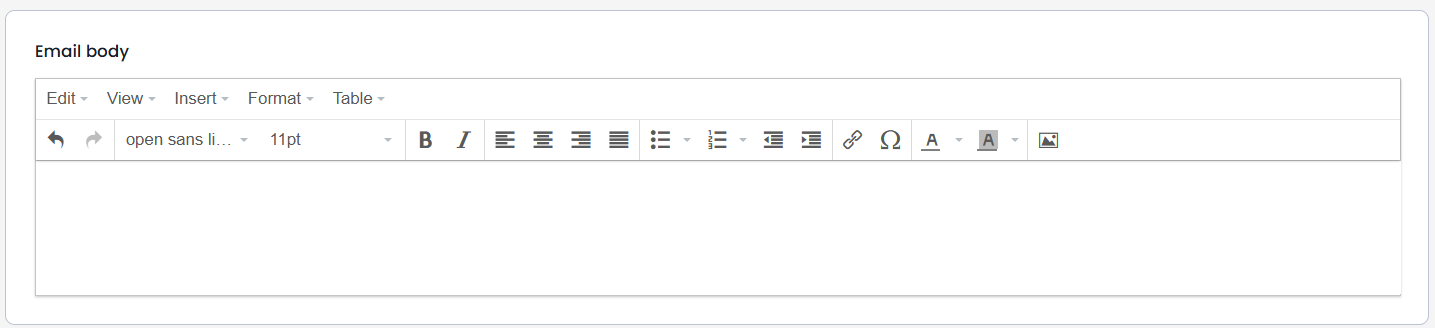
Email body — a standard word-processor editor with formatting options: bold, italic, alignment, lists, links, images, and text colour. Paste from Word or Google Docs and basic formatting is preserved; use Edit → Paste as plain text to strip it.
Merge Tags — the left panel lists all available personalisation placeholders grouped by category (Person, Dates, Receipts, Email, and more). Click any tag to insert it at the cursor. The most common use is Hi {{first_name}}, at the start of the body.
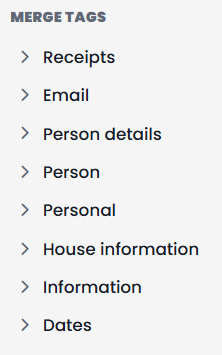
For the full list of tags, see Email Merge Tags.
Step 3 — Set options
| Option | What to do |
|---|---|
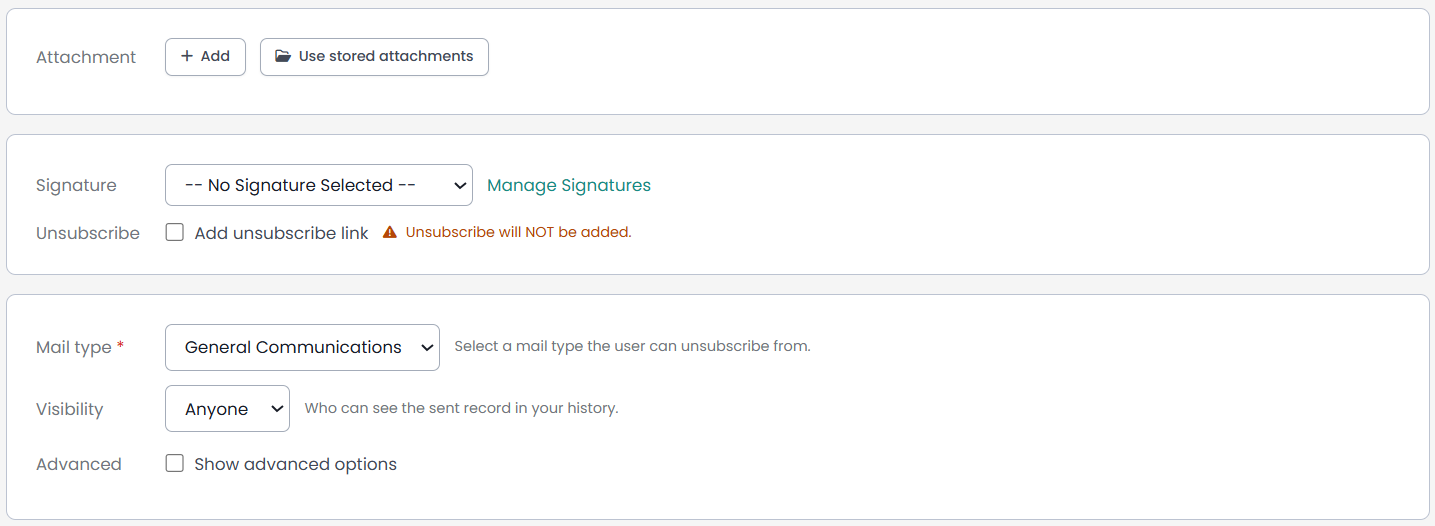
| Attachment | Click + Add to attach a file, or Use stored attachments to reuse a previously uploaded file |
| Signature | Pick a saved signature from the dropdown, or click Manage Signatures to create one |
| Unsubscribe | Tick Add unsubscribe link for bulk emails. Leave unticked for personal or transactional messages |
| Mail type | Tag the email so recipients can manage their subscriptions per type (e.g. General Communications, Newsletter) |
| Visibility | Anyone lets colleagues see the sent record in contact history. Change to Just me to keep it private |
| Advanced | Tick Show advanced options for extra settings such as overriding the send date or tagging to a campaign |
Step 4 — Send

| Action | What it does |
|---|---|
| Send now | Sends immediately to all recipients |
| Schedule | Tick and pick a future date and time to send later |
| Send Test Email | Sends a copy to your own inbox so you can preview it before sending to everyone |
| Save as Template | Saves the subject, body, signature and mail type as a reusable template |
| Save draft now | Saves without sending — infoodle also auto-saves as you type |
After sending
Find the email in Sent & Scheduled in the left sidebar with per-recipient delivery status. Replies arrive in your Inbox (if you chose My infoodle inbox) and are recorded against each recipient's contact history. Any delivery failures appear under Sending Errors— see Failed Emails.
Common questions
Some recipients didn't get the email.
Open Sent & Scheduled and check the per-recipient status. The usual reasons are no active email address on their record, or they've unsubscribed from the mail type you sent.
My merge tag came through as {{first_name}} instead of a name.
Always insert merge tags by clicking them from the side panel rather than typing them by hand — this ensures the braces match exactly what infoodle expects.
An image I pasted into the body didn't arrive.
Use Insert → Image to upload the image rather than pasting from the clipboard. Pasted images use a temporary local reference that infoodle can't embed.
Recipients say the email went to spam.
Send from a verified domain with SPF, DKIM and DMARC set up. See Verifying email domains.