Use this form pattern to let people pre-register for an event — for example, when you need to cap the number of attendees or track who is coming in advance.
Before you start
Is a form the right tool?
This approach suits pre-registration — capturing bookings in advance, limiting numbers, and optionally taking payment. If you need to record who actually turned up week to week, use infoodle's built-in Group Attendance or Event Attendance instead. Using a form with custom fields for ongoing attendance recording has a key limitation: a custom field holds only one value per person — each new submission overwrites the previous one, making per-session reporting unreliable.
What you need:
- The Forms functionality (included in the main infoodle CRM module)
- Either the Finance or Events module (required for the ticketing and stock functions used in this form)
- An infoodle user account with Finance Admin permissions to set up Stock Items and Payment Methods
Step 1 — Set up a Payment Method
You need a Payment Method even if your event is free. Skip this step if you already have done this.
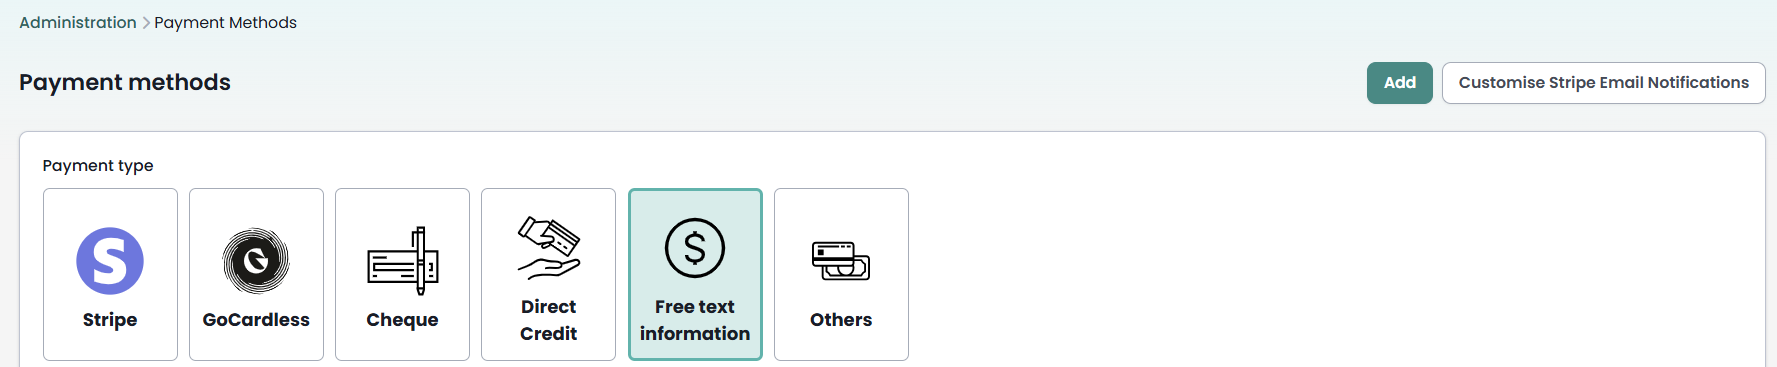
- Go to Administration → Payment Methods to add a new method.
- If your event is free, choose Free text information as the gateway type. This lets the form use stock items without charging anyone.
- For paid events, configure the appropriate payment gateway — see Payment Methods and Set Up for details.
Step 2 — Create Stock Items for your tickets
Stock items control how many places are available and prevent overbooking.
- Go to Finance → Stock and create one stock item per ticket type — for example, an Adult ticket and a Child ticket. If you run multiple services in a day, create a separate stock item for each service.
- Set the Quantity on each item to the maximum number of people you can accommodate.
- See Stock Items for full setup details.
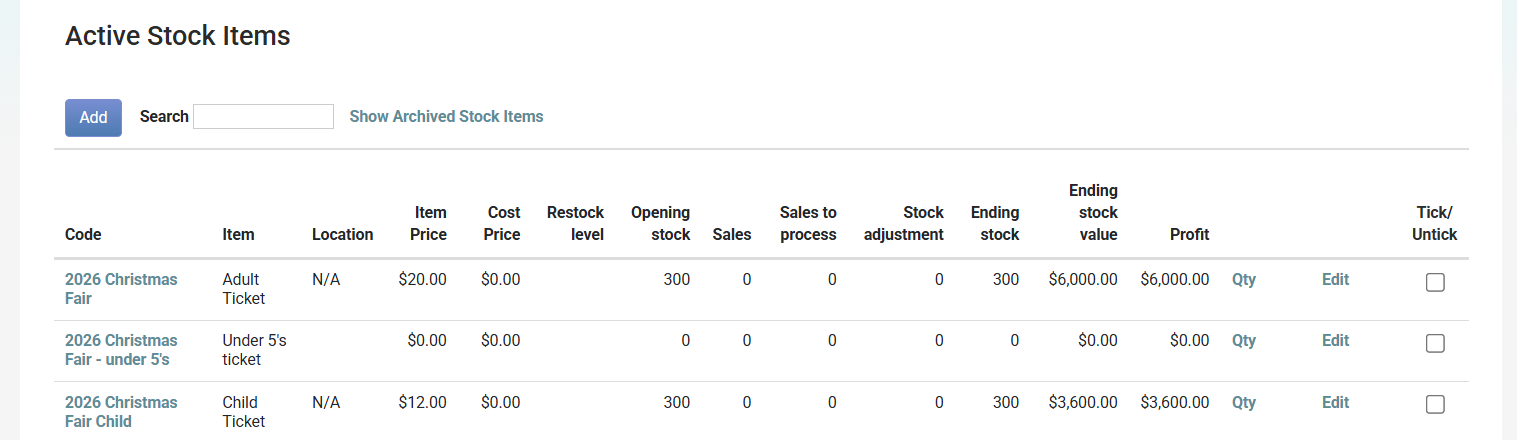
Note: Each ticket type's count is tracked separately. If your total capacity is 100, decide the split upfront (e.g. 70 Adult, 30 Child) — infoodle does not automatically share the pool between types.
Optional — Create an Attendance Group
If you want to manage or communicate with your attendees as a group, create a Group in infoodle for this event's attendees before building the form. When a form entry is approved, the person will automatically be added to the group. If you have the Events Package, this group can also be used with the Online Check-In system.
Step 3 — Build the form
- Go to Forms and click Add Form to create a new form.
- Add your contact fields — at minimum: Person's name, Email, and Phone.
- Add a Stock Item field for each ticket type:
- Select the matching stock item.
- Turn on Show headings and Full width for a cleaner layout.
- Repeat for each ticket type (e.g. Adult, Child).
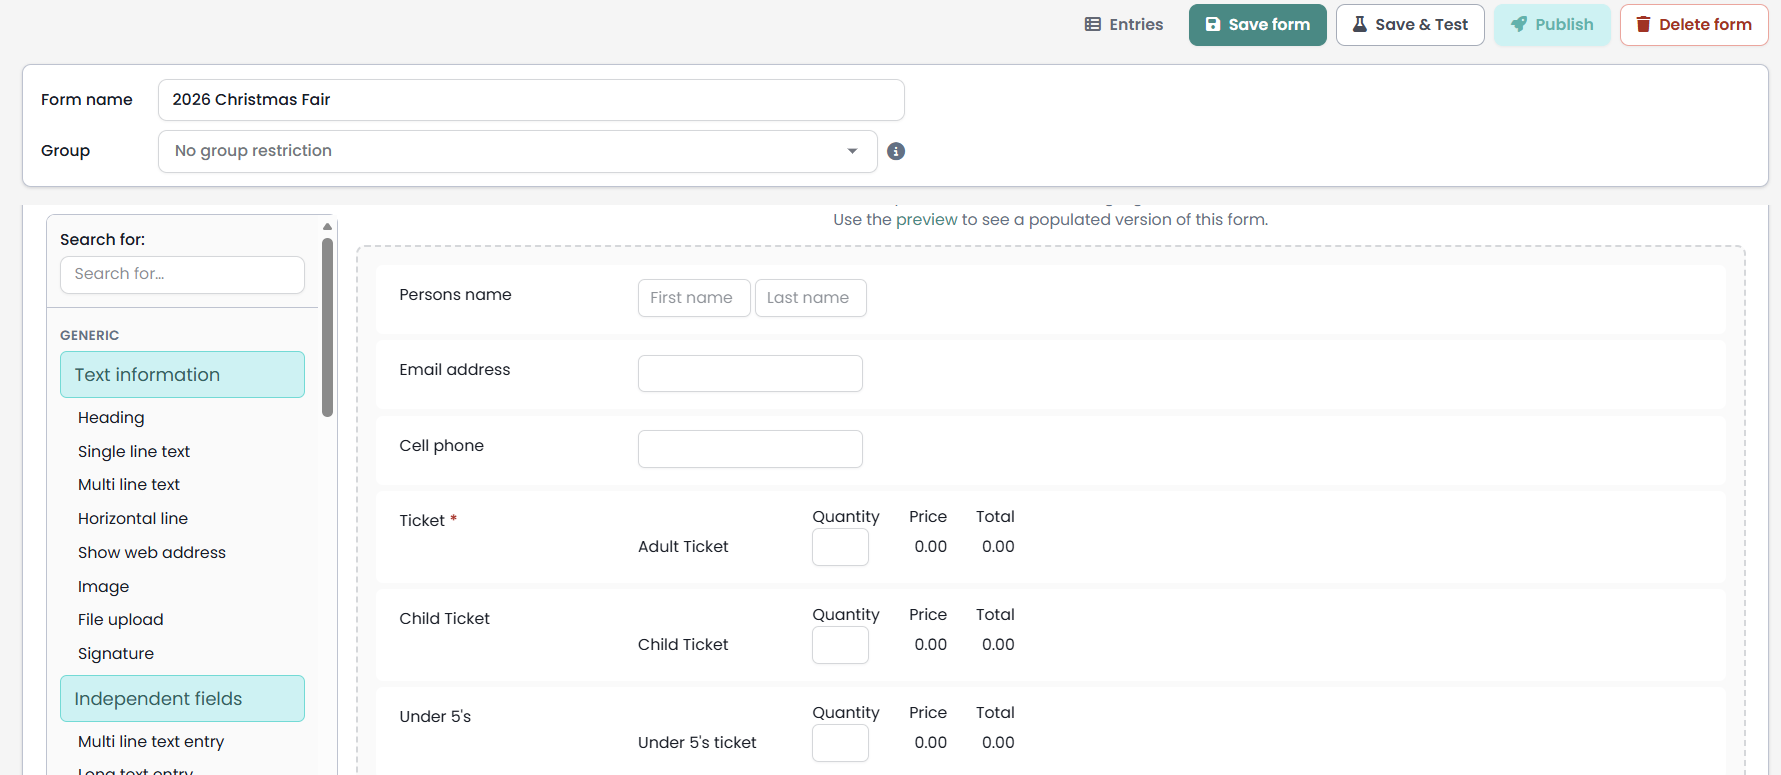
- (Optional) Turn on Show available stock when stock less than [number] on each stock item field. This displays remaining availability to the person filling in the form, but only once stock drops below the threshold you set — for example, show when fewer than 10 tickets remain.
- Add a Total amount field to calculate the total amount that they will have to pay for all of their selected tickets.
- Add a Pay/Donate field:
- Select the Payment Method you set up in Step 1.
- Add your working on their statement text as required.


Note: When a stock item's price is $0.00, the price and total columns are automatically hidden on the form. When a ticket type is fully booked, the form displays None Available.
- (Optional) If you created an Attendance Group, add a Group field to the form:
- Under Which Group(s), select your attendees group.
- Set it as the Default Value so it pre-selects automatically.
- Turn on Only on approval to hide this field from the person filling in the form.
Step 4 — Save and publish the form
- Click Save to store your draft.
- When you are ready to go live, click Publish form.
- Go to the Publish tab — here you'll find:
- A shareable link you can email or add to your website
- An embed snippet to place the form directly on your website
- A QR code for print or display use
Important: Clicking Save while in edit mode does not update the live form — it only saves your draft. You must click Publish form to make your changes visible to the public. Any existing links or embeds update automatically when you publish.
Optional — Hide pricing on free events
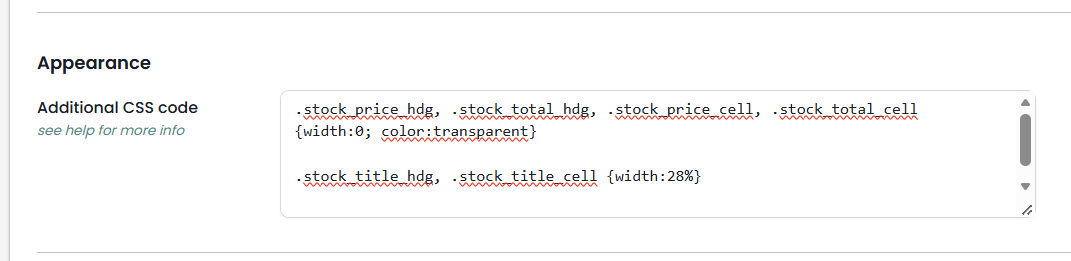
If your event is free and you don't want $0.00 price columns cluttering the form, you can hide them using CSS.
- Go to Form Settings.
- Paste the following into the Additional CSS code field:
.stock_price_hdg, .stock_total_hdg, .stock_price_cell, .stock_total_cell {width:0; color:transparent}
.stock_title_hdg, .stock_title_cell {width:28%}
- Click Save.
Reviewing bookings
infoodle automatically tracks stock quantities to prevent overbooking. To see how many tickets have been booked, check the totals under Finance → Stock.
You can also set up a low stock notification so you are alerted as the event fills up.
Reusing the form for a future event
If you plan to reuse the same form and stock items for a future event:
- After the event, update the Quantity on each stock item to reflect the new capacity.
- If you used an Attendance Group, remove the previous attendees from the group before the form goes live again — otherwise new registrations will mix with old ones.
Common questions
The prices on my stock items are showing as 0.00 in the form builder.
This is expected — the form builder shows a placeholder value of 0.00 while you are editing. The correct prices will show on the live form once it is published.
I made changes to the form but the live link hasn't updated.
After editing a published form, you need to click Publish form to push your changes live. Saving only updates your draft. See Form Versioning for more detail.
The form is showing as "Editing" but I didn't make any changes.
Clicking Edit form opens a new draft version even if you don't make changes. The live form is unaffected. The person who opened the edit session needs to either publish the draft or cancel the editing session. Currently there is no delete-draft option — if the draft has no useful changes, publishing it will make it live as-is (identical to the previous version).
When does the confirmation email get sent to the person who registered?
If there is no payment involved, the Email Response is sent as soon as the form is submitted. If payment is required, the email is sent after the payment step is completed (e.g. after the person finishes the Stripe payment screen). If you are using Free Text or Direct Credit, the email is sent on submission.
Note: only the first person on the form receives the confirmation email — additional people added in a repeating block do not receive one.
Can I use this form to track attendance week to week?
Not reliably — see Before you start above. Each new form submission overwrites the previous custom field data for that person. For regular, recurring attendance use Group Attendance instead.
I can't see my Stock Items in the list.
Check whether the role permission Limit finance admin to just user's own groups has been enabled. If a stock item is assigned to a group and your role has this restriction, the item will be hidden. Deselecting this permission in the Role settings will restore visibility.